INFICON Cleaning and maintenance | 8
UL6000-Fab,-PLUS-Operating-instructions-iinc75en1-01-(2206) 119 / 152
5 Push the metal grill and then the two new inserts into the filter from the front.
Make sure that grill and inserts do not cant.
6 Switch on the leak detector.
7 Close the sniffer probe with your finger. With the water protection tip, you have
to also cover the opening on the side. You should then be able to feel a
negative pressure. If not then there is a leak somewhere and you have to check
the screw connection. The cone seal may also have fallen out.
8 If you have activated the display of maintenance requests, set the maintenance
interval to the desired new period. Also see "Activate or deactivate
maintenance requests [}61] " and "Set maintenance interval "Filter sniffer tip"
or "Air filter" [}61]".
Replacing the sinter
filter of the sniffer
handle
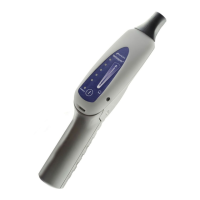
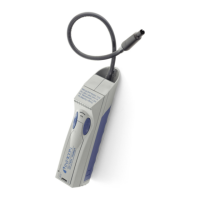
The sinter filter is in the sniffer handle. To replace the filter inserts, proceed as follows:
1 Switch off the leak detector.
2 Unscrew the two cross-head screws that hold the sniffer probe in place.
3 Remove sinter filter including o-ring.
Fig.18: Sinter filter in the sniffer handle
4 Check the filter for visible soiling.
5 Insert a new sinter filter with o-ring in the base of the filter tip.
6 Tighten the sniffer tip again.
7 Switch on the leak detector.
8 Close the sniffer probe with your finger. You should be able to feel the
underpressure. If not then there is a leak somewhere and you have to check
sniffer probe and handle.
9 If necessary, set the maintenance interval to the desired new period. See also
"Set maintenance interval "Filter sniffer tip" or "Air filter" [}61]".
8.6 Mounting or changing the gas cylinder
Observe the following notes when using the optionally available cylinder holder:

 Loading...