Intel
®
Server Chassis P4304XXMFEN2/P4304XXMUXX Product Family System Integration and Service Guide
21
Notes:
The underside of the processor has components that may damage the socket pins if installed improperly.
The processor must align correctly with the socket opening before installation. DO NOT DROP the processor
into the socket.
The pins inside the processor socket are extremely sensitive. Other than the CPU, use no object to make
contact with the pins inside the processor socket.
When possible, use a processor insertion tool to install the processor.
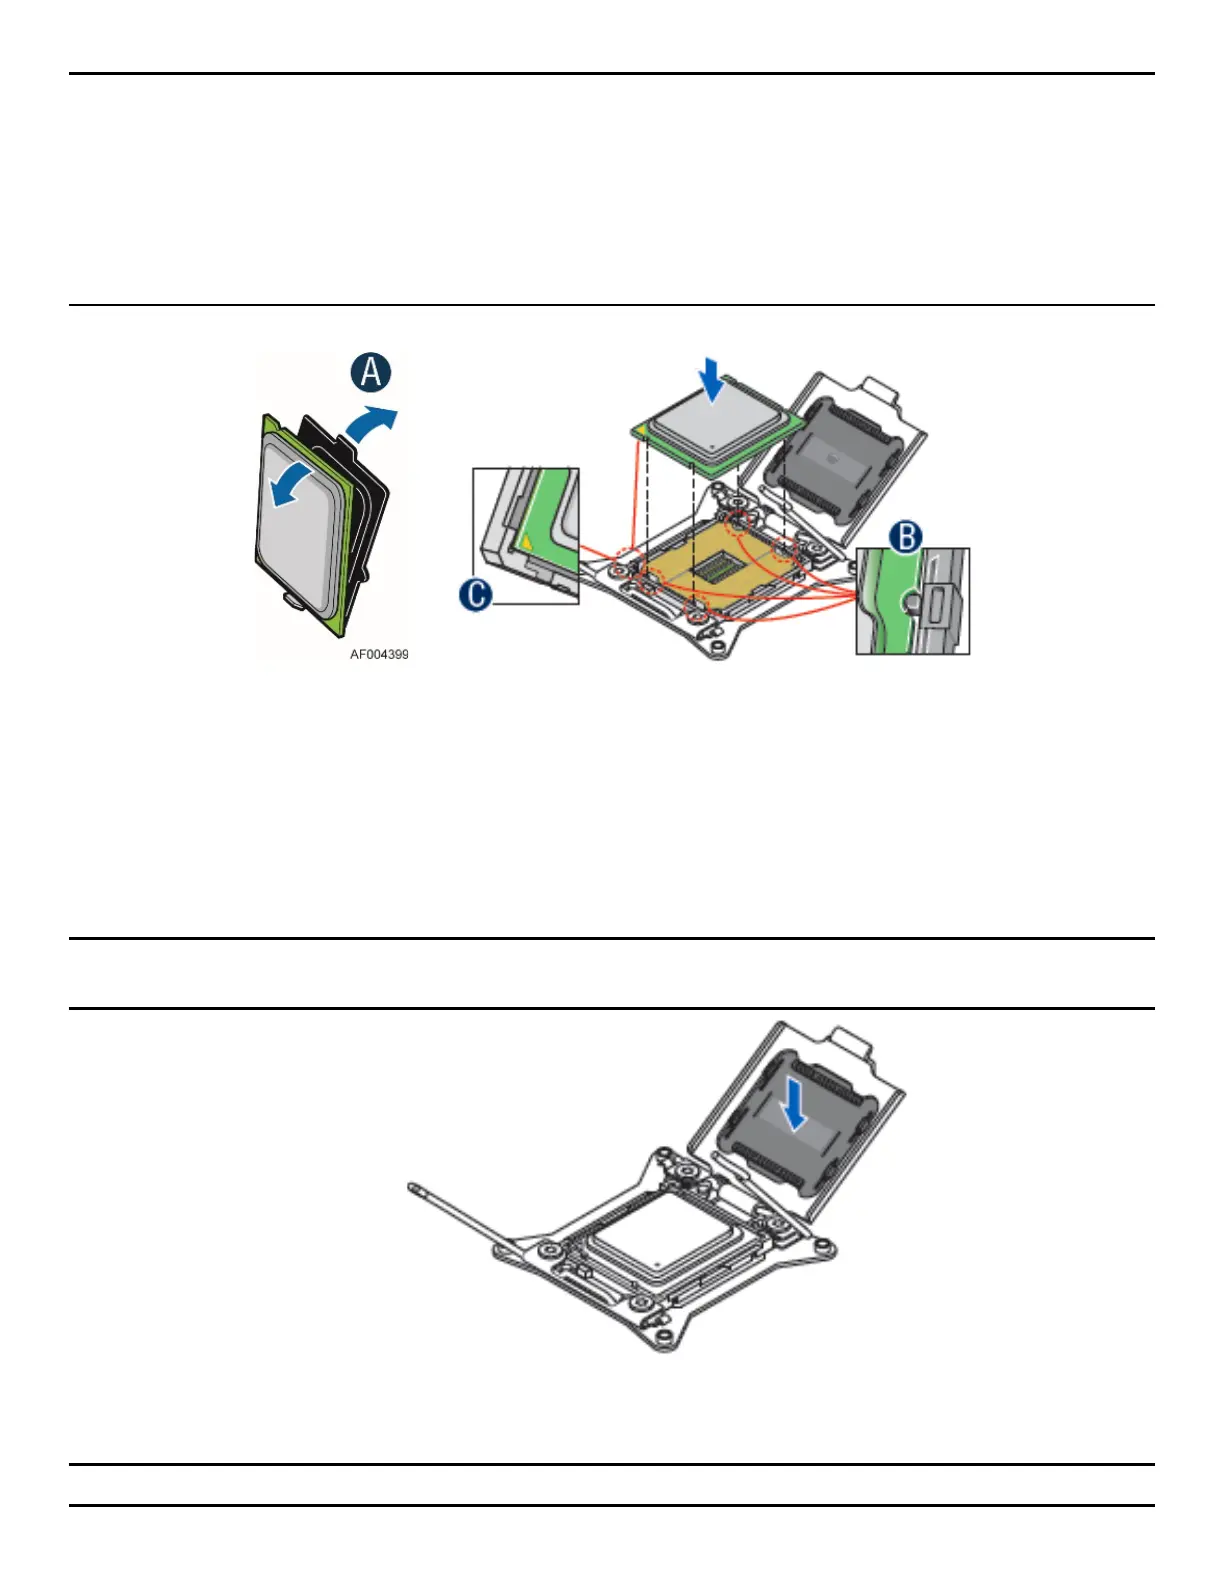
Figure 24. Processor Installation – Install the Processor
6. Remove the processor from its packaging. Carefully remove the protective cover from the bottom
side of the CPU, taking care not to touch any CPU contacts (see letter A). Orient the processor with
the socket so that the processor cutouts match the four orientation posts on the socket (see letter
B).
7. Remove the socket cover by pressing it out of the load plate.
Note the location of the gold key on the corner of processor (see letter C). Carefully place (Do NOT drop) the
CPU into the socket.
Figure 25. Processor Installation – Remove the Socket Cover
Note: Save the socket cover for re-use should the processor need to be removed at any time in the future.
 Loading...