Intel
®
Server Chassis P4304XXMFEN2/P4304XXMUXX Product Family System Integration and Service Guide
70
2.3.8.3 3.5” Hard Disk Drive Installation
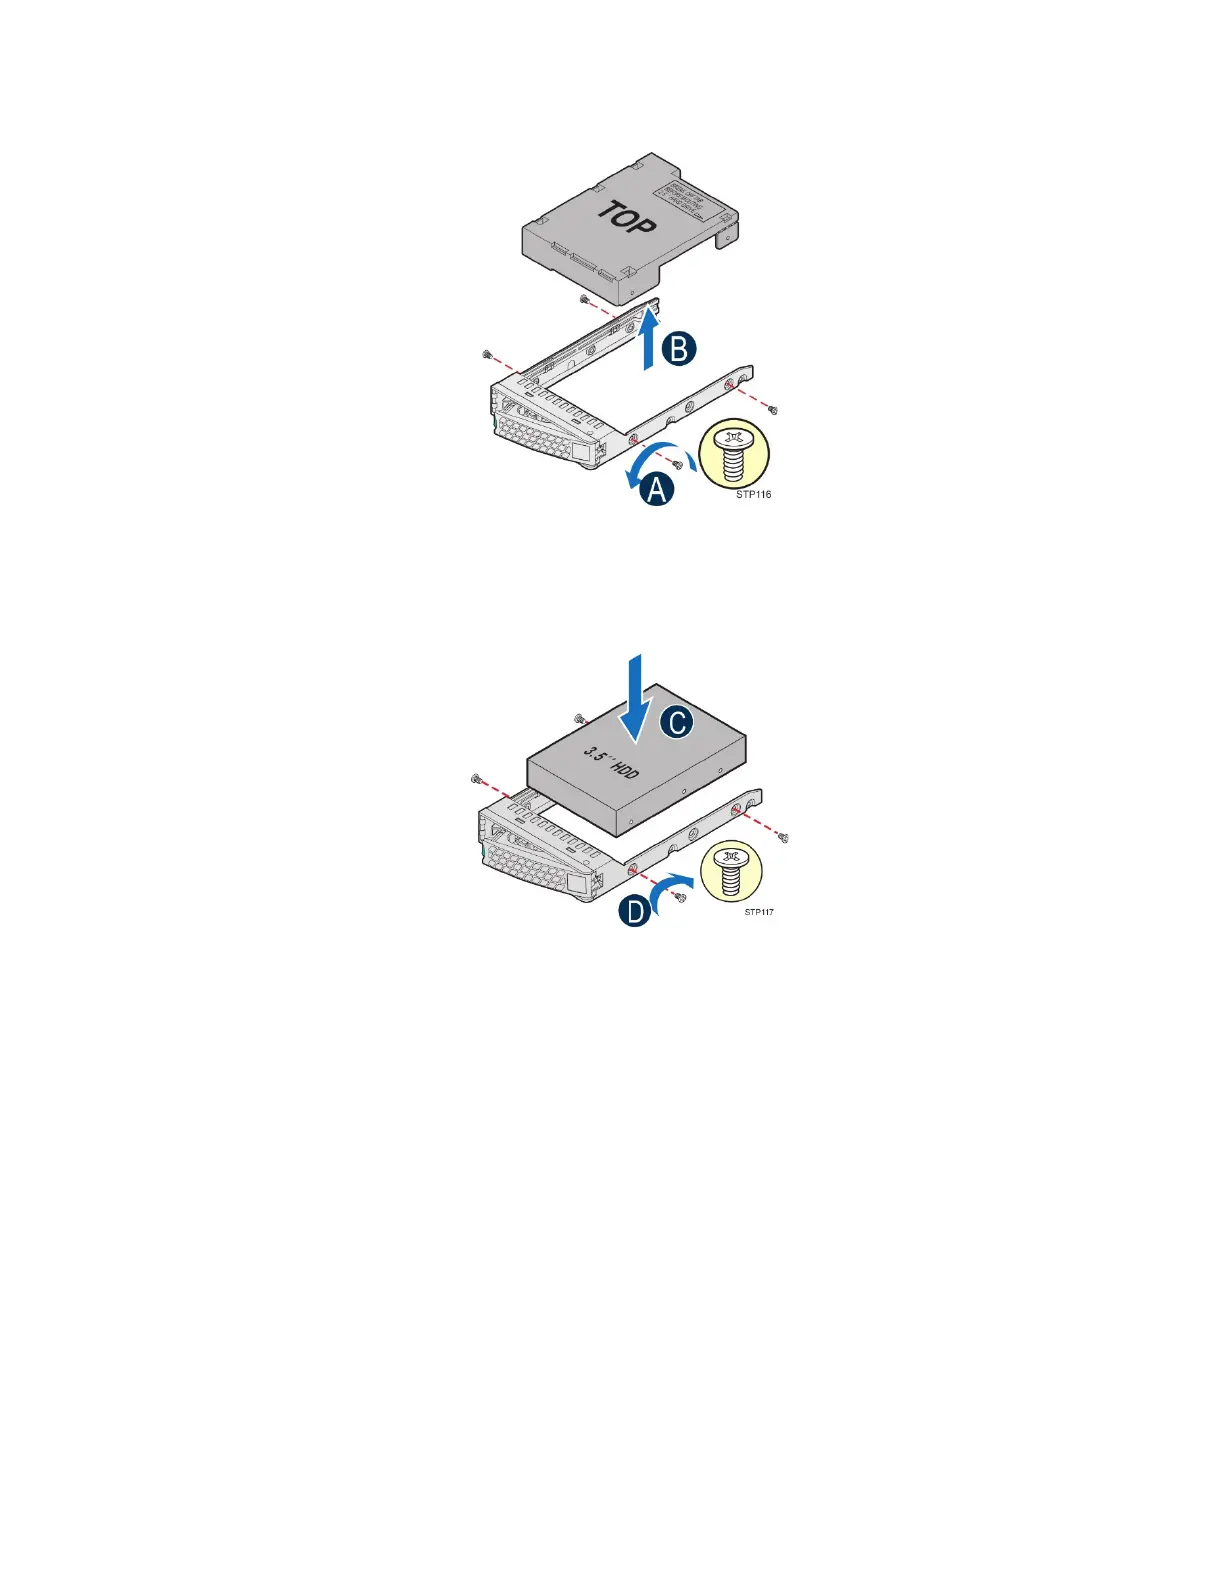
Figure 83. 3.5” Hard Disk Drive Installation – Removing the Drive Blank
1. Remove the four screws securing the plastic drive blank to the carrier (see letter A).
2. Remove the drive blank from the carrier (see letter B).
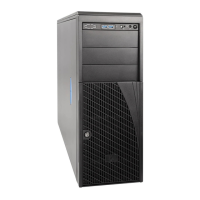
Figure 84. 3.5” Hard Disk Drive Installation – Mounting the Drive to the Carrier
3. Install the drive into the carrier. Verify the connector end of the drive is located towards the back
of the carrier (see letter C).
4. Secure the drive to the carrier using four screws (see letter D).