Appendix B — Media Specifications
EasyCoder PD41 Printer User’s Guide 67
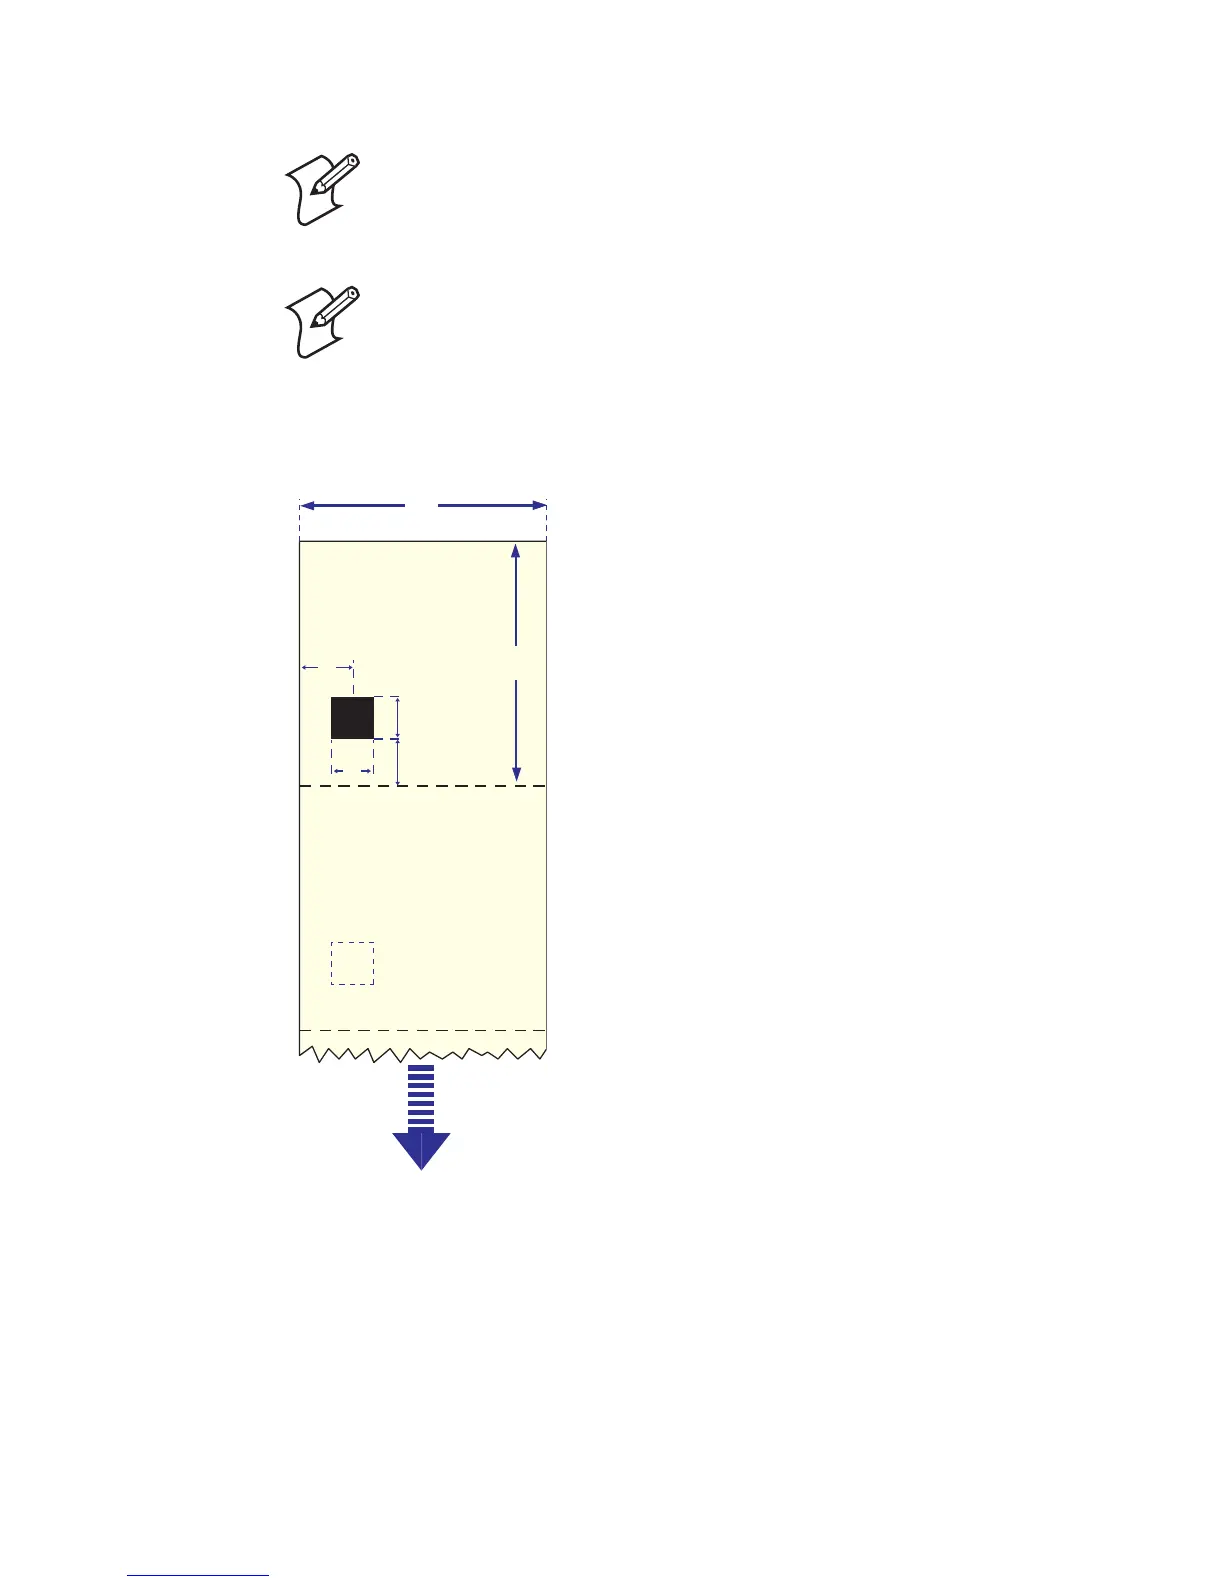
Tickets with Black Mark
Note: Preprint that may interfere with the detection
of the black mark should be avoided.
Note: the black mark should be non-reflective carbon
black on a white or near-white background. Do not
allow any perforations to break the edge of the media
as this may cause the media to split and jam the
printer.
a
TICKETS
WITH MARKS
c
FEED
DIRECTION
e
d
f
b