- If you choose to power on your AP using DC power supply, connect the PWR port of your AP to a
DC power resource using the included power adapter.
- If you have several IP-COM APs, to avoid IP address conflict, you should connect one AP to a PoE
port of your PoE switch first and set a new IP address for the AP. Then repeat this procedure to
connect other APs one by one and configure new IP addresses for them respectively.
After finishing connection, ensure that the AP’s LED indicator blinks and the lower-right network icon
on your computer is not displayed .
2. Configure the IP address of your computer (Example: Win7).
(1) Right-click the network icon on the lower-right corner of your computer. Then click Open
Network and Sharing Center, Local Area Connection, and Properties.
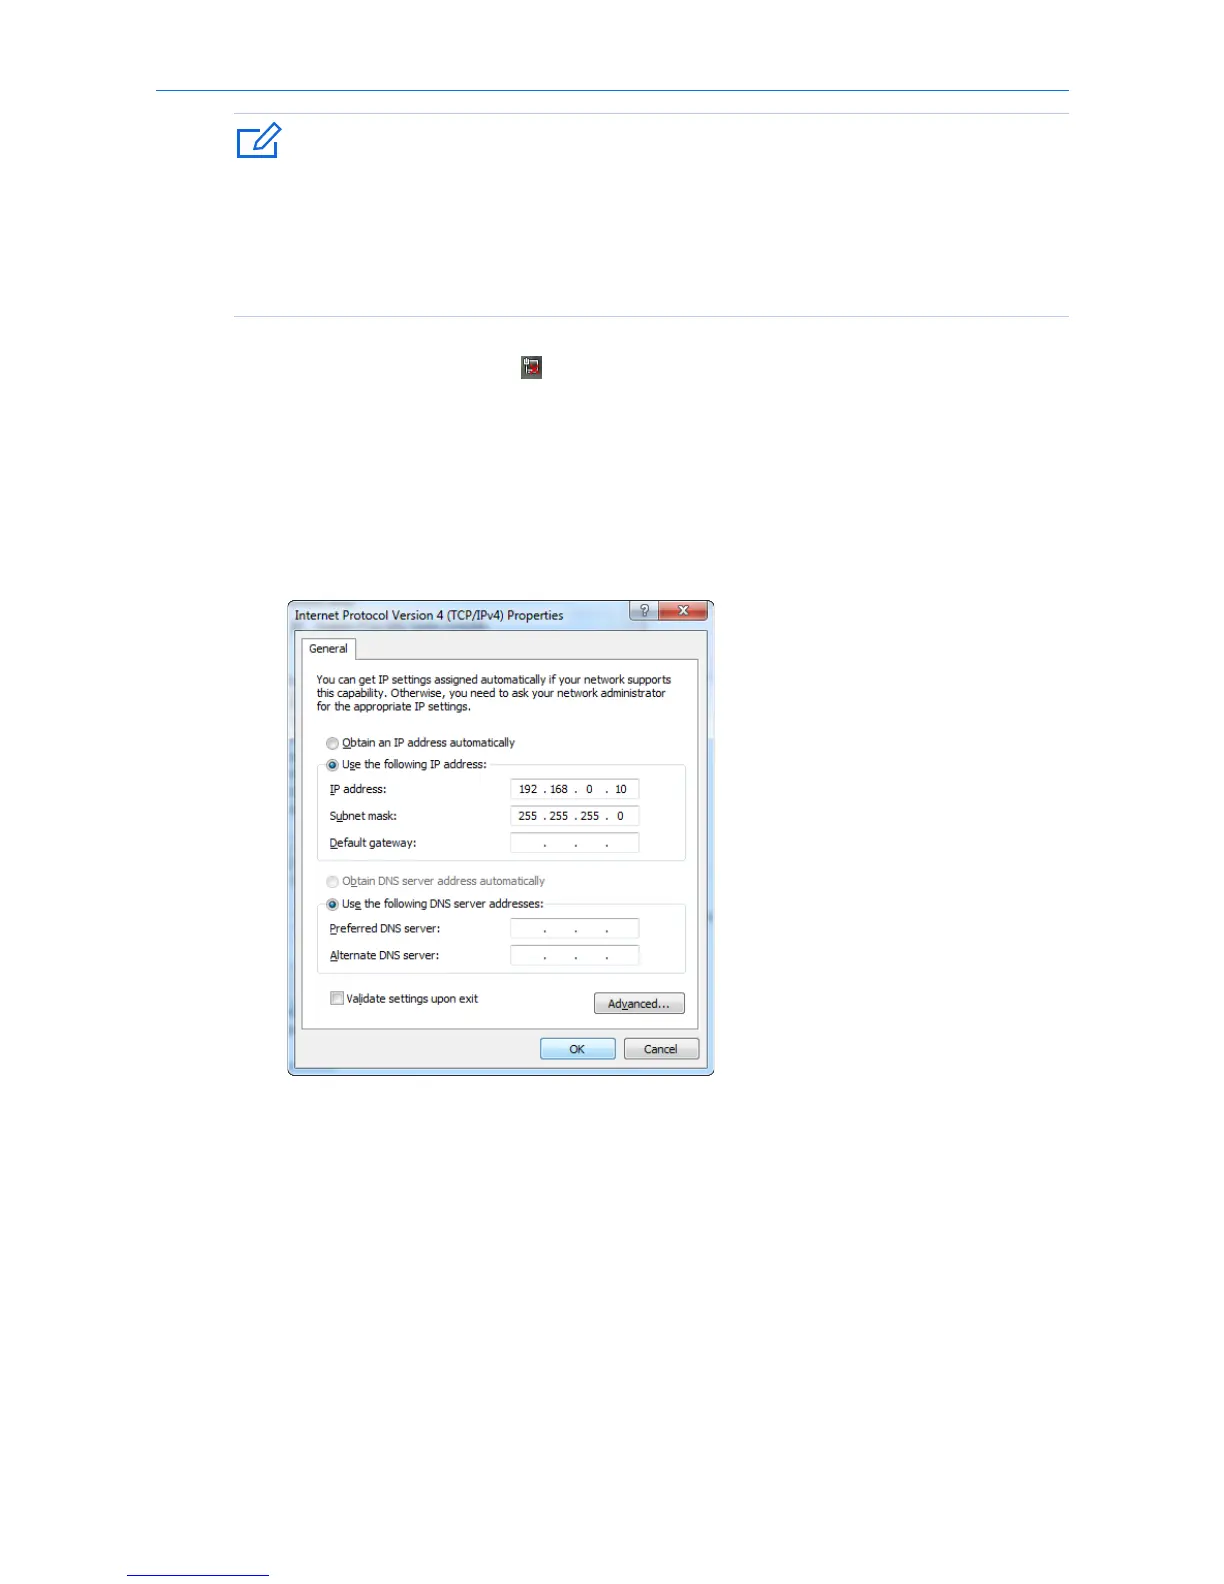
(2) Double-click Internet Protocol Version 4 (TCP/IPv4), select Use the following IP address, set IP
address to 192.168.0.x (x: 2 to 253. The IP address in this example is 192.168.0.10) and Subnet
mask to 255.255.255.0.
(3) Click OK.
3. Log in to the web UI of your AP.
(1) Start a web browser on your computer. Enter 192.168.0.254 in the address bar, and press Enter.
(2) Enter the user name and password (default: admin/admin) of the AP.
(3) Click Login.
8