EasyManua.ls Logo

Jensen VM9424 - User Manual

Jensen VM9424
130 pages
Print Icon
To Next Page IconTo Next Page
Loading...
VM9424
Operating Instructions
160
watts peak
40W x 4

Table of Contents

Other manuals for Jensen VM9424

Questions and Answers

  • H
    Heather WhiteAug 19, 2025
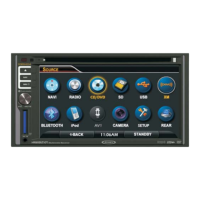
    What to do if my Jensen VM9424 unit will not power on?
    • C
      Chelsey JonesAug 19, 2025
      If your Jensen Car Video System doesn't power on, it could be due to a blown fuse or an illegal operation. First, check the radio and car battery fuses and install new fuses with the correct rating if necessary. If the fuses are fine, press the RESET button located in the bottom right corner of the front panel.
  • P
    Patricia BakerAug 21, 2025
    What to do if there is no audio output from my Jensen Car Receiver?
    • A
      amanda98Aug 21, 2025
      If you're experiencing no or low audio output from your Jensen Car Receiver, there are several potential causes. First, ensure that your audio output connections are properly wired. Next, verify that the volume isn't set too low and increase it if necessary. Also, check the “MUTE” connection against the wiring diagram. Damaged speakers can also cause this issue, so consider replacing them. Heavily biased volume balance can lead to low output, so adjust the channel balance to the center position. Finally, ensure that speaker wiring isn't in contact with any metal parts of the car; insulate the connections if it is.
  • G
    Gregory TaylorAug 23, 2025
    Why my Jensen Car Receiver will not power on?
    • J
      Joseph DavisAug 25, 2025
      If your Jensen Car Receiver won't power on, start by checking the radio fuse and the car battery fuse. If either is blown, replace it with a new fuse of the correct rating. If the fuses are fine, try pressing the RESET button located in the bottom right corner of the front panel, as this could be due to an illegal operation.
  • M
    Madison FrostAug 26, 2025
    How to fix poor sound quality on Jensen Car Receiver?
    • M
      michaeljaneAug 26, 2025
      If you're experiencing poor sound quality or distortion with your Jensen Car Receiver, start by ensuring you're using an original copy of the disc, not a pirated one. Check that your speaker power rating is compatible with the unit and connect proper speakers if needed. Also, inspect the speaker contact to ensure the speaker isn't shorted.
  • C
    Corey StoneAug 28, 2025
    What to do if my Jensen Car Receiver remote control does not function?
    • B
      Bonnie TranAug 28, 2025
      If the remote control for your Jensen Car Receiver isn't working, the first thing to check is the battery. If the battery is depleted, replace it with a new one. If that doesn't solve the issue, remove the battery and reinstall it correctly, ensuring proper alignment.
  • L
    lscottAug 30, 2025
    Why is there interference on the screen of my Jensen Car Receiver?
    • M
      Michael SmithAug 30, 2025
      If you notice a flashing image or interference on the screen of your Jensen Car Receiver, it could be due to the DVD not being compatible with the current TV system settings. Try changing the setup to accommodate the disc. Also, check the video signal connections to ensure they are properly wired.
  • M
    Michael EdwardsSep 1, 2025
    What to do if there is no image on my Jensen Car Receiver?
    • W
      Wendy CollinsSep 1, 2025
      If your Jensen Car Receiver displays no image, first, check the connection to the parking brake wire and correct it if necessary. If the connection is correct, ensure that the parking brake is engaged by stopping the vehicle in a safe place and applying it.
  • D
    David ConnerSep 3, 2025
    Why does my Jensen Car Receiver resets itself when the engine is off?
    • D
      Donna WongSep 4, 2025
      If your Jensen Car Receiver resets itself when the engine is off, it's likely due to an incorrect connection between the ACC and the positive battery wire. To resolve this, check the wiring and correct it.
  • T
    Teresa SteeleSep 5, 2025
    Why is there no/low audio output from my Jensen VM9424?
    • S
      Shelia MathisSep 5, 2025
      The audio output might be low or absent due to several reasons: * Improper audio output connection: Check the wiring and correct it. * Volume set too low: Increase the volume level. * Improper 'MUTE' connection: Review the wiring diagram and check the 'MUTE' connection. * Damaged speakers: Replace the speakers. * Heavily biased volume balance: Adjust the channel balance to the center position. * Speaker wiring in contact with metal part of car: Insulate all speaker wiring connections.
  • K
    Kevin BrooksSep 7, 2025
    Why does my Jensen Car Video System have poor sound quality or distortion?
    • A
      Angela StoneSep 7, 2025
      Poor sound quality or distortion in your Jensen Car Video System can occur due to a few reasons. Using a pirated disc can cause this issue; try using an original copy. Additionally, the speaker power rating might not be compatible with the unit, so connect proper speakers. Finally, a shorted speaker can also lead to poor sound quality, so check the speaker contact.

Summary

FEATURES

DVD Features

Details DVD playback capabilities including aspect ratio, fast forward/reverse, and chapter control.

CD;MP3;WMA Capabilities

Covers CD-Text, ID3 tag compatibility, directory search, and MP3/WMA file playback.

iPod Functionality

Explains iPod connection via USB, accessing playlists, and music/video playback.

Chassis Details

Information on the 2.0 DIN size, 6.2" TFT active matrix LCD, and heat management system.

General Features

Lists connectivity options like MediaLink USB, built-in navigation, and Bluetooth readiness.

OPTIONAL EQUIPMENT

BTM10 Module

Required accessory for connecting Bluetooth enabled devices.

Rear Camera Compatibility

Details the unit's readiness for a rear video camera.

WARNINGS

Driving Safety Warnings

Emphasizes not interfering with safe driving and avoiding video use while driving.

Unit Handling Precautions

Advises against disassembly, exposure to moisture, and manual monitor adjustment.

CONTROLS AND INDICATORS

Front Panel Controls

Identifies and explains the functions of the unit's buttons and ports.

Input and Interface Ports

Details the SD card input, 3.5mm A/V input, and IR remote receiver.

REMOTE CONTROL

Remote Control Layout

Provides a diagram of the remote control and its numbered buttons.

USING THE TFT MONITOR

Aspect Ratio Adjustment

Explains how to adjust the screen's display ratio (FULL, NORMAL, STANDBY).

Picture Settings

Details how to adjust monitor display settings like brightness.

OPERATING INSTRUCTIONS

Power Management

Instructions for turning the unit on and off using the SRC button.

Source Selection

How to change between available audio and video sources.

Volume Adjustment

Audio Control Menu

Allows adjustment of Fader, Balance, and EQ settings for optimal acoustics.

System Reset

Resetting the Unit

Procedure to correct system halts by restoring factory default settings.

Steering Wheel Control (SWC)

SWC Functions and Operation

Details available steering wheel controls and their operation.

TUNER OPERATION

Accessing Radio Mode

Steps to enter the radio source and use its features.

Tuner Display and Controls

Explanation of indicators, touch buttons, and band selection.

DVD;VCD VIDEO OPERATION

Disc Handling

Instructions for inserting, ejecting, and resetting the disc mechanism.

DVD Playback Modes

Details on accessing DVD mode and on-screen playback controls.

CD;DVD;MP3 AUDIO OPERATION

Accessing External Media

Guide for connecting and accessing USB and SD card devices for audio playback.

MP3;WMA File Requirements

File Format Compatibility

Specifies compatible MP3/WMA file naming formats and compression settings.

XM RADIO OPERATION

Accessing XM Radio

Steps to select the XM Radio source and view its interface.

XM Radio Interface

Explanation of XM radio indicators, controls, and channel browsing.

iPod OPERATION

Accessing iPod Mode

How to connect and access the iPod source for playback.

iPod Interface Controls

Details on iPod playback controls, menus, and direct track entry.

BLUETOOTH OPERATION

About Bluetooth Technology

Provides a general overview of Bluetooth connectivity and its capabilities.

Accessing Bluetooth Mode

Steps to enter the Bluetooth source and its phone dial interface.

Pairing Your Mobile Phone and Head Unit

Bluetooth Pairing Process

Step-by-step guide to connect your mobile phone to the head unit.

Managing Incoming Calls

Call Handling Procedures

How to answer, reject, and manage incoming calls via Bluetooth.

Making an Outgoing Call

Dialing and Call Management

Instructions for making calls from the direct dial screen or call logs.

Bluetooth Auto Connect

Automatic Connection Setup

Enables the unit to automatically connect to paired Bluetooth devices.

VIEWING JPEG PHOTOS

JPEG Image Access

How to access and view JPEG images from discs, SD, or USB interfaces.

REAR CAMERA FUNCTION

Camera Integration and Usage

Details on connecting a rear camera and its operation.

REAR MONITOR VIDEO DISPLAY

Rear Display Configuration

Instructions for setting up and controlling playback on rear monitors.

TROUBLESHOOTING

General Unit Issues

Lists common problems like no power, low audio output, and resets.

Monitor Display Problems

Troubleshooting for no image, flashing image, or improper aspect ratio.

Error Messages

Common Error Indicators

Explains messages like Loading, No Disc, Bad Disc, and Unknown disc.

Care and Maintenance

Cleaning and Handling Precautions

Guidelines for cleaning the unit and handling discs to prevent damage.

SPECIFICATIONS

Disc Player Specifications

Technical details for DVD/CD player including media formats and S/N ratio.

Tuner Specifications

FM and AM tuner frequency ranges, sensitivity, and signal-to-noise ratios.

Monitor Specifications

Details on the 6.2" TFT LCD screen size, type, and resolution.

General Unit Specifications

Includes power supply, operating temperature, and fuse rating.

BASIC OPERATION

Acquiring a Satellite Signal

Instructions for gaining a GPS signal for navigation.

HORIZON NAVMATE INTRODUCTION

Key Navigation Features

Highlights of the navigation system: Tele Atlas maps, POI database, voice guidance.

GPS and GNSS Explained

Explains how GPS and GNSS technology works for vehicle navigation.

SAFETY INFORMATION

User Agreement and Driver Rules

Covers the initial agreement and critical safety rules for drivers.

Main Menu

Navigation Menu Options

Overview of main menu choices: Home, Go To, Setup, Office, Trip Computer.

SELECTING A DESTINATION

Finding an Address

Procedure to locate a destination by entering an address.

Point of Interest

POI Search Methods

Explains how to find points of interest by category, city, or name.

Navigating to a Recent Location

History Feature Usage

How to quickly locate and return to previously visited destinations.

Choosing a Location from your Address Book

Address Book Navigation

Steps to view and select destinations stored in the address book.

Following a Trail

Trail Navigation Procedure

How to navigate to a saved path or trail.

SELECTING A POINT OF INTEREST

Searching for a Specific POI

How to narrow POI search results by category, city, or name.

Category Search

Procedure to select a POI category to find specific locations.

My POI

Personal POI Creation

Allows creation of personalized POI categories and adding destinations.

NAVIGATING

Route Calculation and Guidance

Explains how the system calculates routes and provides guidance.

MANAGING FAVORITES

Favorite Location Management

How to save and manage home, work, and other frequent destinations.

Edit Address Book

Address Book Entry Management

Instructions for storing, renaming, and deleting address book entries.

Edit Trip Book

Trip Book Management

Covers creating and editing trips, which are sets of multiple destinations.

Edit Trail Book

Trail Book Entry Management

Allows adding, editing, and setting display preferences for trail book entries.

SETUP MENU

Setup Routing Criteria

Configure route preferences like avoiding freeways, tolls, or using ferries.

Display Options

Map Orientation Settings

Options for Heading Up or North Up map views and on-screen icons.

User Preferences

Language and Voice Settings

Adjust on-screen text language and voice guidance language.

Time and Units Configuration

Set the clock time and choose units for distance measurements.

Day;Night Settings

Automatic Day;Night Mode

Allows selection of Day, Night, or Auto mode for map display.

Location Reset

Resetting Vehicle Location

Procedure to reset the vehicle's current location in the navigation system.

Installation Guide

What’s in the Box

Lists all components included with the VM9424 head unit.

Tools and Supplies

Lists necessary tools and supplies for installing the unit.

ISO-DIN Installation

Dashboard Mounting Procedure

Details on fitting the unit into a 2.0 DIN dashboard opening.

Installation Using Half-Sleeve

Sleeve Installation Steps

Instructions for installing the half-sleeve into the dashboard opening.

Wiring Diagram

Electrical Connection Guide

Provides a detailed diagram for all unit wiring connections.

Jensen VM9424 Specifications

General IconGeneral
BrandJensen
ModelVM9424
CategoryCar Video System
LanguageEnglish

Related product manuals