JS-MD 3 RES Maintenance Manual
Supplement
MD11-AMM-00-002
Issue: 00
7. Remove the pylon support.
8. Install the main doors.
NOTE: The actuator system and main door setup must be done again to ensure the
kinematic system is working correctly. Refer to the Calibration & setup
section.
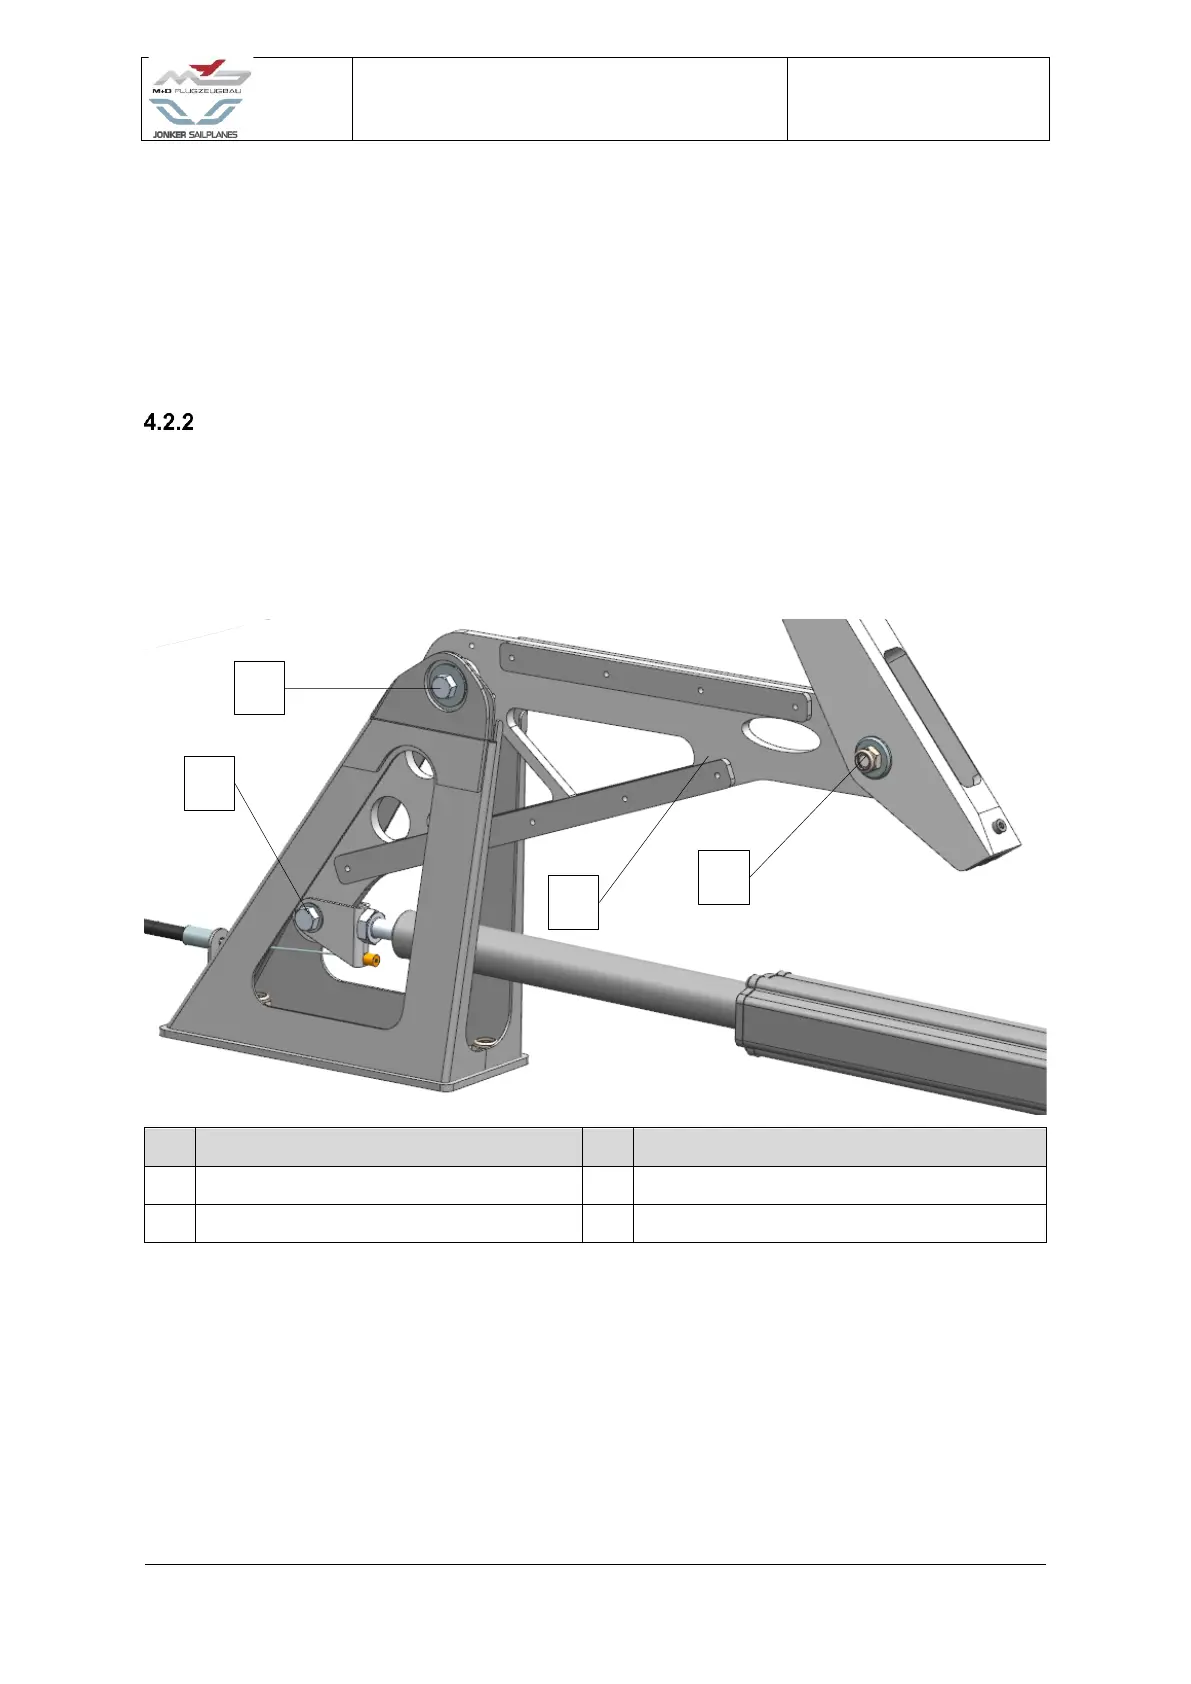
Pylon bell crank
The pylon bell crank is connected to the actuator and pylon driver arm. The pylon bell crank
is held in place by the pylon bell crank bracket as illustrated in Figure 4-3.
4.2.2.1 Overview
Pylon bell crank bracket bolt
Figure 4-3 Pylon bell crank assembly
4.2.2.2 Removal
1. Extend the pylon to a position slightly below the extended position.
2. Switch off the RES master switch.
3. Remove the main doors.
4. Support the pylon slightly below the extended position.

 Loading...