1. Plug one end of the Ethernet cable into the RJ-45 to DB-9 serial port adapter supplied
with your services gateway.
2. Plug the RJ-45 to DB-9 serial port adapter into the serial port on the management
device.
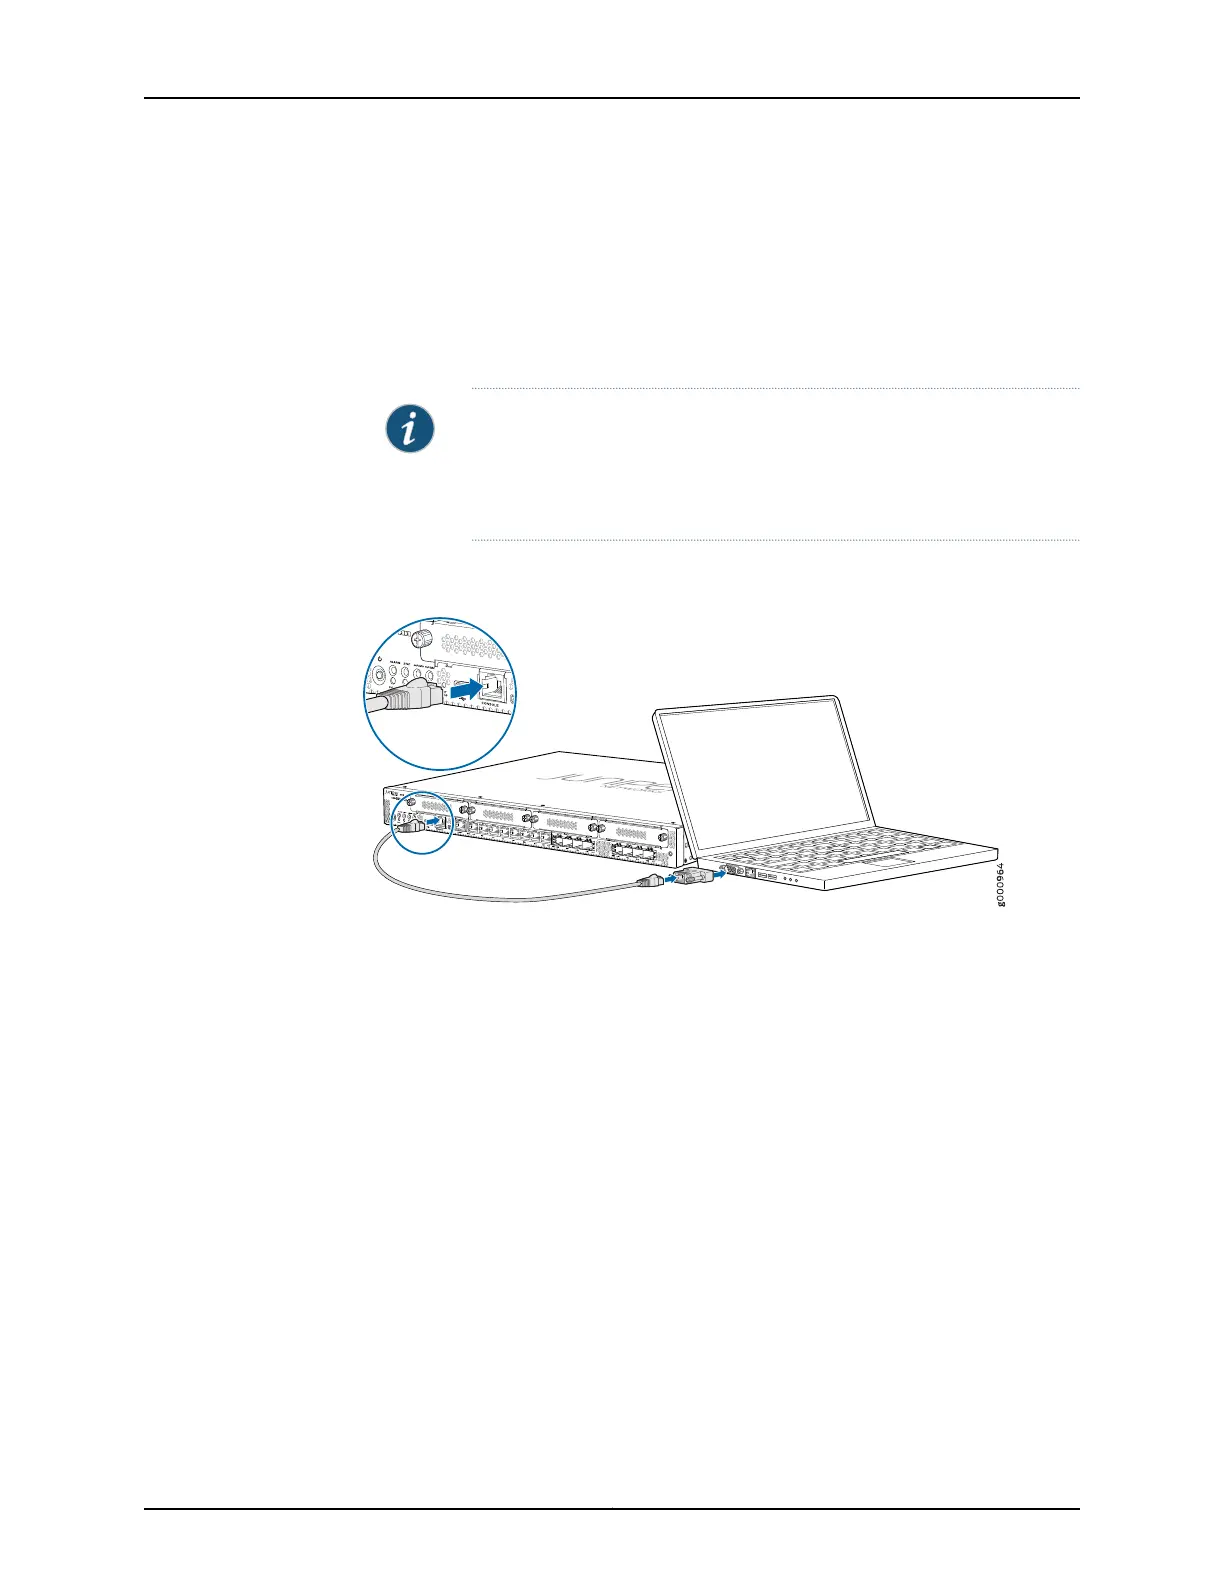
3. Connect the other end of the Ethernet cable to the serial console port on the services
gateway. See Figure 12 on page 70.
NOTE: Alternately, you can use the USB cable to connect to the mini-USB
console port on the services gateway. To use the USB console port, you
must download a USB driver to the management device from
http://www.juniper.net/support/downloads/group/?f=junos.
Figure 12: Connecting to the Console Port on the SRX340 Services
Gateway
4. Start your asynchronous terminal emulation application (such as Microsoft Windows
HyperTerminal) and select the appropriate COM port to use (for example, COM1).
5. Configure the serial port settings with the following values:
•
Baud rate—9600
•
Parity—N
•
Data bits—8
•
Stop bits—1
•
Flow control—none
6. Power on the services gateway. You can start performing initial software configuration
on the services gateway after the device is up.
Related
Documentation
SRX340 Services Gateway Software Configuration Overview on page 63•
• Understanding SRX340 Services Gateway Factory-Default Settings on page 64
• Viewing SRX340 Services Gateway Factory-Default Settings on page 64
• Accessing J-Web on the SRX340 Services Gateway on page 66
Copyright © 2016, Juniper Networks, Inc.70
SRX340 Services Gateway Hardware Guide