Once you connect two microphones to the
MICRO 1 and MICRO 2 connectors you can
access to a bunch of options for the voice
treatment.
M I C R O
▀
The MICRO button enables the MICRO 1
input and MICRO 2 input. Connect one or two
microphones to the jacks on the rear and adjust
the level by using the GAIN 1 and GAIN 2 wheels.
VOCALIZER
▀
The VOCALIZER button enables the effect
processor for the harmonization and the
automatic pitch only on MICRO 1.
Setting a vocal effect
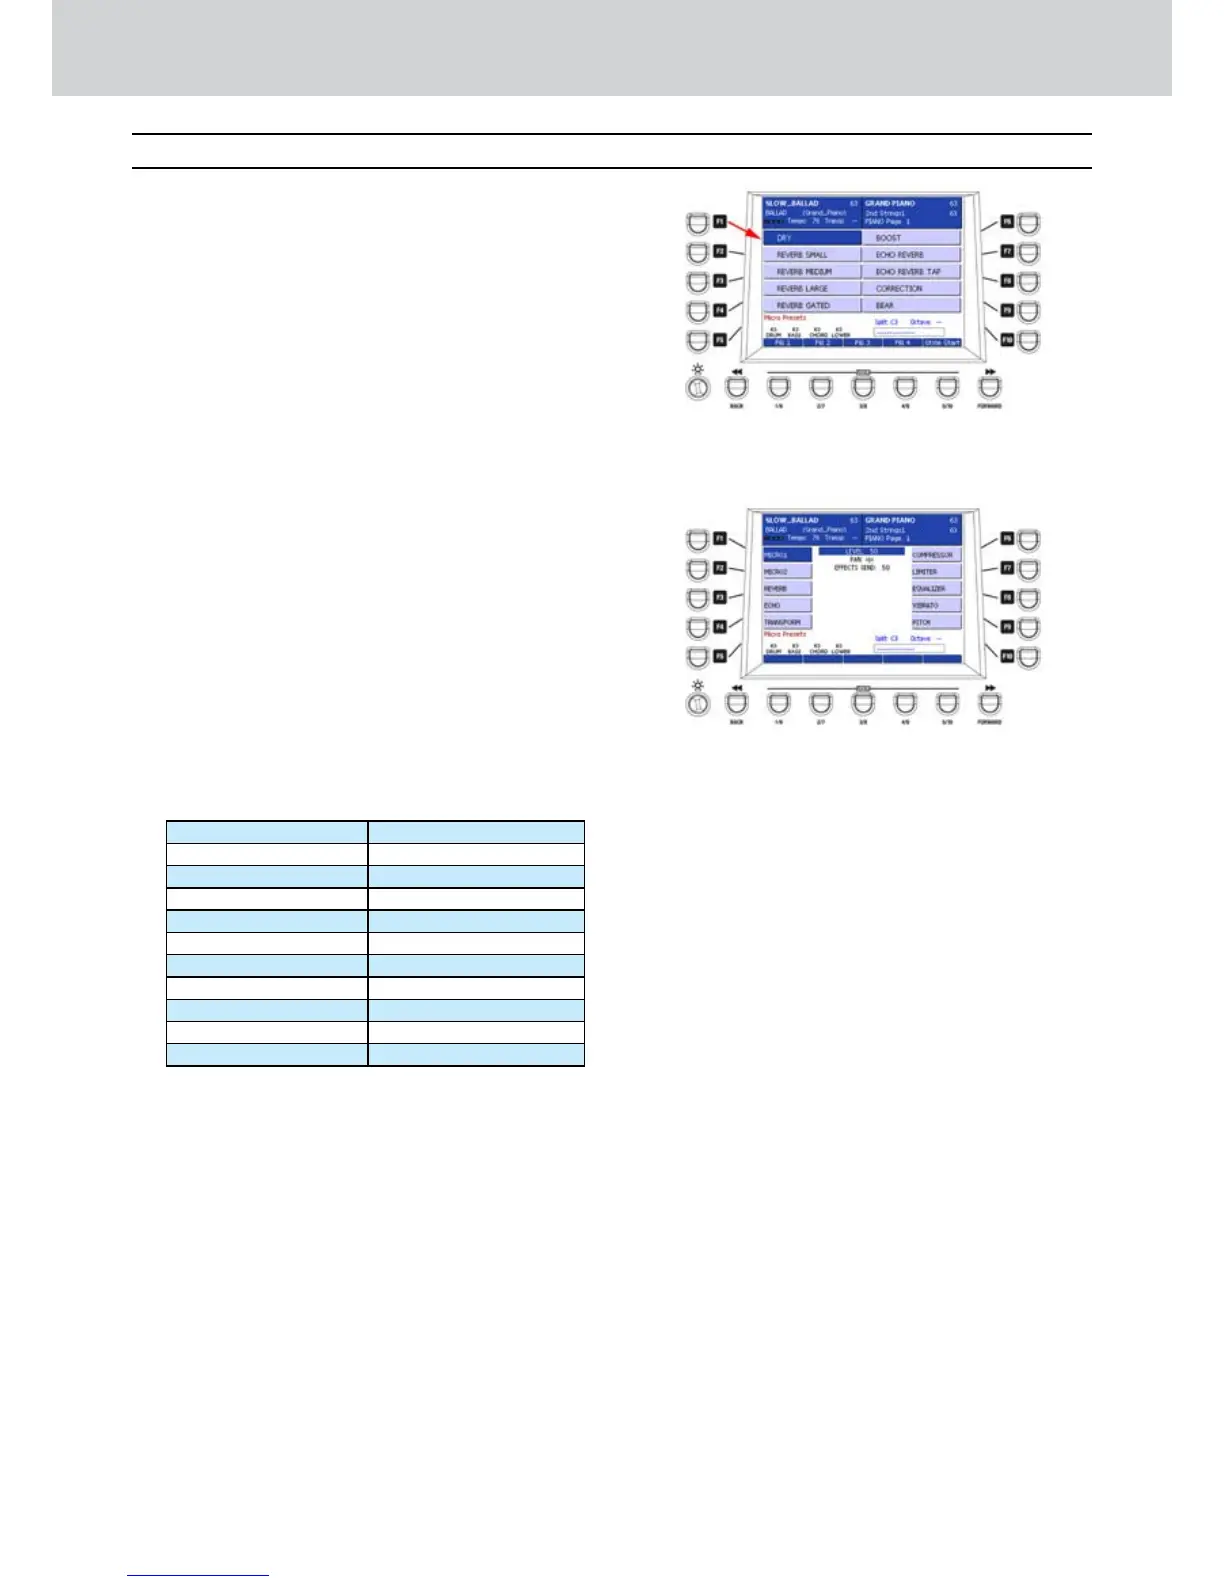
Press the MICRO button.1.
The MICRO PRESETS window will appear (2. Figure
292).
Press the F1-F10 buttons to select one of the 3.
MICRO PRESETS, that is one effect for the
microphone connected to MICRO 1 and/or
MICRO 2.
Press the CURSOR 4.
Ó Á
buttons
to scroll the
MICRO PRESETS pages.
By using the F1-F10 buttons you can select
20 MICRO PRESETS from two pages:
PAGE 1 PAGE 2
F1–DRY F1–GIRL
F2–REVERB SMALL F2–BABY
F3–REVERB MEDIUM F3–VIBRATO
F4–REVERB LARGE F4–PHONE
F5–REVERB GATED F5–ANGEL
F6–BOOST F6–MICRO_01
F7–ECHO REVERB F7–MICRO_02
F8–ECHO REVERB TAP F8–MICRO_03
F9–CORRECTION F9–MICRO_04
F10–BEAR F10–MICRO_05
Editing a vocal effect
Select one MICRO PRESETS from the list on the 1.
display.
Press the EDIT button on the front panel.2.
A window like 3. Figure 293 will appear.
By using the F1-F10 buttons you can select the 4.
following options:
F1–MICRO1
F2–MICRO2
F3–REVERB
F4–ECHO
F5–TRANSFORM
F6–COMPRESSOR
F7–LIMITER
F8–EQUALIZER
F9–VIBRATO
F10–PITCH
Please note that for MICRO1 (that is the microphone
connected to MICRO 1 on the rear) all the options are
available, while for MICRO2, only REVERB and ECHO
are available.
MICRO1
By selecting the F1 button (MICRO1), you can choose
one of the following options:
F3–REVERB
F4–ECHO
F5–TRANSFORM
F6–COMPRESSOR
F7–LIMITER
F8–EQUALIZER
F9–VIBRATO
F10–PITCH
MICRO2
By selecting the F2 button (MICRO2), you can choose
one of the following options:
F3–REVERB
F4–ECHO
Figure 292
Figure 293
Voicetron
Voicetron