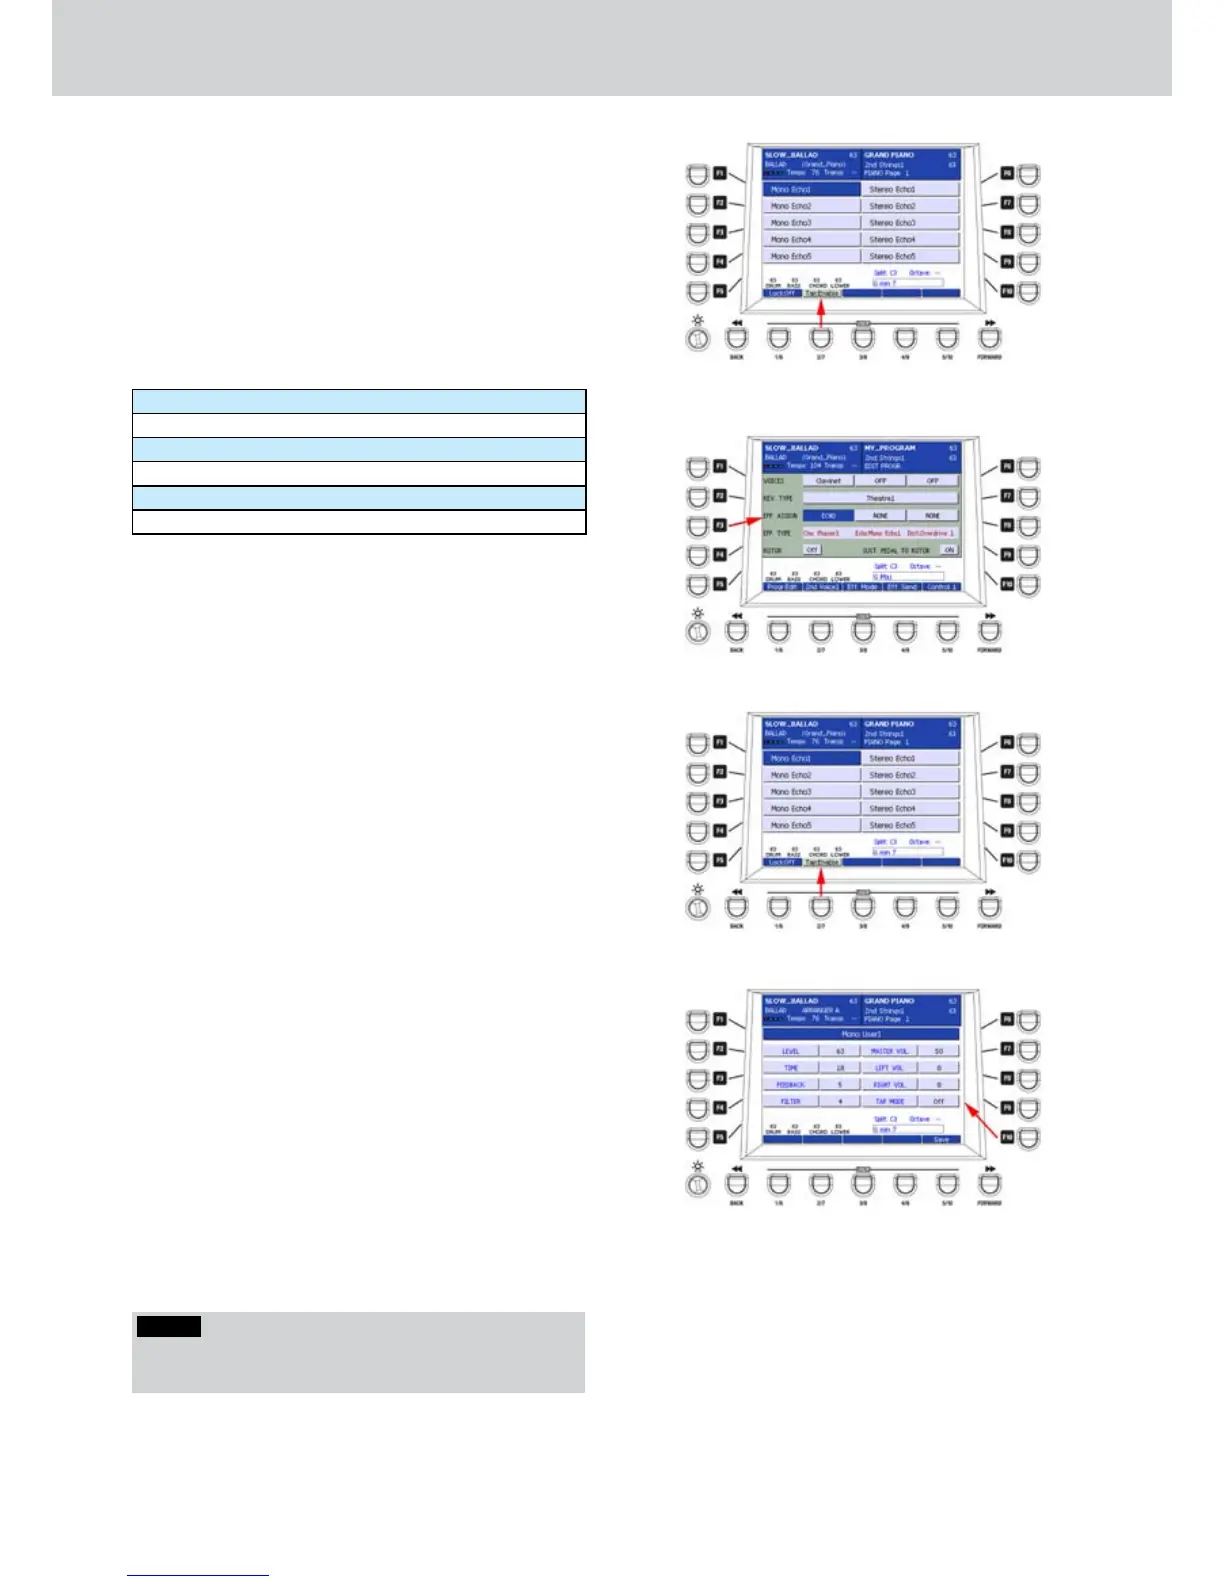
ECHO-DELAY
By pressing the F3 button on the DSP page, you can
access the ECHO-DELAY screen, as shown in Figure
237. Here you can make the selection of the ECHO-
DELAY type to set into the DSP in order to make it
available for PROGRAMS from which you can choose
an ECHO algorithm (Figure 238).
10 Echo Presets are available in the first page and 10
in the second, by pressing any CURSOR button or
the DATA/VALUE wheel. Press any F1-F10 button to
select the corresponding Echo type:
Mono Echo1 ... Mono Echo5
Stereo Echo1 ... Stereo Echo5
Triple Echo1 ... Triple Echo5
Mono User1
Stereo User1 and Stereo User2
Triple User1 and Triple User2
When you activate an Echo Preset you can set the
option Lock:On/Off as for the previous Reverb and
Chorus effects and the option Tap Enable/Disable
(Figure 239).
The Tap Enable/Disable option allows to activate
the Tap function of the Echo effect set into one
PROGRAM. In other words , when Tap is active, the
delay of the effect will be synchronized accordingly
to the current tempo. The effect delay will be
synchronized also if the tempo changes. That is,
this parameter allows the effect to be automatically
synchronized by the tempo change.
USER ECHO-DELAY
When you select one of the five custom Echo effects,
you can access the parameters of the corresponding
effect by pressing the EDIT button on the front panel.
The Figure 240 shows the parameters for Mono
User1, but the parameters are identical for Stereo
User 1, Stereo User 2, Triple User 1 and Triple User
2. The only difference is the basic algorithm. The
parameters are the following:
F1– User Echo (choose from 1 to 5)
F2– LEVEL: effect level (values 0–63)
F3– TIME: effect time (values 0–63)
F4– FEEDBACK: feedback amount (values 0–63)
F5– FILTER: filter amount (values 0–63)
F7–MASTER VOL.: master volume (values 0–63)
F8–LEFT VOL.: left channel volume (values 0–63)
F9–RIGHT VOL.: right channel volume (values 0–63)
F10– TAP MODE ON/OFF: enables/disables the Tap
mode. If the parameter is disabled, the effect
will not be affected by the Tap Enable/Disable
function.
After you set the parameters you can to store the
custom Echo by pressing the USER 5 button (SAVE)
or the SAVE button on the front panel. A brief SAVE
DATA TO DISK message will appear.
Figure 237
Figure 238
Figure 239
Figure 240
NOTE
By pressing the CURSOR
Ó Á
buttons together you
set the value to 0.