July 2016 8 06-236115-003
3.3 Installation of Nitrogen Pilot Cylinder, P/N WK-877940-000 and
Mounting Bracket, P/N WK-877845-000
Follow all instructions contained in the main body of the DIOM up to this section.
1. Locate the nitrogen cylinder mounting bracket in an area where the cylinder valve assembly
and control head will be protected from inclement weather by a suitable total or partial en-
closure, preferably adjacent to the agent storage cylinders.
2. Install the mounting bracket clamps and hardware. Install the nitrogen cylinder in position
in a mounting bracket; tighten sufficiently to hold the cylinder in place while allowing the
cylinder enough free play to be rotated.
3. Turn the cylinder until the valve discharge outlet is in the desired position. The nitrogen
cylinder must be positioned so that control head is readily accessible for manual operation.
4. Securely tighten the mounting bracket clamps and hardware.
5. Attach the adapter (P/N WK-699205-010) and connect the nitrogen pilot lines.
6. Remove the protective cap from the cylinder valve actuation port.
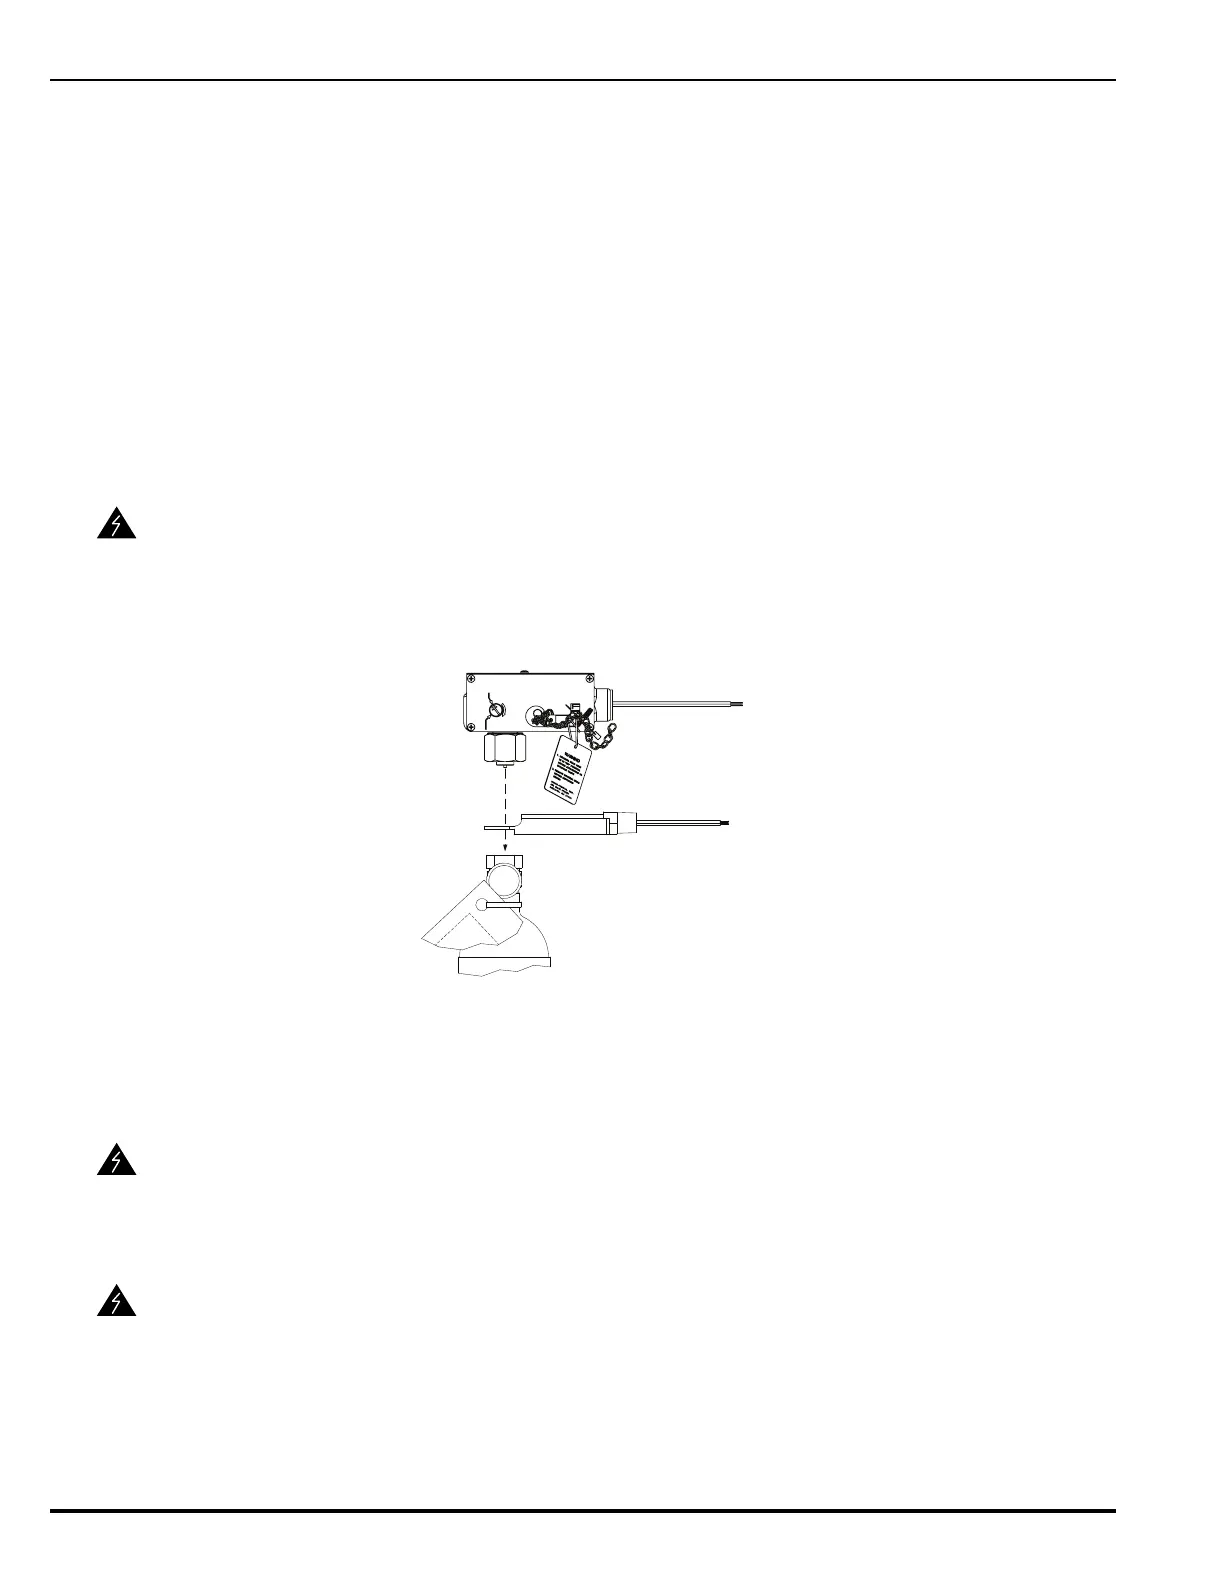
7. Insert the Control Head Monitor between the control head and the cylinder valve actuation
port as shown in Figure 6.
Figure 6. Order of Installation
8. Install the control head to the cylinder valve actuation port and tighten securely.
Note: When installed, the Control Head Monitor does not sit completely snug against the
valve. This play allows for easier attachment of conduit to the component.
9. Make all electrical connections as outlined in the DIOM.
WARNING
Ensure the control head is in the SET position (that is, the actuating pin is in the
fully retracted or SET position) before attaching it to the cylinder valve. If the
control head is not in the SET position, agent will discharge accidentally.
WARNING
The placement supervision signal is not a substitute for ensuring proper
interlock of the actuator plunger to the pilot check assembly. Make sure the
control head is properly seated.
WARNING
For US and Canada Explosion proof installations, seal all conduits within 18
inches from the end of the component.