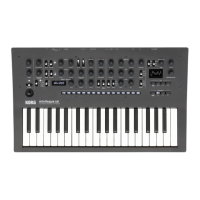
microKORG 2 - GLOBAL, CONTROL, MIC, MIDI, MIDI FILTER
85
Internal: Synchronizes to the internal clock.
External USB: Synchronizes to the clocks received via the USB port.
External MIDI: Synchronizes to the clocks received via the MIDI IN connector.
Note:
If Clock Source is set to “External USB” or “External MIDI” and there is no external clock input,
the arpeggiator, LOOP REC and LFOs also stop. If the DELAY effect parameter “Bpm Sync” is set to
“On”, the delay will operate as though the system tempo is 30 BPM.
5. Local Control (LocalCtrl) [Off,On]
Turns the local control on/off.
Off: The keyboard and wheel operations are internally disconnected from the sound generator of this
instrument.
Use this when you want to avoid doubling of notes (“echo-back”) while the microKORG2 is connected
to an external sequencer. (Echo-back occurs when you play a note on this instrument, the perfor-
mance data is transmitted to an external sequencer and the same data is sent back to trigger the
microKORG2.)
On: Set this when you want to use the microKORG2 on its own.
|
MIDI settings for connecting to another MIDI device or
computer
MIDI channel and connection settings
To exchange data with a connected external MIDI device, you must set the MIDI channel of the
microKORG2 to match the MIDI channel of your external MIDI device. Use the steps below to set the
MIDI channel.
1 Press the EDIT GLOBAL button to access the MIDI page.
2 Use knob 1 to select Global Ch, where you can set the global MIDI channel.
3 Use knob 2 to select “Timbre 2Ch (Timb2 Ch)” when you want to set Timbres 1 and 2 to different
MIDI channels for receiving data. Timbre 1 receives data on the channel that’s set in Global Ch.
4 Use knob 3 to set the Routing, which selects whether to use either the MIDI connector or the USB
port to exchange MIDI data with an external device.
5 Set this to the MIDI channel of the external MIDI device that you connected.
Tip:
See the Owner’s Manual of your external MIDI device or DAW for details on other settings that
need to be made.
MIDI local settings for connecting to an external MIDI sequencer or computer
If the microKORG2 is connected to an external MIDI sequencer or computer and the echo back setting
of the external MIDI sequencer or computer is turned on while the microKORG2’s Local Control set-
ting is also on, the performance data generated when you play the microKORG2’s keyboard is sent to
the external MIDI sequencer, and is also echoed back to trigger the microKORG2’s tone generator a
second time. To prevent this kind of echo-back from happening, you can turn off Local Control on the
microKORG2.
1 Press the EDIT GLOBAL button to access the MIDI page.
2 Use knob 5 to set Local Control (LocalCtrl) to “Off”.
Synchronizing the arpeggiator playback
Synchronizing an external MIDI device to the tempo of the microKORG2
Connect the microKORG2’s MIDI OUT connector to your external MIDI device’s MIDI IN connector, or
connect the USB ports of both devices.