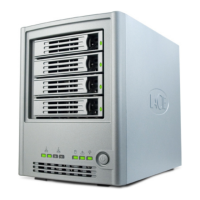
LaCie Ethernet Disk RAID (Firmware version 1.4)
User Manual
page 64
Managing Your Ethernet Disk RAID
e Disks page displays information about all the
hard disks that are currently installed in your Ethernet
Disk RAID.
is page includes the following details:
e disk configuration (that is, whether the disks use
a linear or RAID configuration,
and the RAID level)
e overall status of the disks:
Normal – All the disks are working properly.
Degraded – One or more disks have failed but all
the data is still available.
Failed – e Ethernet Disk RAID has stopped
working properly.
e slot where each hard disk resides
e model number, serial number, and size of each
hard disk
e current status of each disk:
Linear or RAID n – e disk is working properly
as part of the specified configuration.
New – e disk has been added to the Ethernet
Disk RAID but is not currently being used.
Spare – e disk is acting as a spare disk for the
RAID.
Rebuilding – e disk is being rebuilt (for exam-
ple, when a failed disk is replaced)
N/A – e disk is detected but not available for
use (for example, when it has failed)
e hot-plug indicator:
RED – Removing the disk will cause the RAID
to fail.
YELLOW – Removing the disk will cause RAID
degradation.
GREEN – Removing the disk will not affect the
RAID.
❖
❖
•
•
•
❖
❖
❖
•
•
•
•
•
❖
•
•
•
TeChNICAl NOTe: Whenever you add or
remove a disk from the Ethernet Disk RAID,
you must click Refresh to update the hot-plug
indicator.
5.7.6. Reconfiguring the Disks■
ImpOrTANT INfO: For detailed informa-
tion about RAIDs and how adding, removing, or
swapping disks affects the Ethernet Disk RAID,
refer to section 11. RAID and Storage Policies.
You can change the disk configuration or amount
of storage space that is allocated for shared folders
at any time. However, for additional security, you
must enter your administrator password to be able
to make these changes.