LaCie Ethernet Disk RAID (Firmware version 1.4)
User Manual
page 67
Managing Your Ethernet Disk RAID
configuration is used for a single hard disk, RAID 1
is used for two hard disks, and RAID 5 is used for
three or four hard disks.
If you want to change the disk configuration, select
the desired RAID level and then click Next. (For
detailed information about the different RAID lev-
els, refer to Section 11. Raid and Storage Policies)
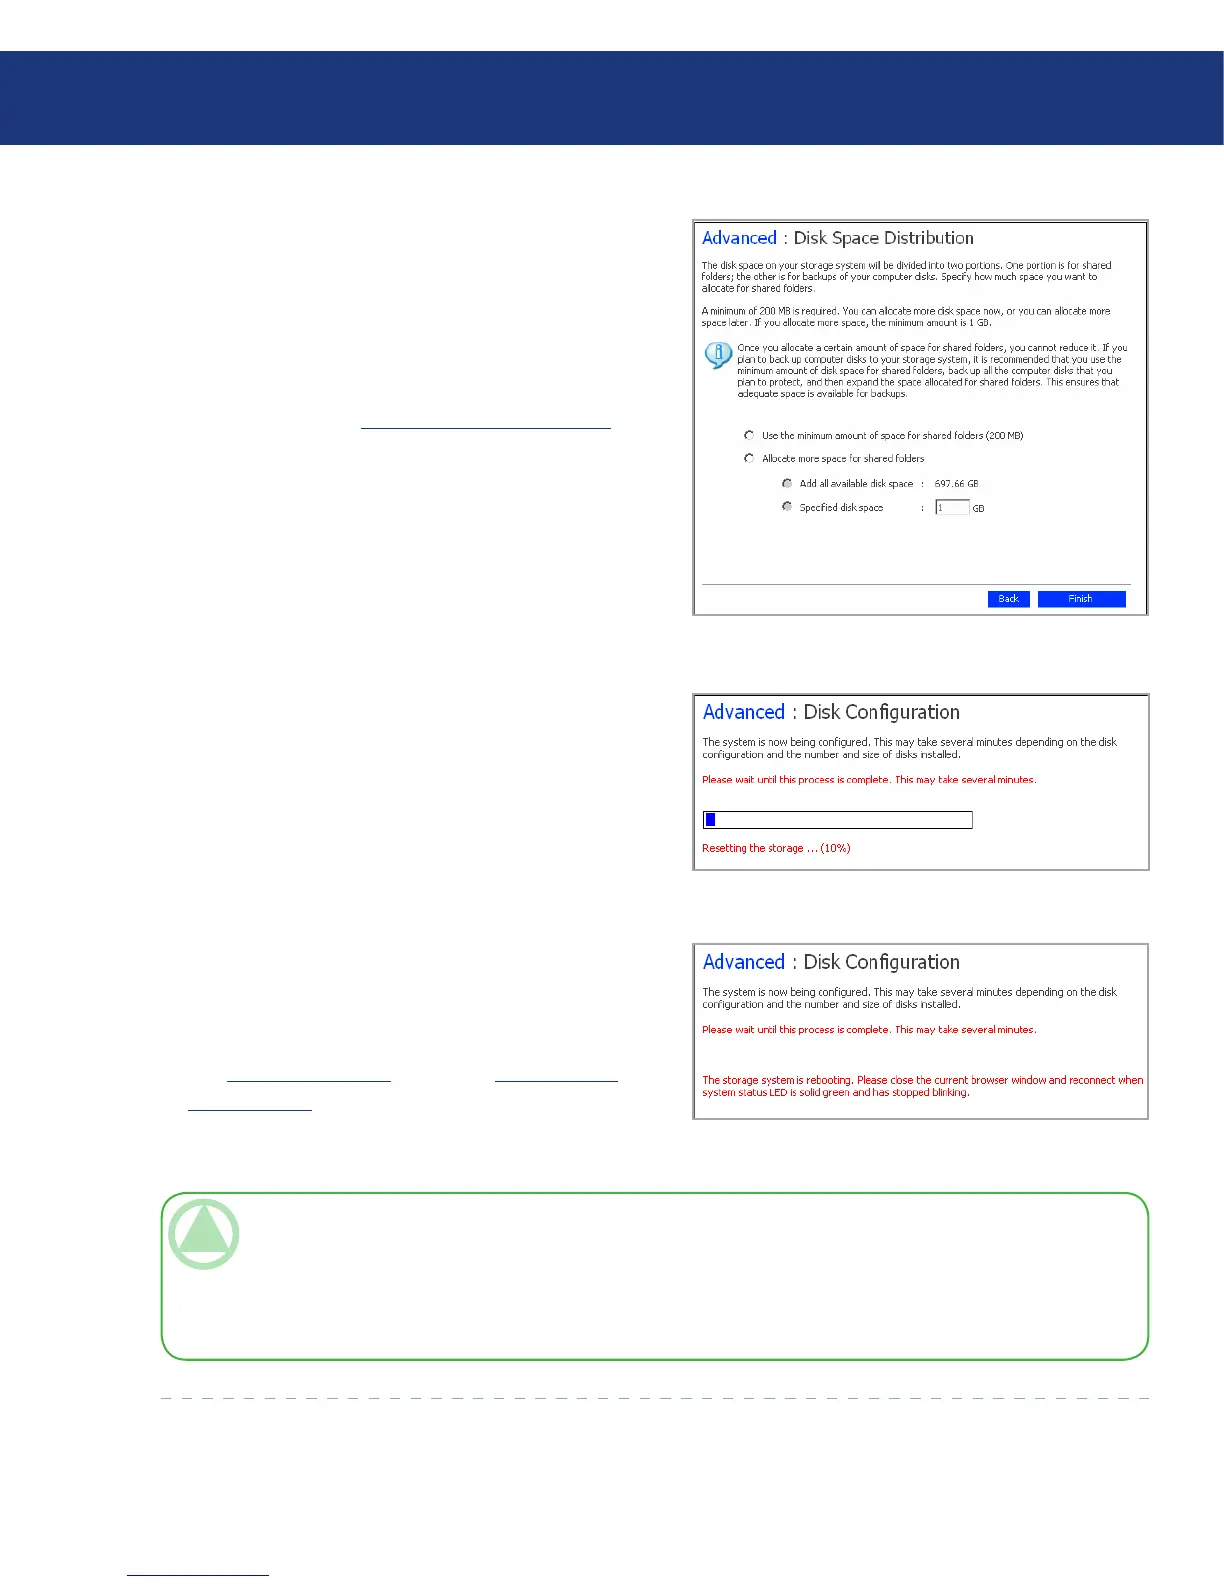
e Disk Space Distribution page appears (see Fig.
5.7.6.2.B).
6. To accept how the disk space will be proportioned
for shared folders and backups (only 200 MB
will be allocated for shared folders), click Finish.
If you want to allocate more space for shared fold-
ers, select Allocate more space for shared folders and
then specify how much space to allocate (either All
available disk space or Specified disk space). If you
select Specified disk space, enter the number of gi-
gabytes to allocate for shared folders (the minimum
is 1 GB). en click Finish.
7. When the confirmation message appears, click OK.
e screen displays the progress of the process (see
Fig. 5.7.6.2.C and 5.7.6.2.D). When this process is
complete, the Ethernet Disk RAID restarts.
Close the browser window. After the system has re-
started, you can access the Manager and re-create
your users and shared folders (as described in sec-
tion 5.4.1. Adding Users and section 5.5.1. Creating
Shared Folders).
Fig. 5.7.6.2.B
TeChNICAl NOTe: You can expand the amount of disk space allocated for shared folders later (as long as free
disk space is available), but you cannot reduce it without reconfiguring your disks and losing all your data.
If you plan to back up computer disks to your Ethernet Disk RAID, it is recommended that you use the mini-
mum amount of space for shared folders, back up all the computer disks that you plan to protect, and then expand
the space allocated for shared folders. is ensures that adequate space is available for backups.
Fig. 5.7.6.2.D
Fig. 5.7.6.2.C