7-12 LeeBoy Model 8510B Conveyor Paver
Maintenance
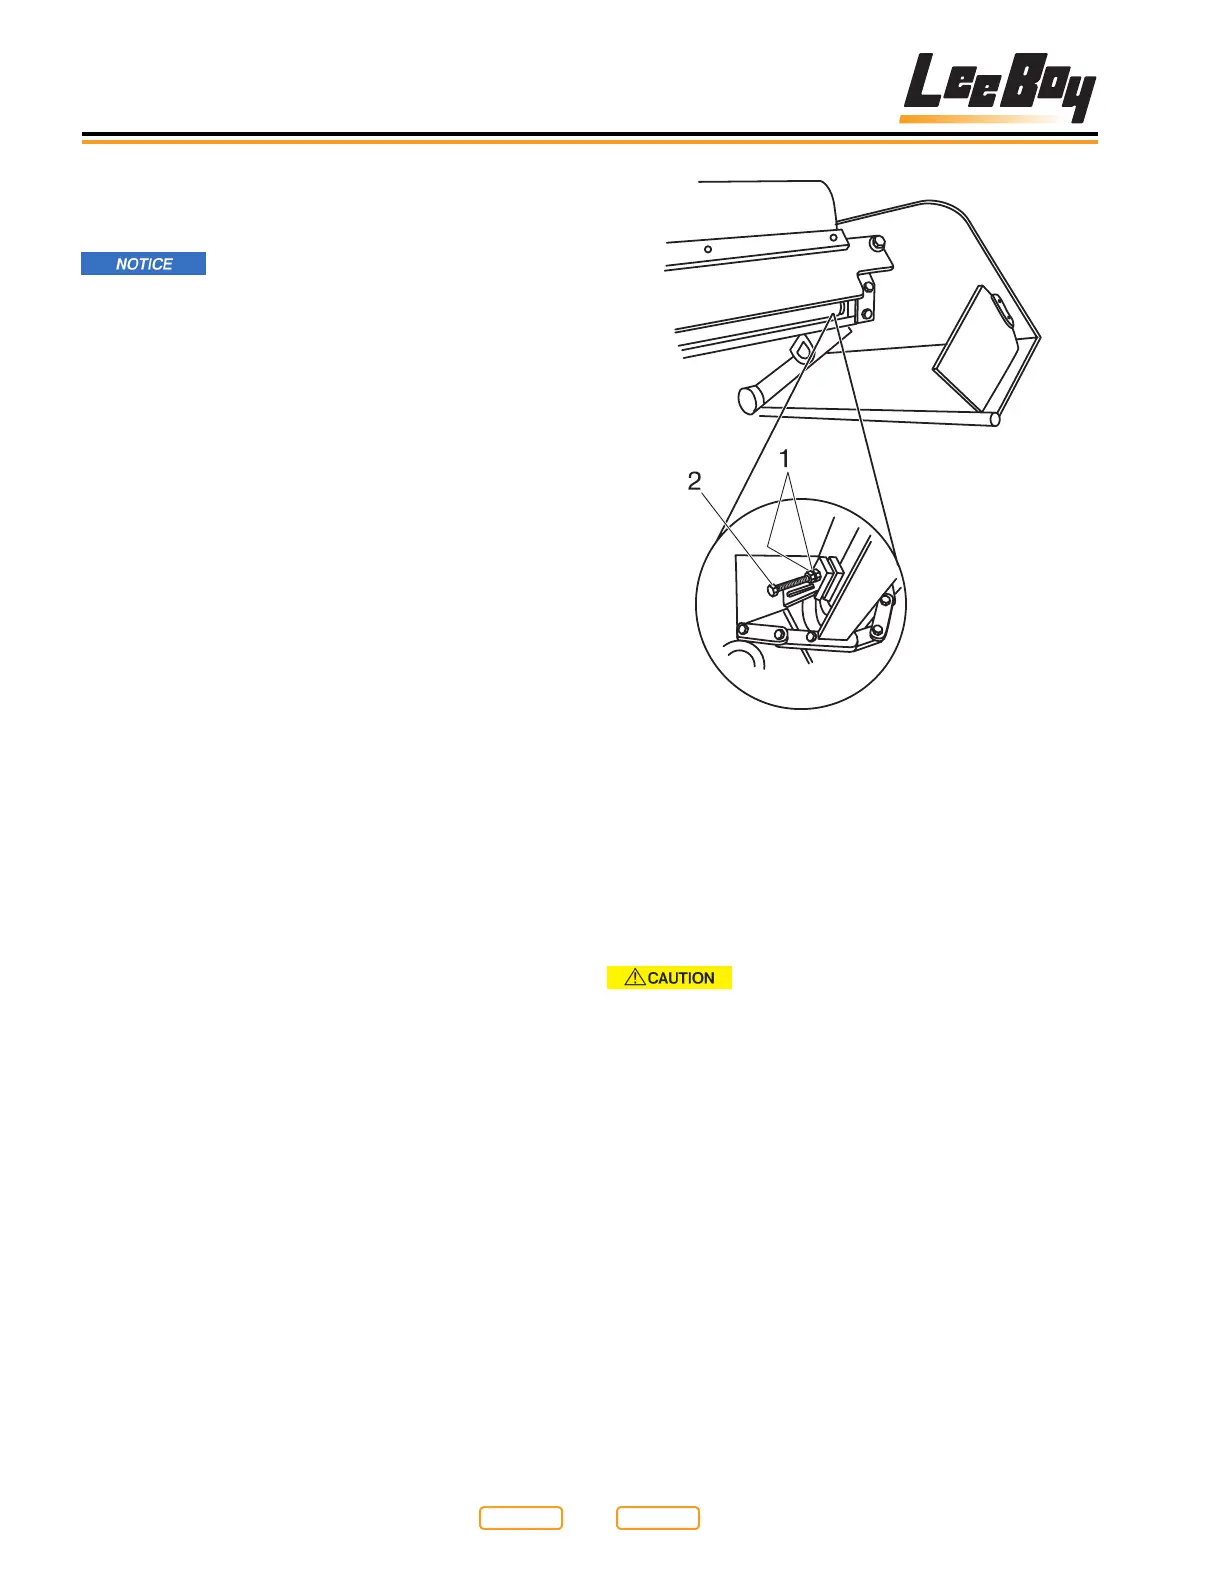
Adjusting Bolt
Figure 7-9
1 - Locknut
2 - Adjustment Bolt
Automatic Track Adjustment
NOTE: Failure to maintain adequate throttle setting may
cause improper adjustment to track.
When backing this paver with load,
maintain at least a three-quarter throttle setting.
Failure to do so may cause improper track tension,
resulting in poor performance and damage.
Hydraulic adjustment cylinders are automatic and
provide even tension on track that prevents excessive
wear to paver undercarriage. This feature requires the
operator, when backing with load, to maintain at least
three-quarter throttle setting. Hydraulic pressure below
three-quarter throttle is not adequate to maintain track
adjustment.
Conveyor Flight Chain
Adjustment
For cold weather, keep conveyor ight
chain properly oiled with cleaning solvent or release
agent. This will prevent conveyor from sticking inside
of conveyor pan. Neglect could result in conveyor
bars bowing if conveyor sticks.
NOTE: The conveyor should run smooth when conveyor
chain is properly adjusted. These chains should
be adjusted every 100 hours to maintain smooth
operations. If irregular movement of the conveyor
occurs, this is generally a sign that an adjustment
is needed.
Use the following procedure to make adjustment:
1. Raise conveyors (see Raising Conveyor in Section
7). Put keys in safe place.
2. Secure safety prop (Figure 7-8,1) to prevent
conveyor from accidentally lowering.
3. Loosen the locknut (Figure 7-9,1) and bolt holding
the Adjustment Roller Assembly.
4. Turn adjustment bolts (Figure 7-9,2) alternately on
both sides of the conveyor. (LeeBoy recommends
turning one bolt one half turn, then the other bolt
one half turn. Continue alternating tightening until
chains have 3/4” to 1 1/4” slack on top when lifted off
conveyor deck). The pressure on the chain will be
noticeable as the bolts are tightened.
5. After the conveyor chain tension is set, tighten
locknut (Figure 7-9,1) and bolt holding assembly.
6. If the adjustment bolts (Figure 7-9,2) have been
run out, it will be necessary to remove a link in the
conveyor chains and add a half link. This repair
should bring the adjustment bolts back to full travel.
7. Repeat steps 1 through 4 for the opposite side.
Return to
Last Viewed
Return to
Thumb Index