Adjustments
70
Raise the plough slightly using the three-
point hydraulics.
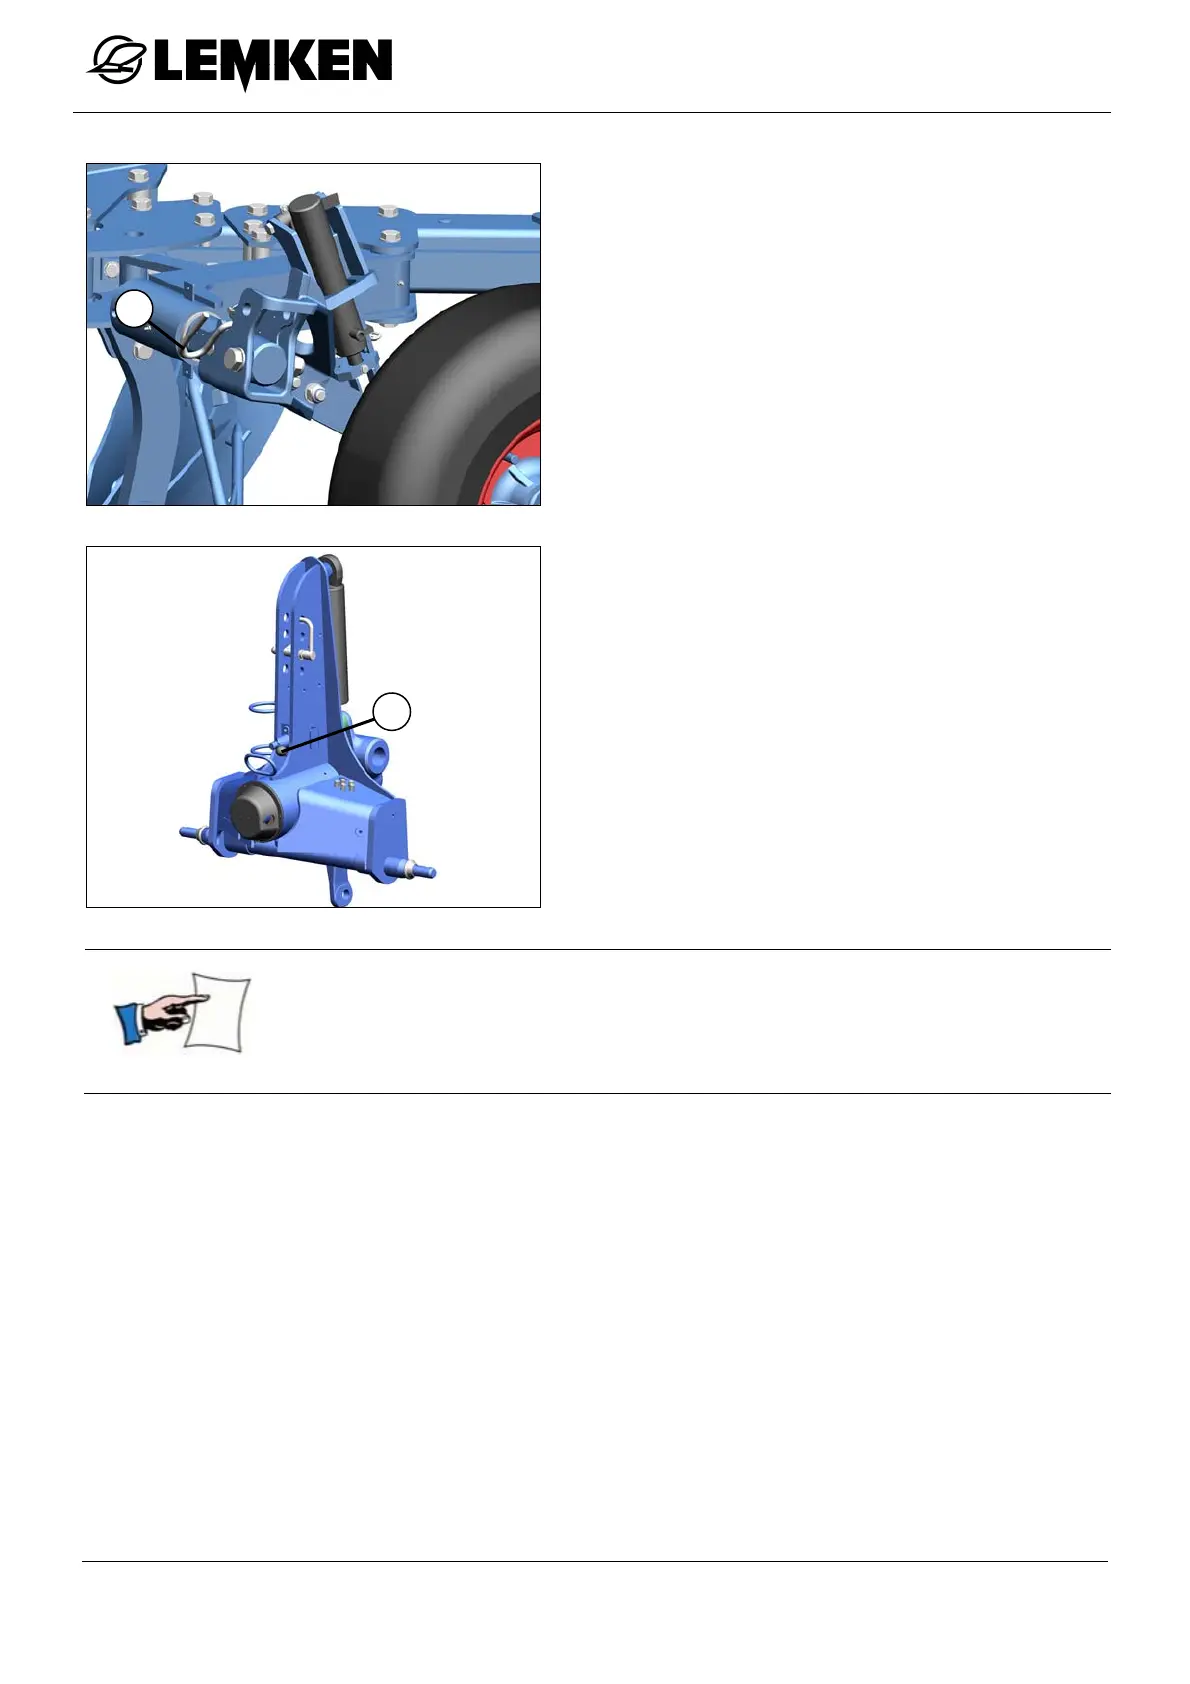
Release the pin (3) and pull it out.
Swivel the wheel by 90°.
Lock the wheel using the pin (3).
Secure the pin (3) with the securing pin.
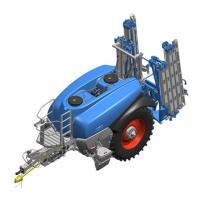
Swivel the locking pin (5) by 180° in the
clockwise direction.
Please ensure that you observe the sequence in the following.
Never modify the working width while the plough is in a turning
position.
Raise the plough fully.
Adjust the plough to the smallest working width.
Turn the plough slowly until the locking pin (5) audibly engages.
Check whether the locking pin (5) is engaged correctly.
Lower the plough using the three-point hydraulics.
Remove the upper linkage from the headstock.
Raise the plough fully in the front = transport position.
5
3