5.Removethescrewthatsecuresthestorage-drivebracket.Then,pushthestorage-drivebracketwiththe
storagedriveasshowntoremoveitfromthestorage-driveconnectoronthesystemboard.
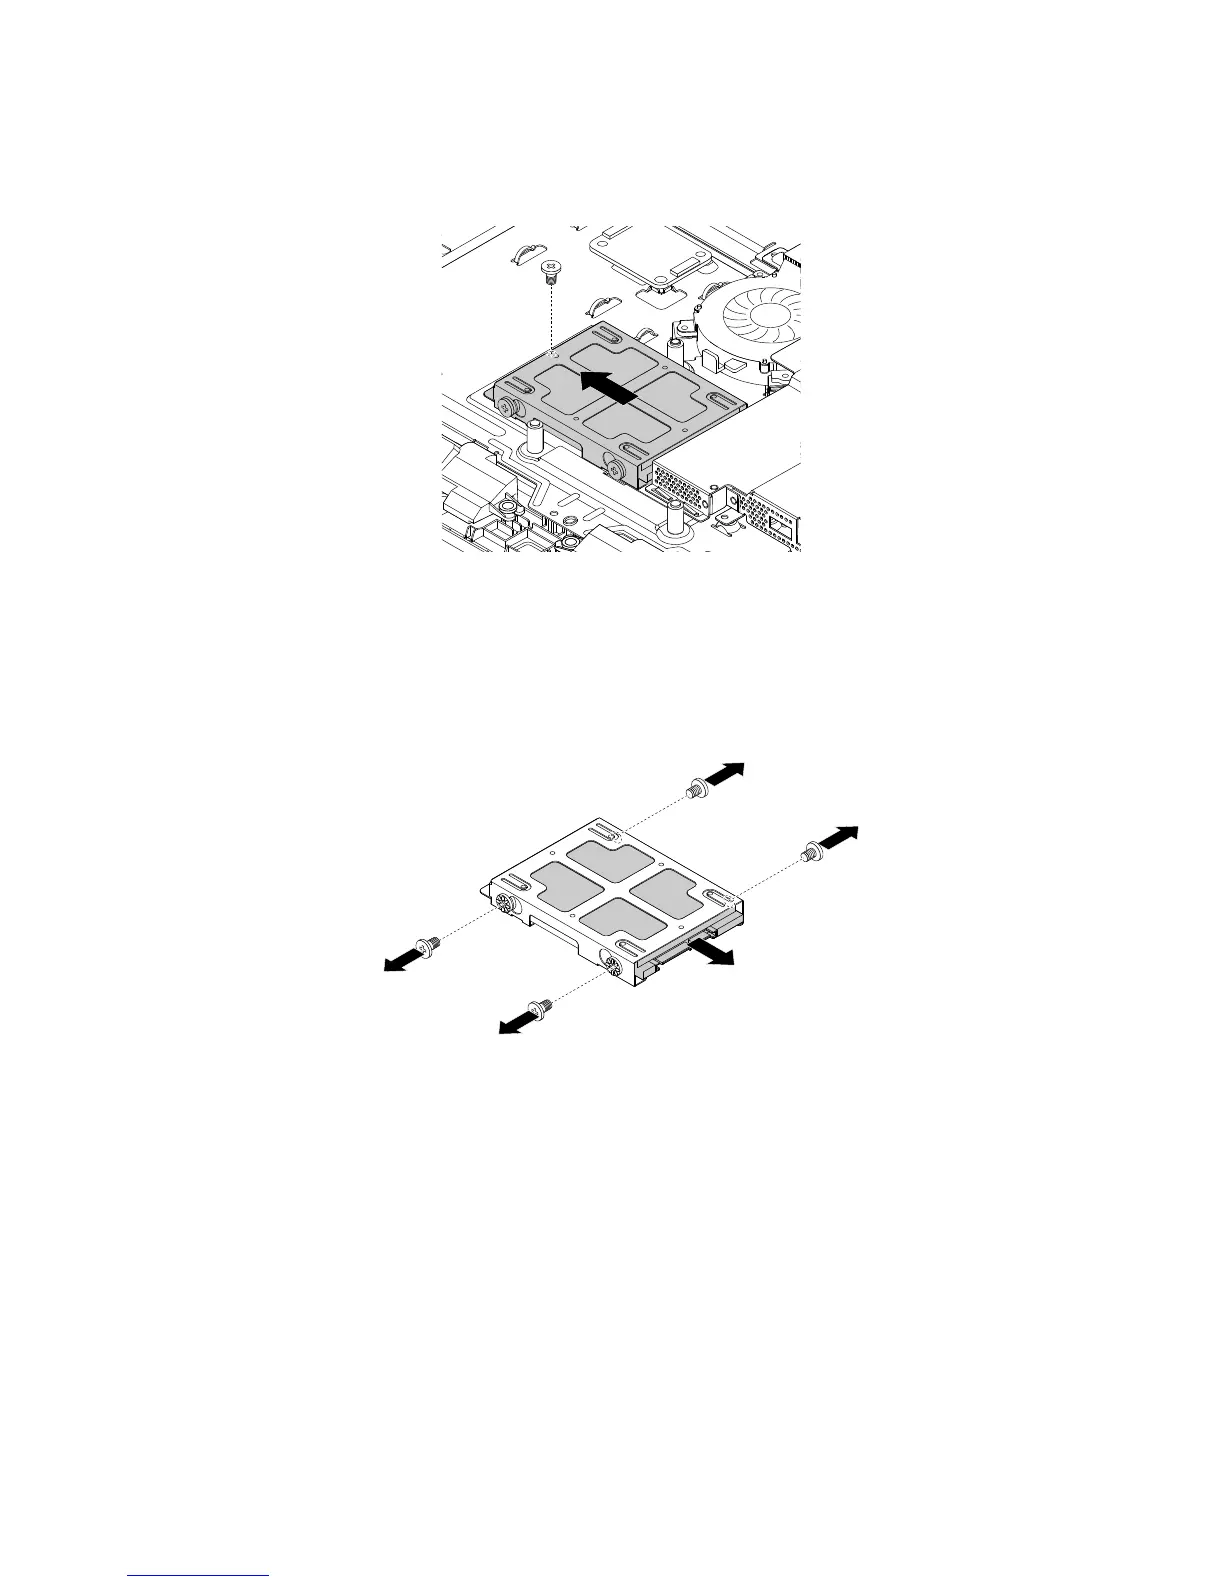
Figure15.Removingthestorage-drivebracketwiththestoragedrive
6.Removethefourscrewsthatsecurethestoragedrivetothebracket.Then,pushthestoragedriveas
showntoremoveitfromthebracket.
Note:Donottouchthecircuitboardonthebottomofthestoragedrive.
Figure16.Removingthestoragedrivefromthebracket
7.Toinstallthenewstoragedrive,insertthenewstoragedriveintothestorage-drivebracketsothatthe
fourscrewholesinthestoragedrivealignwiththecorrespondingholesinthebracket.Then,installthe
fourscrewstosecurethestoragedrivetothebracket.
8.Connectthebracketwiththenewstoragedrivetothestorage-driveconnectoronthesystemboardso
thatthescrewholeinthebracketalignswiththecorrespondingholeinthechassis.Then,installthe
screwtosecurethebracketwiththestoragedrivetothechassis.
Whattodonext:
•Toworkwithanotherpieceofhardware,gototheappropriatesection.
•Tocompletetheinstallationorreplacement,goto“Completingthepartsreplacement”onpage127.
Replacingtheinternalspeakers
Thissectionprovidesinstructionsonhowtoreplacetheinternalspeakers.
104ThinkCentreE63zUserGuide