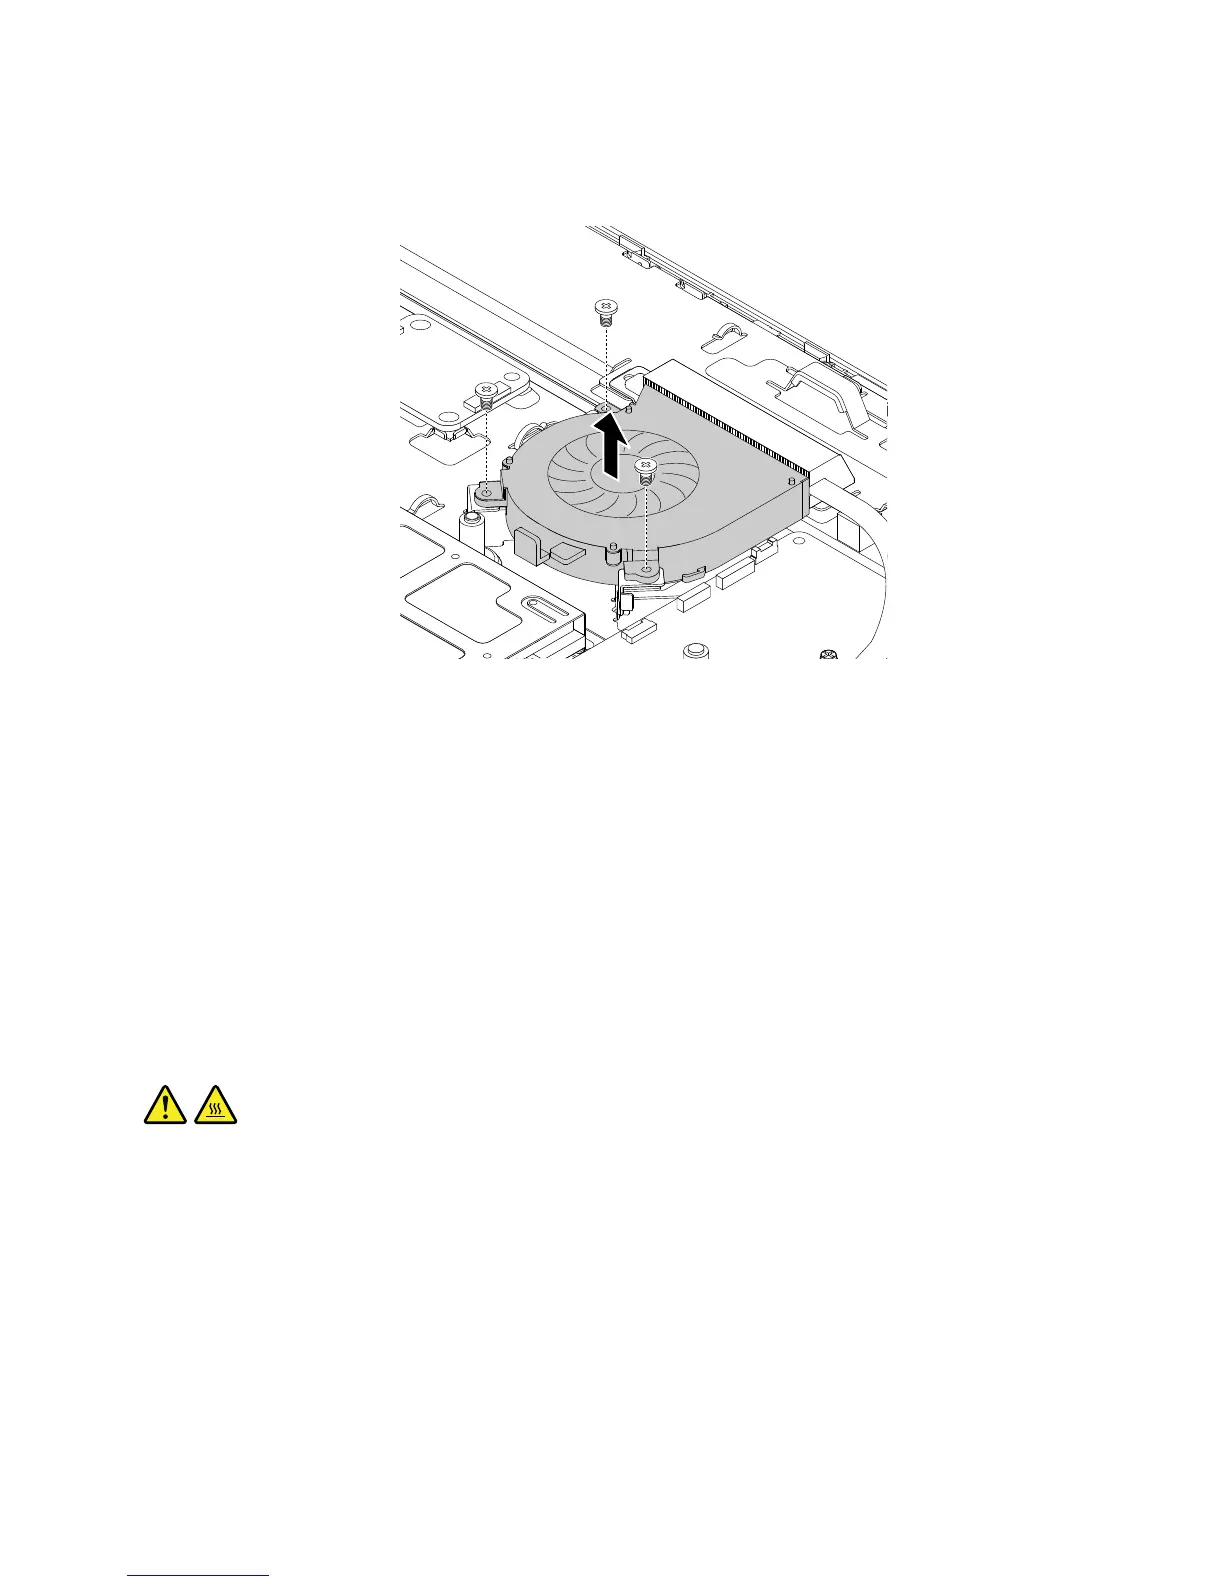
7.Removethethreescrewsthatsecurethesystemfan.Then,liftthesystemfantoremoveitfromthe
chassis.
Figure34.Removingthesystemfan
8.Toinstallthenewsystemfan,positionthenewsystemfaninthechassissothatthethreescrewholesin
thenewsystemfanalignwiththecorrespondingholesinthechassis.Then,installthethreescrewsto
securethesystemfantothechassis.
9.Routethecableofthenewsystemfan,andthenconnectthecabletothesystemboard.See“Locating
partsonthesystemboard”onpage32.
10.Installthesystem-boardshield.See“Removingandinstallingthesystem-boardshield”onpage106.
Whattodonext:
•Toworkwithanotherpieceofhardware,gototheappropriatesection.
•Tocompletetheinstallationorreplacement,goto“Completingthepartsreplacement”onpage127.
Replacingtheheatsinkassembly
CAUTION:
Theheatsinkassemblymightbeveryhot.Beforeyouopenthecomputercover,turnoffthecomputer
andwaitseveralminutesuntilthecomputeriscool.
Attention:DonotopenyourcomputerorattemptanyrepairbeforereadingandunderstandingtheChapter
1“Readthisfirst:Importantsafetyinformation”onpage1.
Thissectionprovidesinstructionsonhowtoreplacetheheatsinkassembly.
Toreplacetheheatsinkassembly,dothefollowing:
1.Removeallmediafromthedrivesandturnoffallattacheddevicesandthecomputer.Then,disconnect
allpowercordsfromelectricaloutletsanddisconnectallcablesthatareconnectedtothecomputer.
2.Placeasoft,cleantowelorclothonthedeskorsurface.Holdthesidesofyourcomputerandgentlylay
itdownsothatthescreenisagainstthesurfaceandthecoverisfacingup.
Chapter11.Installingorreplacinghardware117