Actions Yes No
Step 8
Reseat the connections.
Does the problem remain?
Go to step 9. The problem is
solved.
Step 9
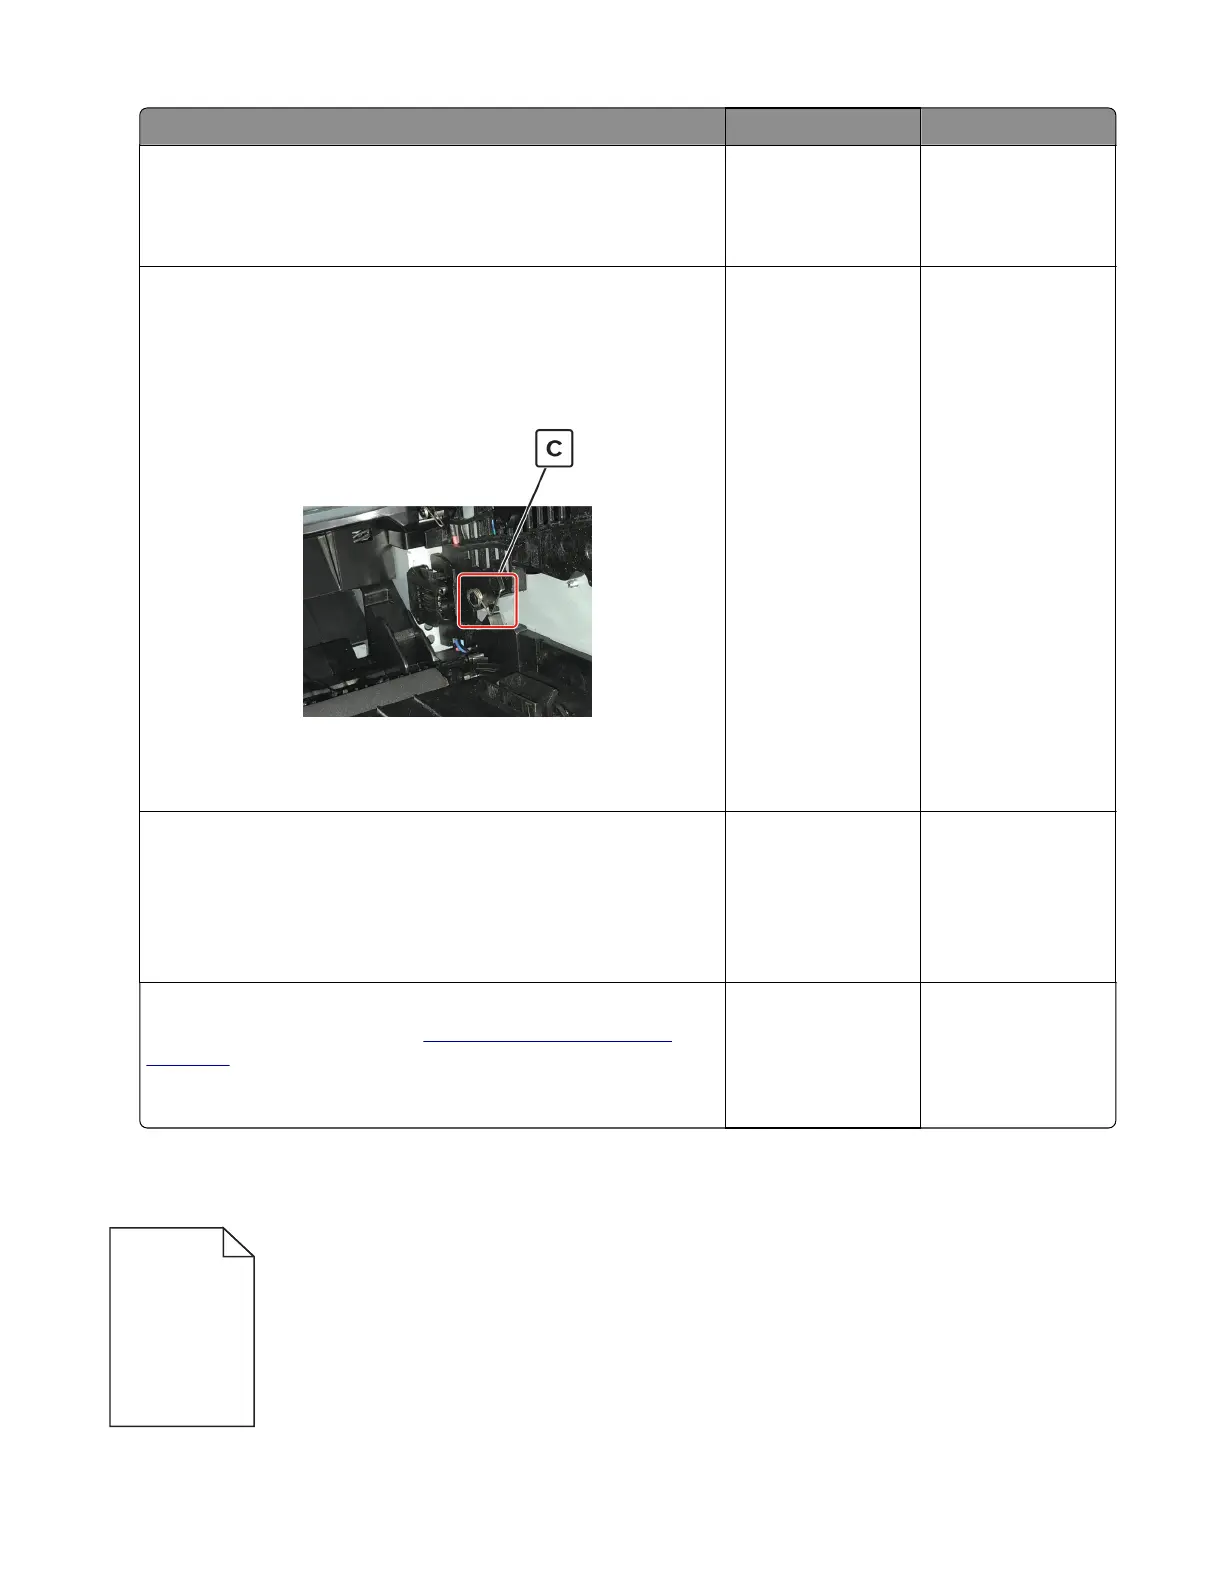
Note: Poor electrical contact to the photoconductor is the most
likely source of a full page background defect.
a Remove any contamination from the photoconductor charge
contact (C) on the right side of the frame.
b Perform a print test.
Does the problem remain?
Go to step 10. The problem is
solved.
Step 10
Check if the photoconductor charge contact is bent, damaged, or
not in proper contact with the imaging unit.
Is the contact free from damage and in proper contact with the
imaging unit?
Go to step 11. Contact the next
level of support.
Step 11
Replace the power supply. See
“Power supply removal” on
page 216.
Does the problem remain?
Contact the next
level of support.
The problem is
solved.
Blank pages check
4600-830, -835, -895
Diagnostics and troubleshooting
29

 Loading...