Page 286 of 295
Learn Mode - recommendations
• Using the Learn Mode functionality allows easy current limit setting to help the lift comply with the ISO 10535 requirement.
• The Learn Mode functionality is recommended to use for channel 1 when adjusting the lifting actuator to fit the Safe Working Load load rating of the lift.
• Based on settings from the Learn Mode function use, the lift shall not be able to lift more than 1.5 times the maximum load.
However, the current limit setting will not stop the actuator at the exact same load as used for the Learn Mode function.
This is due to the fact that an actuator uses less current when its components have been run in.
• When making new current limit settings, be aware to use a defined set of actuator and control box.
• For Learn Mode, the following conditions must be fulfilled:
When using Standard Learn Mode, the actuator current consumption must be at least 2 Amp and the function must either
be active for at least 2 seconds or the actuator must run at least 20 mm.
When using Advanced Learn Mode, the actuator stroke length must be specified in the software.
Run the actuator to full stroke length to set new current limits.
• Always use fully charged batteries (as a minimum more than 50% battery capacity) for Learn Mode procedures.
• A maximum cut-off value of 12 Amp can be registered (stored).
• The ambient temperature must be approx. 20 ºC.
• The difference between the highest and lowest load should exceed 10% if using the standard Learn Mode function.
• To activate the learn mode function, use the special Learn Mode hand control.
• If an actuator or control box is exchanged, it is necessary to reset the maximum load to ensure the correct cut-off value for the new system.
• The preset current cut-off value of a specific lift can be reset by means of the Learn Mode function, however, this may not be in accordance
with EN10535 if done with different loads than the rated load of the lift.
• There is a risk of false position due to the use of manual lovering/quick release and this may therefore impact the use of advanced learn mode.
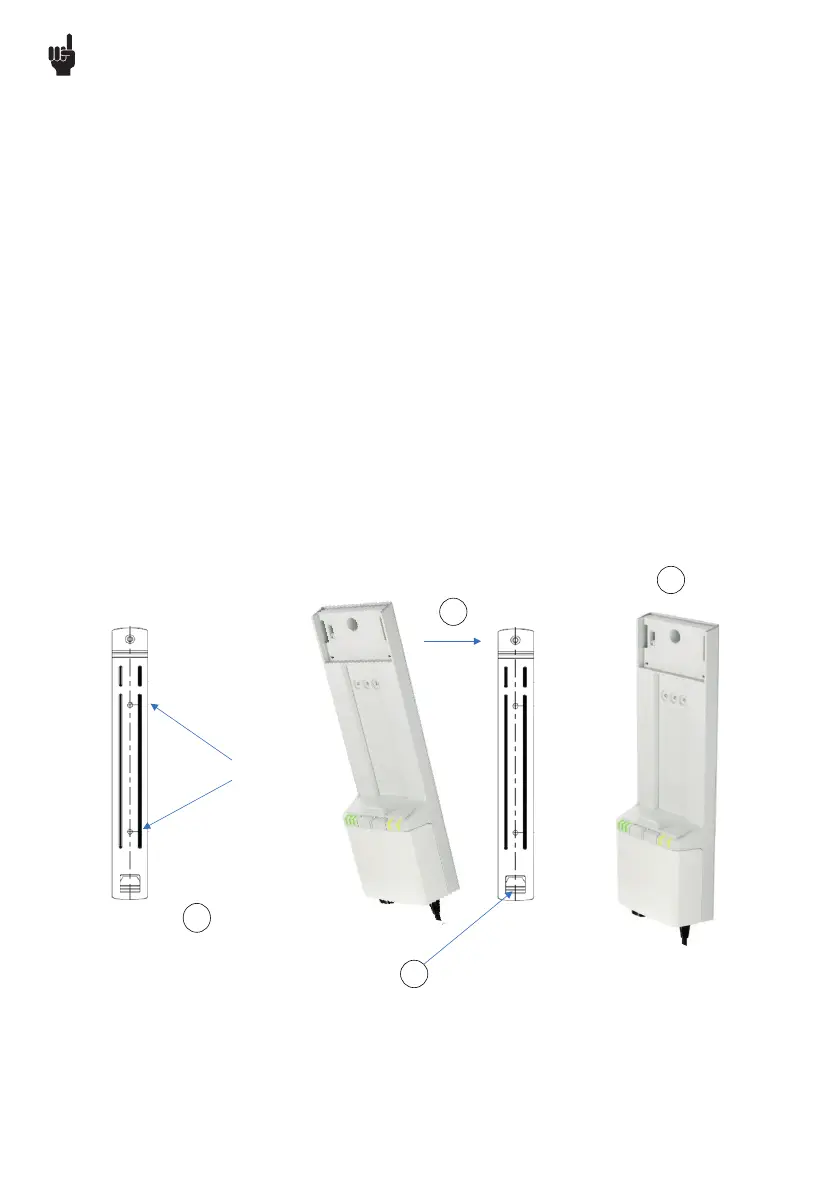
LIFT50 mounting
* The bracket kit includes 3 M5x10 mm screws. This is a special screw type (Bossard Ecosyngrip) with a wide collar for improved fixing.
Screw torque for the screw betweeen COL50 and the bracket must be max. 1 Nm.
1
4
2
Mount the steel bracket
on the patient hoist using
the two dedicated holes
Mount control box (COL50)
on steel bracket. Move lower
position in first
Mounting holes
Mount with screw*
3
Move top
position in.