GETTING STARTED
Logicube Forensic Falcon™ User’s Manual 9
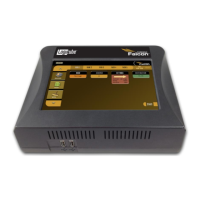
2.1 Turning the Falcon on and off
The Falcon comes with a 12V, 12.5A (output DC) power supply that connects to the back of the
device. Attach the included power supply to the Falcon’s DC power port in the back.
To turn the Falcon on, press and immediately release the top of the momentary on/off switch in
the back. The Falcon will turn on and start the boot process.
There are two ways of turning the Falcon off:
1. Press and immediately release the top of the momentary on/off switch in the back. The
Falcon will begin its shut down process and after a few seconds, the display and fans will
turn off.
2. Using the Graphical User Interface (GUI) either on the touch screen or via a browser
through a remote connection, navigate to the Power Off screen and tap or click the
Power Off icon.
2.2 Connecting various drive types
Cables and adapters are available for the following drive types:
SAS
SATA
USB
FireWire
1.8” microSATA
2.5” and 3.5” PATA/IDE
1.8” ZIF
1.8” PATA/IDE
eSATA (optional)
mSATA (optional)
Flash Media (optional)
PCIe (Source only – optional)
2.2.1 Connecting Source Drives
Source drives (also called suspect drives) must be connected to the left side of
the Falcon. These ports are write-protected and are labeled as follows:
SAS S1 – SAS/SATA data port for the Source 1 (S1) position.
SAS S2 – SAS/SATA data port for the Source 2 (S2) position.
PWR – power port for either Source 1 (S1) or Source 2 (S2) position.
USBS1 – USB 3.0 Source port.
FW S1 – FireWire Source port.
PCIe – Located in the back panel.