Setup Your Printer
Locate the unpacking document and follow the steps to unpack your
printer before you move on to the Setup steps.
1.
Your printer has been pre-calibrated and tested; however, after
unpacking all of the components you will need to re-mount the Y axis
onto the frame and connect the bed and Y axis connectors. Please
follow the steps completely to make certain that the Y axis is re-
mounted correctly and you will be on your way to your first print.
2.
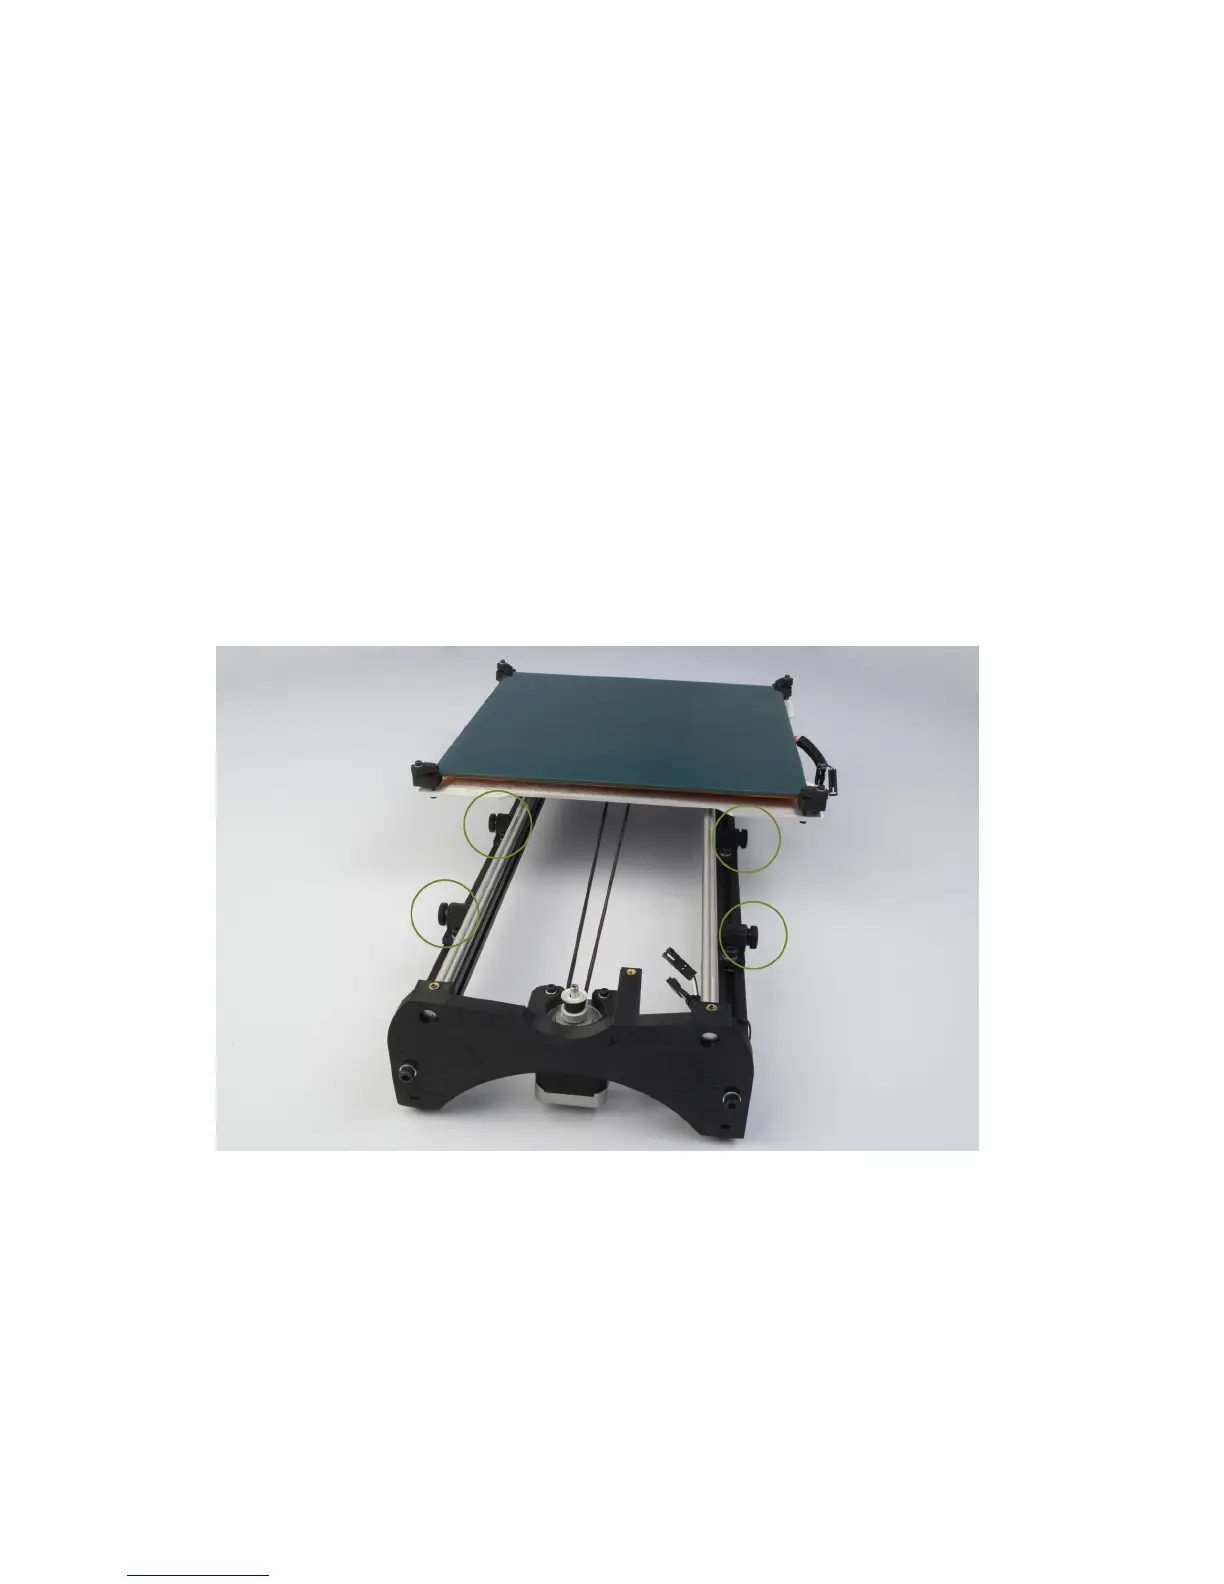
Place the TAZ frame and Y axis assembly on a flat and level surface.
Bring your attention to the Y axis assembly and find the four Y axis
bolts. The four bolts, located on the Y axis aluminum frame bars,
have large plastic knobs that allow the bolts to be easily turned by
hand (Fig. 1.1, page 14). Turning counter clock-wise, remove each of
the four Y axis bolts and set aside (Fig. 1.2, page 15).
Figure 1.1: Locate the four Y axis bolts
14