EasyManuals Logo

LulzBot TAZ User Manual

LulzBot TAZ
120 pages
To Next Page IconTo Next Page
To Previous Page IconTo Previous Page
Page #22 background imageLoading...
Page #22 background image
Setup Your Printer
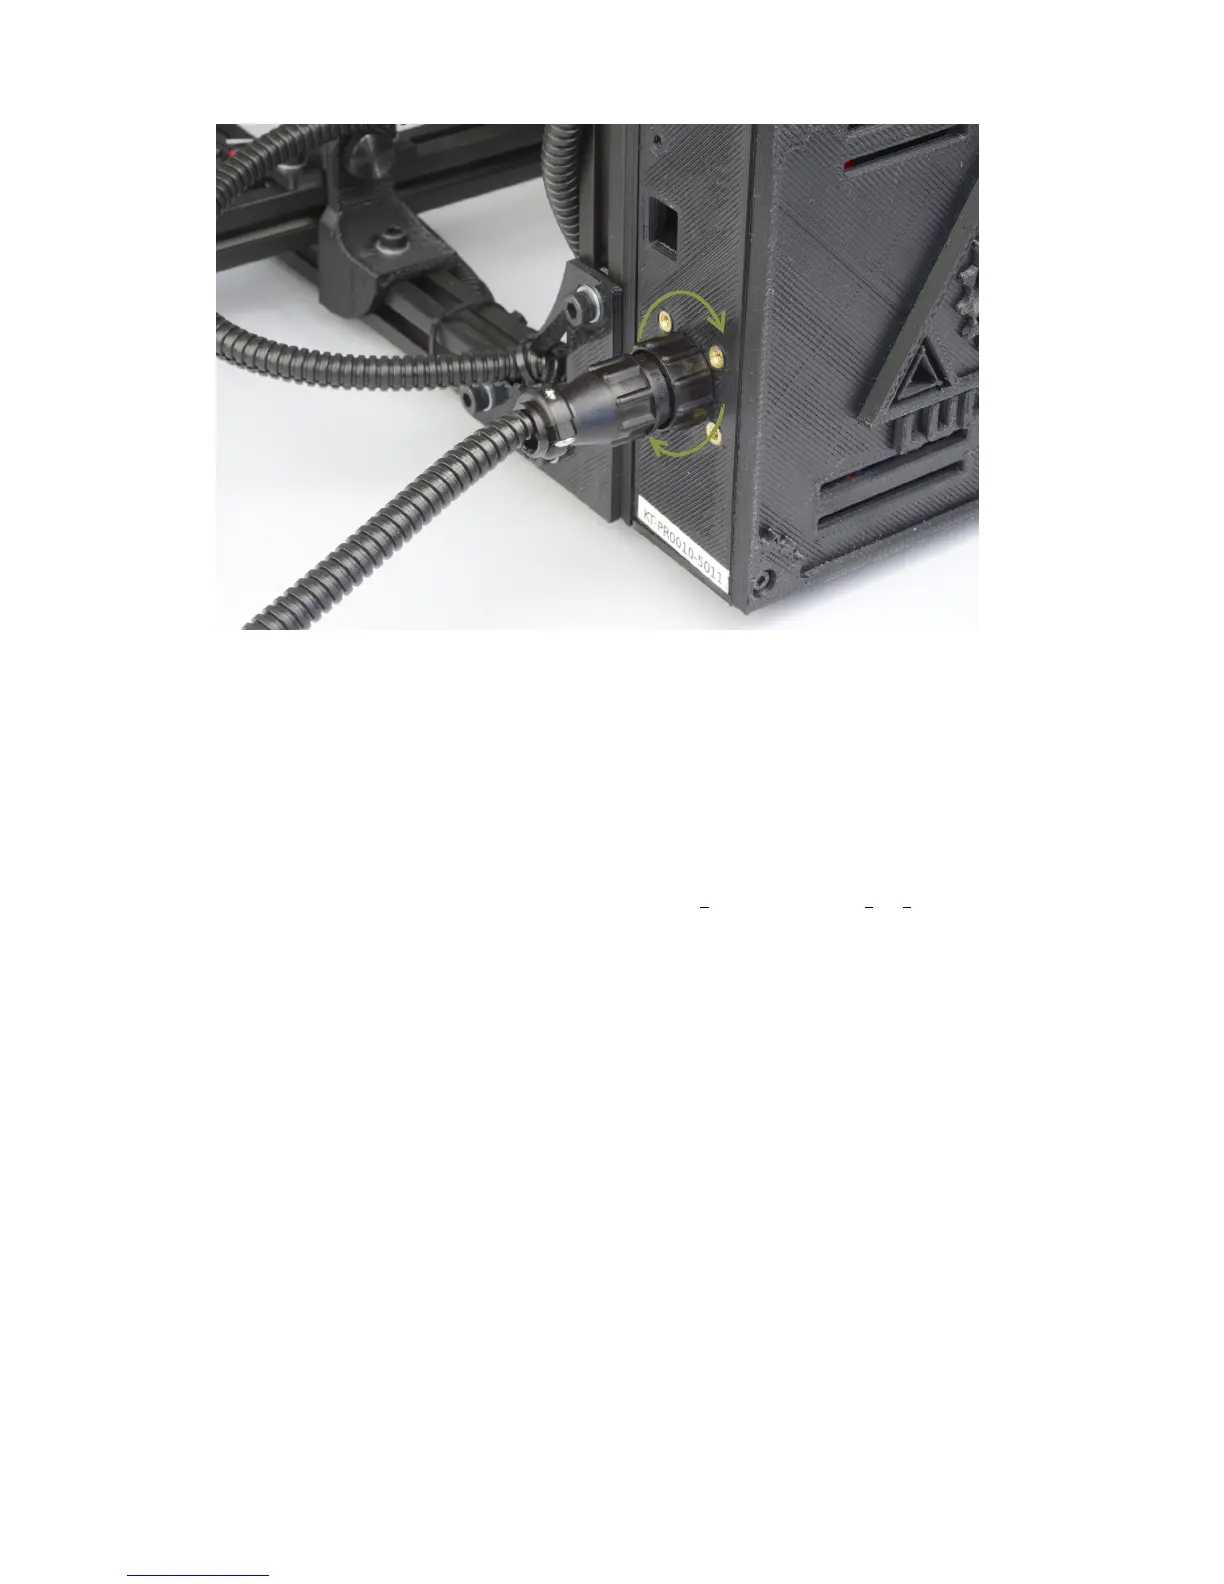
Figure 1.12: The power supply plug correctly plugged in
10.
Locate, on the right of the power supply, the red AC voltage switch.
Depending on your location you will need to change the AC voltage
switch to 115V or 230V. North America is generally 115V and the
majority of other regions are 230V. You can find general voltage by
country at wikipedia.org/wiki/Mains electricity by country.
11.
Plug in the USB cable, B plug (square plug) side, into the USB
receptacle on the printer electronics. Plug the other end of the USB
cable, A plug side, into your computer.
12.
Locate the filament guide with attached PTFE tube (Fig. 1.13, page
23). The filament guide attaches to the filament guide mount which
can be found on the top right side of the printer frame. The filament
guide easily pops on to the guide mount as shown in figure 1.14 (pg.
23).
22

Table of Contents

Other manuals for LulzBot TAZ

Questions and Answers:

Question and Answer IconNeed help?

Do you have a question about the LulzBot TAZ and is the answer not in the manual?

LulzBot TAZ Specifications

General IconGeneral
Nozzle Diameter0.5 mm (standard), interchangeable
Print SpeedUp to 200 mm/s
Max Hotend Temperature300°C
Max Heated Bed Temperature120°C
ConnectivityUSB
Supported MaterialsPLA, ABS, HIPS, PVA, PETG, Nylon, TPE, TPU, PC, wood-filled
Print SurfacePEI-coated borosilicate glass bed
Bed LevelingAutomatic
Operating System CompatibilityWindows, macOS, Linux
Power Requirements100 - 240 VAC
Print TechnologyFused Deposition Fabrication (FDM)

Related product manuals