Grove Published 01-29-2015, Control # 512-01 4-29
TMS700E SERVICE MANUAL BOOM
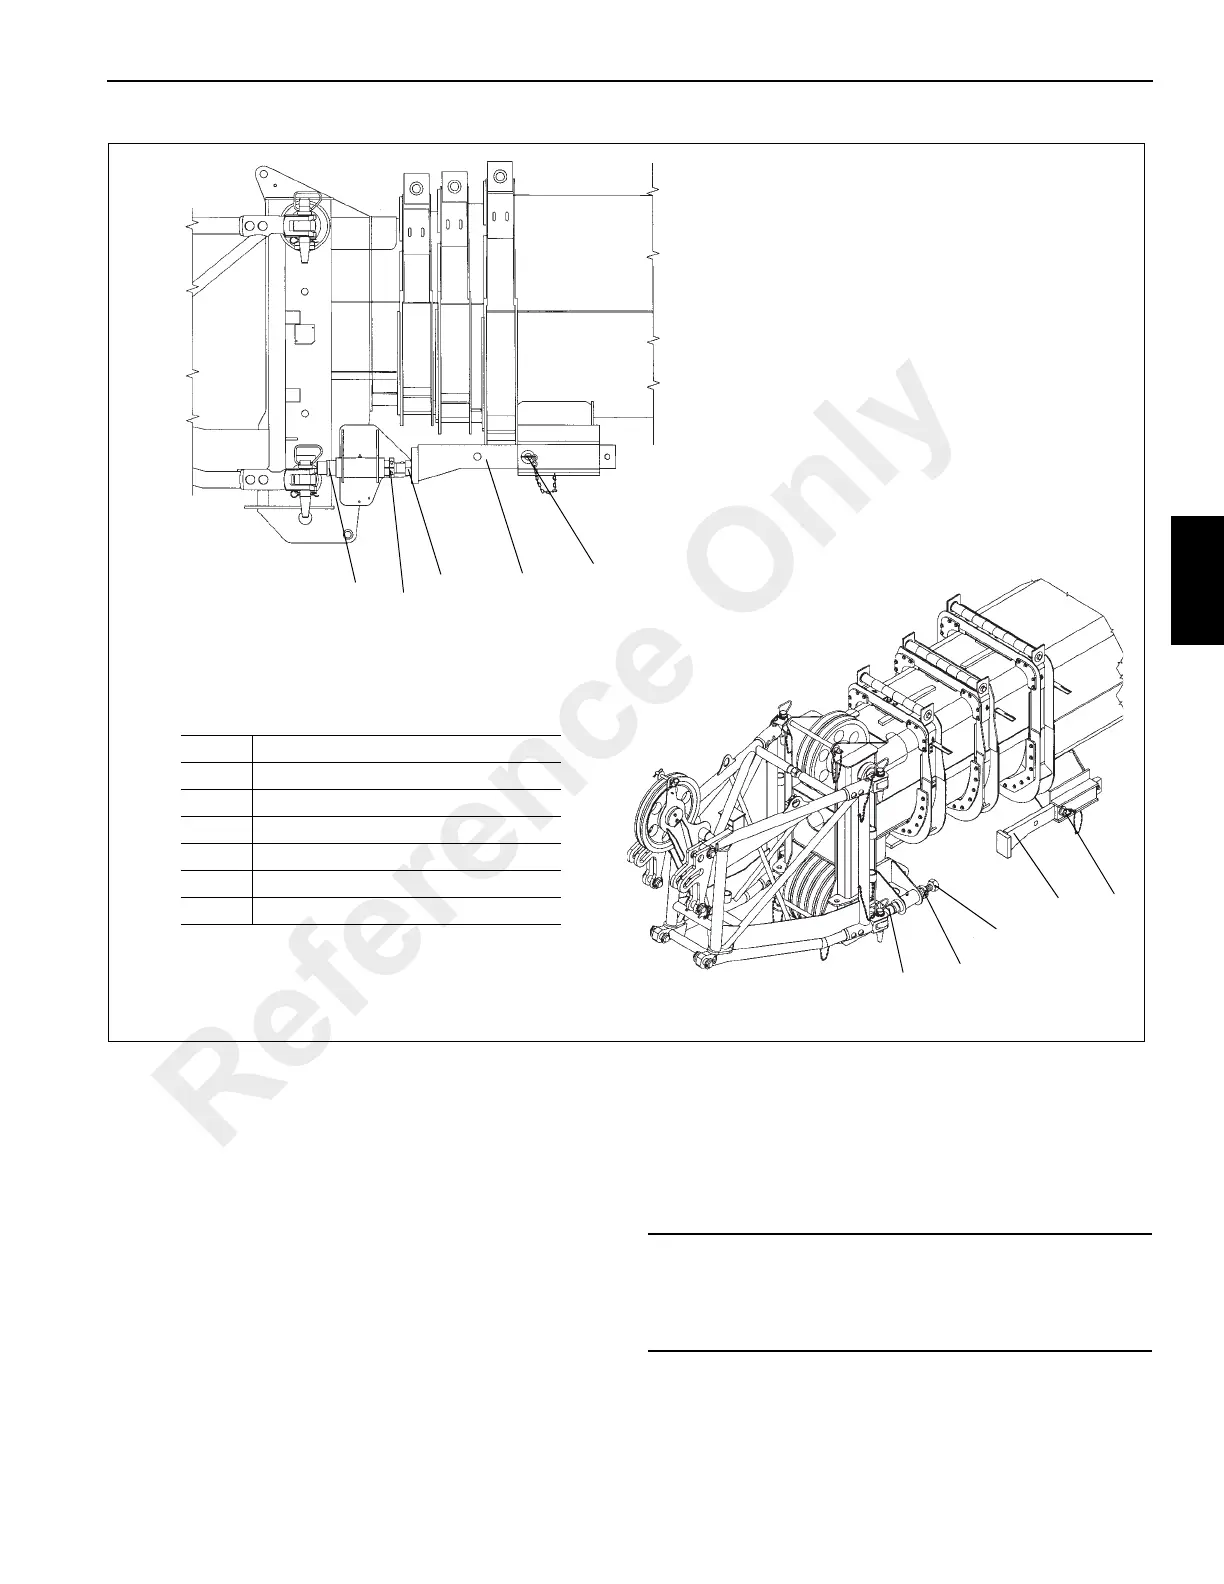
NOTE: If not removing the swingaway stinger perform
steps 7 thru 10.
7. Remove retainer clip from attach pin and remove attach
pin from Section 1 to Stinger attach fittings.
8. Stow the pin in the opposite attach fitting or the stowage
lug.
9. Ensure the pin attaching Stinger to the boom Section 1
rear stowage bracket (see detail D) is in place.
10. At Stinger sheave end (see detail E) push in on spring
loaded latch hook to release latch, allowing the
Swingaway Base to separate from Stinger.
11. Remove the pin attaching Stinger to the boom Section 1
rear storage bracket (see detail D).
12. Remove lock hitch pin securing the Swingaway Base to
the front stowage bracket (see detail A). Stow lock hitch
pin in lug provided.
13. Attach a length of rope to the swingaway tip to aid in
swinging the swingaway into place ahead of the boom
nose.
14. Raise the boom to horizontal and extend the boom just
enough to clear the swingaway stowage lugs from the
Item Description
58 Pusher Bar
59 Collar Clamp
60 Adjustment Bar
61 Push Bar Assembly
62 Hitch Pin
63 Clip Pin
58
59
60
61
62, 63
58
59
60
61
62, 63
FIGURE 4-5 continued
CAUTION
If Stinger remains on the Swingaway Base, do not extend
the swingaway to far, as the nose of the Stinger could
contact the front stowage bracket and cause damage.
Reference Only

 Loading...


