HYDRAULIC SYSTEM MLC165-1 SERVICE/MAINTENANCE MANUAL
2-20
Published 05-26-17, Control # 238-02
Pipe Thread Connection
1. Apply sealant (Loctite 92 or equivalent) to male threads,
never to female threads. Do not apply sealant to the first
two male threads.
2. Tighten the fittings about 4-1/2 turns by hand and then 3
additional turns with a wrench.
Table 2-3 Pipe Thread Connection Repair
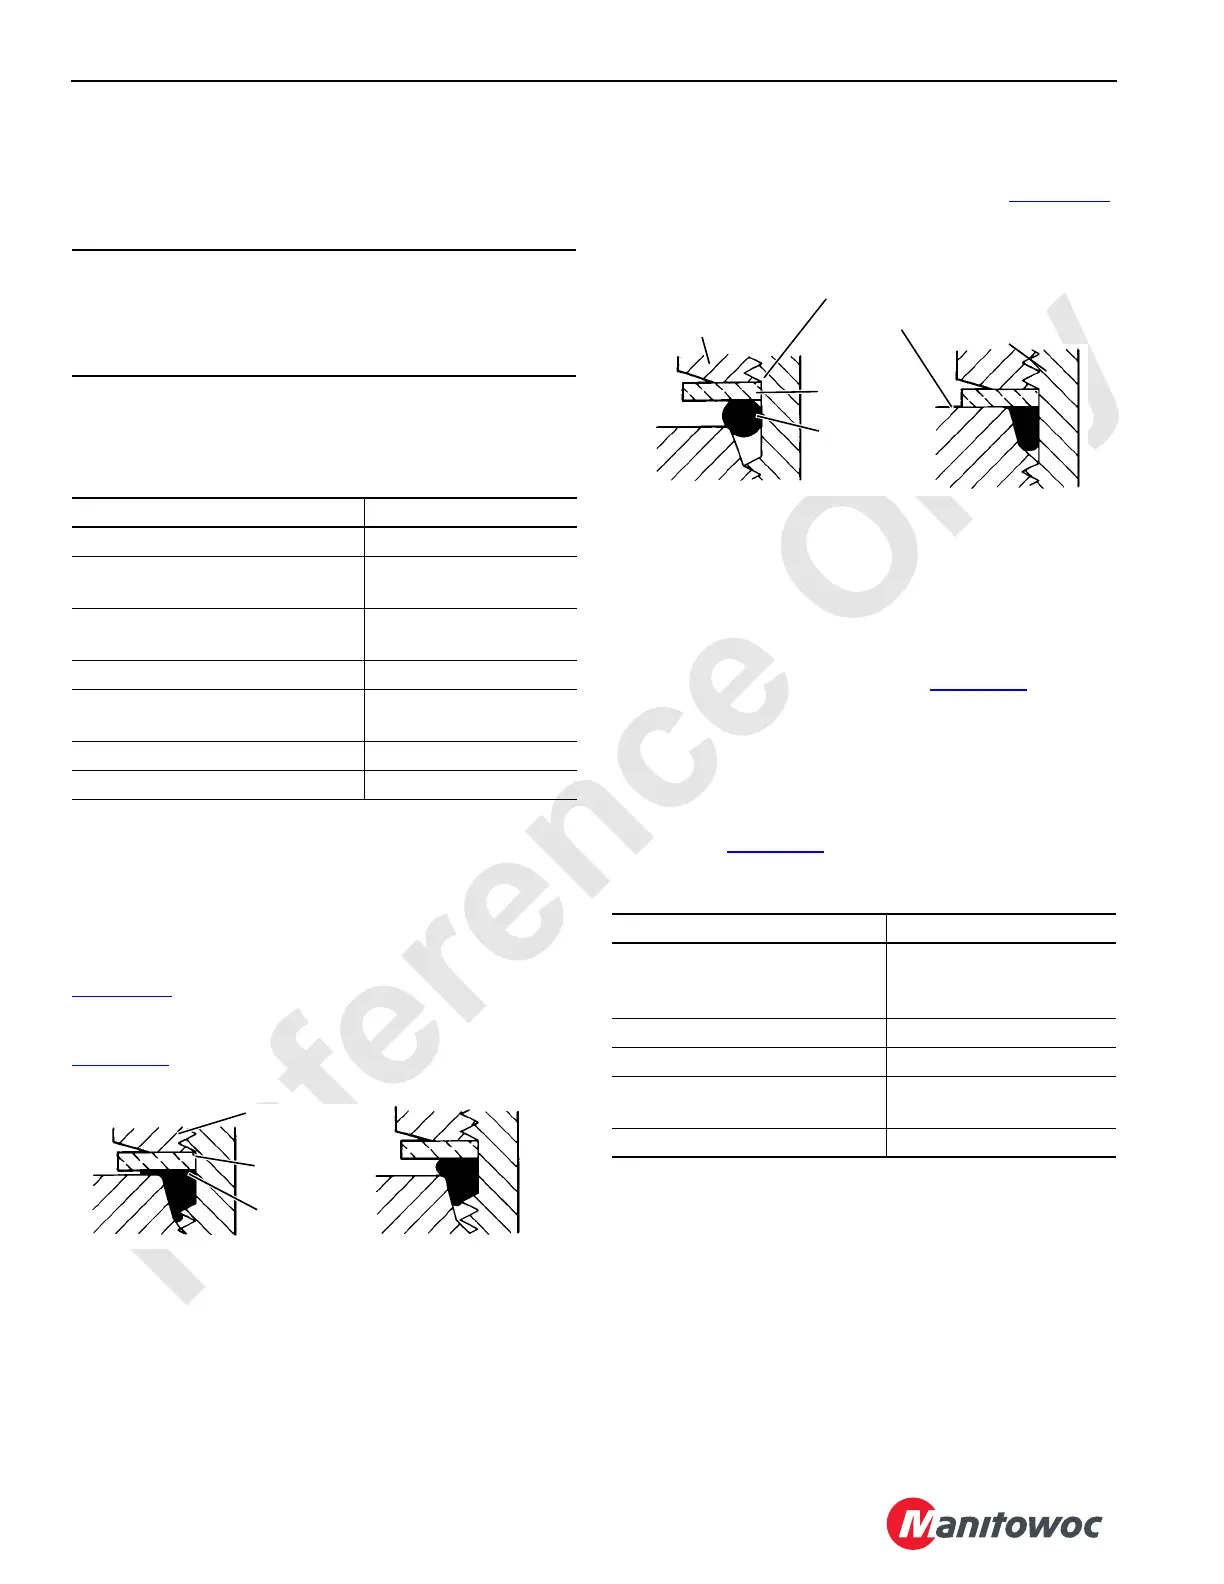
SAE Straight-Thread Connection
This type connection leaks most often because the jam nut
and washer are not backed up before assembly.
When the jam nut and washer are not backed up, there is not
enough room for the O-ring when the squeeze takes place
and the washer cannot seat properly as shown in
Figure 2-19
, View A. The compressed rubber between the
washer and the spot face will cold flow out of compression,
causing the fitting to loosen and leak as shown in
Figure 2-19
, View B.
Tighten SAE straight thread connections as follows:
1. Back up the jam nut and washer to the end of the
smooth portion on the fitting as shown in Figure 2-20
,
View A.
2. Lubricate the O-ring with clean oil. This is very
important.
3. Thread the fitting into the port until the washer bottoms
against the spot face as shown in Figure 2-20
, View B.
NOTE If an elbow is being used, back it out as necessary
to align it with the hose.
4. Tighten the jam nut. When the fitting is properly
installed, the O-ring will completely fill the seal cavity
and the washer will be tight against the spot face as
shown in Figure 2-20
, View B.
Table 2-4 Straight Thread Connection Repair
CAUTION
Hydraulic System Damage
Do not use FTE-fluorocarbon tape to seal threads. Pieces
of tape will enter the hydraulic system and cause damage.
Causes Cures
Fitting loose Tighten
Fitting too tight causing thread
distortion
Replace damaged
parts
Threads on fitting/port wrong
size
Use proper size
threads
Threads dirty, galled or nicked Clean or replace parts
Straight thread used instead of
tapered thread
Use proper type and
size thread
Threads expanded from heat Tighten when hot
Fitting loosened by vibration Retighten
View A
O-Ring
Washer
Jam Nut
Figure 2-19. Incorrect SAE O-ring Seating
Washer cannot seat properly on
spot face. Compressed rubber
between washer and spot face
will cold flow out of compression,
causing fitting to loosen and leak.
When jam nut and washer
are not backed up, there is
not enough room for O-ring
when squeeze takes place.
S107
View BView A
S107
Causes Cures
Jam nut and washer not
backed up at assembly,
causing O-ring to be pinched
Replace O-ring and
tighten fitting properly
O-ring cut Replace
O-ring wrong size Replace with proper size
Sealing surfaces gouged or
scratched
Repair if possible or
replace damaged parts
Sealing surfaces dirty Clean and lubricate
View A
View B
Jam Nut
Figure 2-20. Correct SAE O-ring Seating
Jam nut and washer backed up to
end of smooth portion on fitting.
Spot Face
O-Ring
S106
Washer
 Loading...


