105
Applying a mask to your Matrox effects
Using Select Mask
To apply a mask to your Matrox effect using the Select Mask dialog box, click
the triangle next to the
Select property to expand it, then click the Select Mask
button:
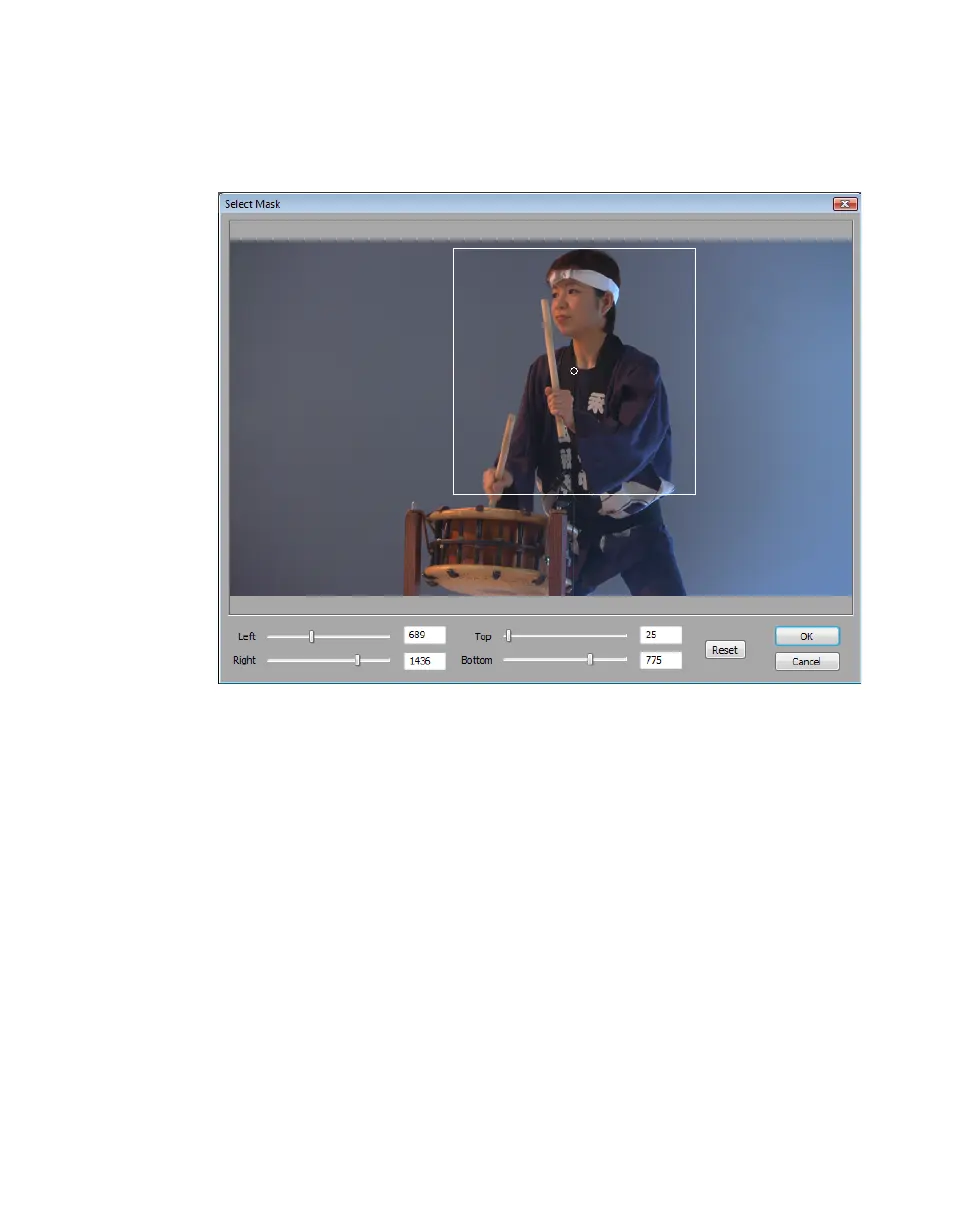
The
Select Mask dialog box allows you to apply a mask in two ways:
• Click and drag directly in the
Select Mask window to create the rectangular
area where you wish to apply the mask.
You can resize the mask area by dragging any side of the rectangle. For ex-
ample, dragging the right side of the rectangle adjusts the right edge of the
mask area. To resize the entire mask area at once, drag one of the corners
(the corner that’s diagonally opposite the corner you are moving will remain
stationary).
•Use the
Left, Right, Top , and Bottom controls to adjust any edge of your
mask by a given number of pixels. You can enter values in the text boxes or
drag the sliders to resize your mask area. For example, drag the
Left slider to
adjust the left edge of your mask area.