4
Operator's Manual English 45
relief clips attached to the cables. Do not place the RSCs, preamplifiers, or cables
connecting the preamplifiers to the monitor in contact with the patient.
7. Optionally, enter a patient ID. See Assigning or Modifying the Patient ID, page 49.
8. Begin monitoring by starting a new case or continuing an existing case:
•
For a new case, press NEW DATA SET.
•
To continue a case, press APPEND OLD DATA.
Note: You can only append to the most recent case. If the append button is
greyed out, the append feature is disabled.
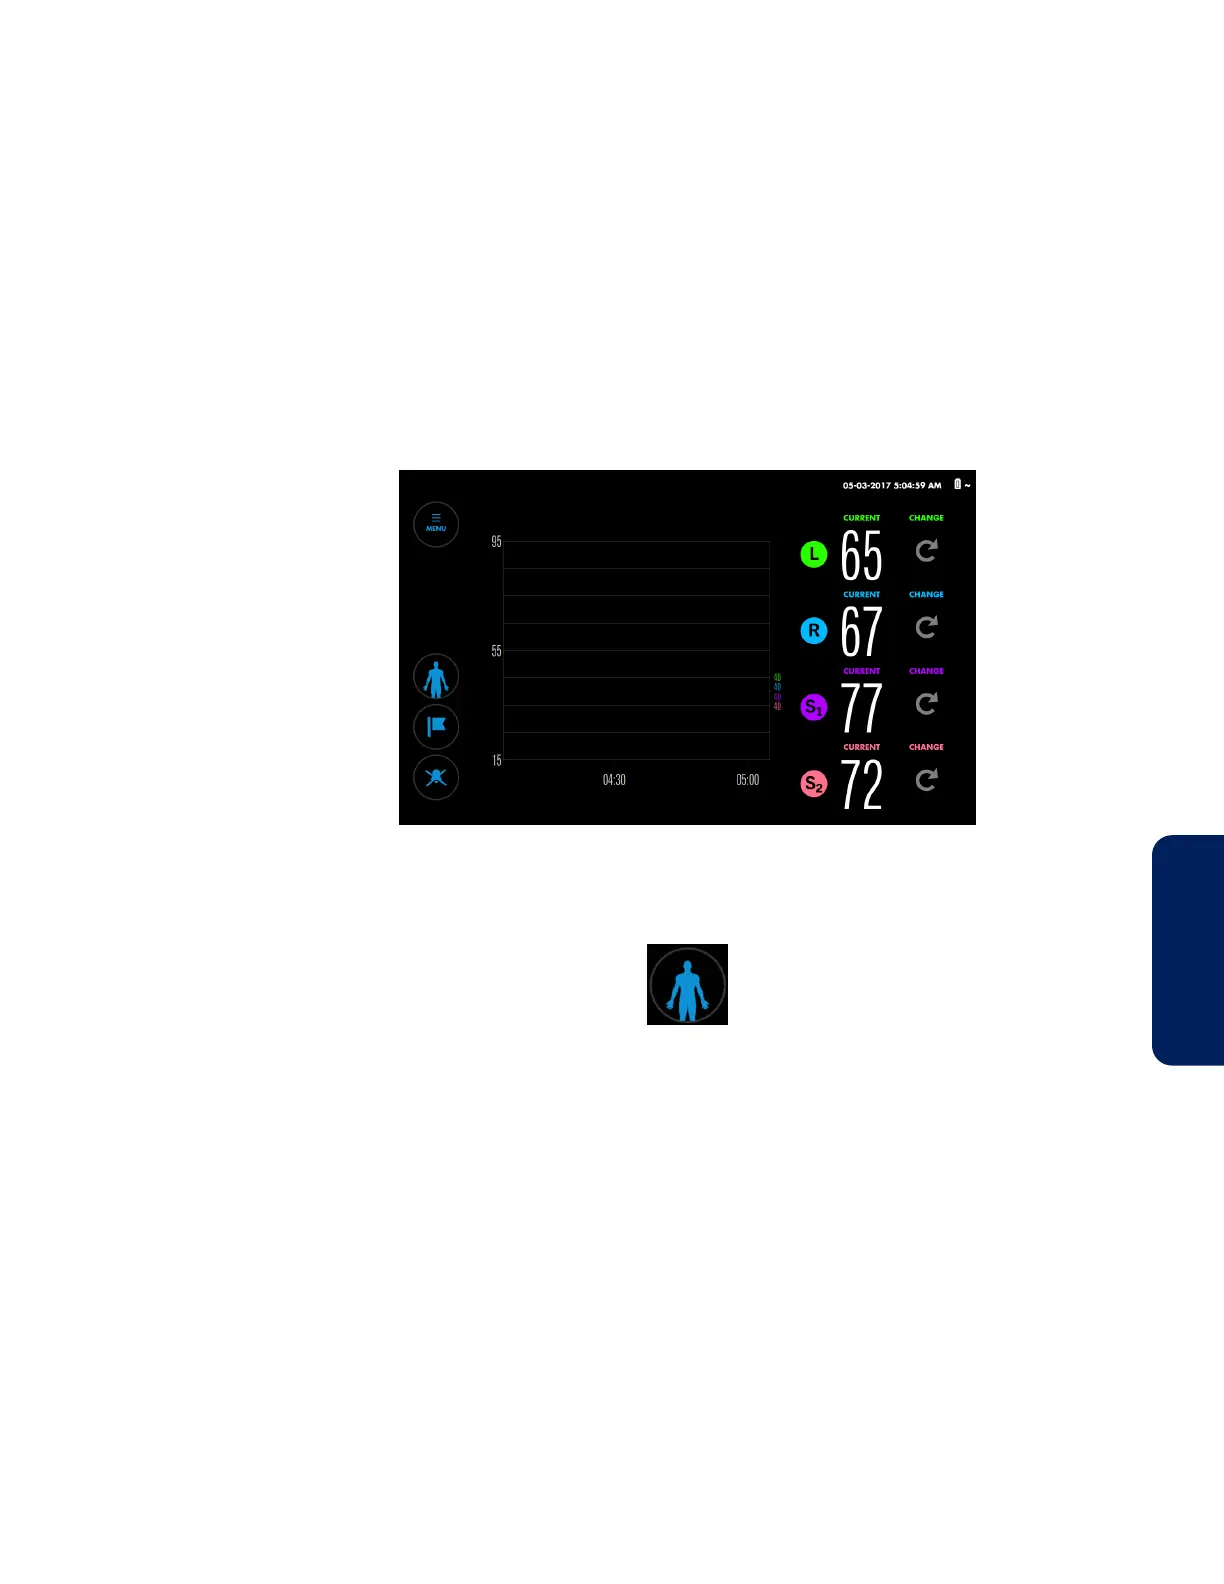
The monitoring screen appears (Figure 24).
Figure 24. Monitoring Screen - New Case - No Baselines Set
Note: If necessary, you can return to the Set-up screen while monitoring by
pressing the Patient button:
9. Set baselines. See Baselines, page 52.
10. Set or change alarm limits, as desired. See Setting Alarm Limits, page 62.
11. Optionally, change the trend view. You can view all sensor readings on one graph
or two, use trend line averaging, and change the time scale. See Trend View
Management, page 55.
12. Optionally, change the on-screen sensor labels. See Changing the On-Screen
Sensor Labels, page 50.
13. Optionally, check the list of available event markers and change it if necessary.
See Changing the Event List, page 69.
14. Optionally, change the Area Under the Curve (AUC) threshold. See Changing the
AUC Threshold, page 71.
15. Optionally, adjust the screen brightness. See Changing the Screen Brightness,
page 51.
16. Optionally, adjust the alarm volume. See Changing the Alarm Volume, page 63.
 Loading...

