90-830234R3 DECEMBER 1997 MID-SECTION - 5B-35
Motor Installation
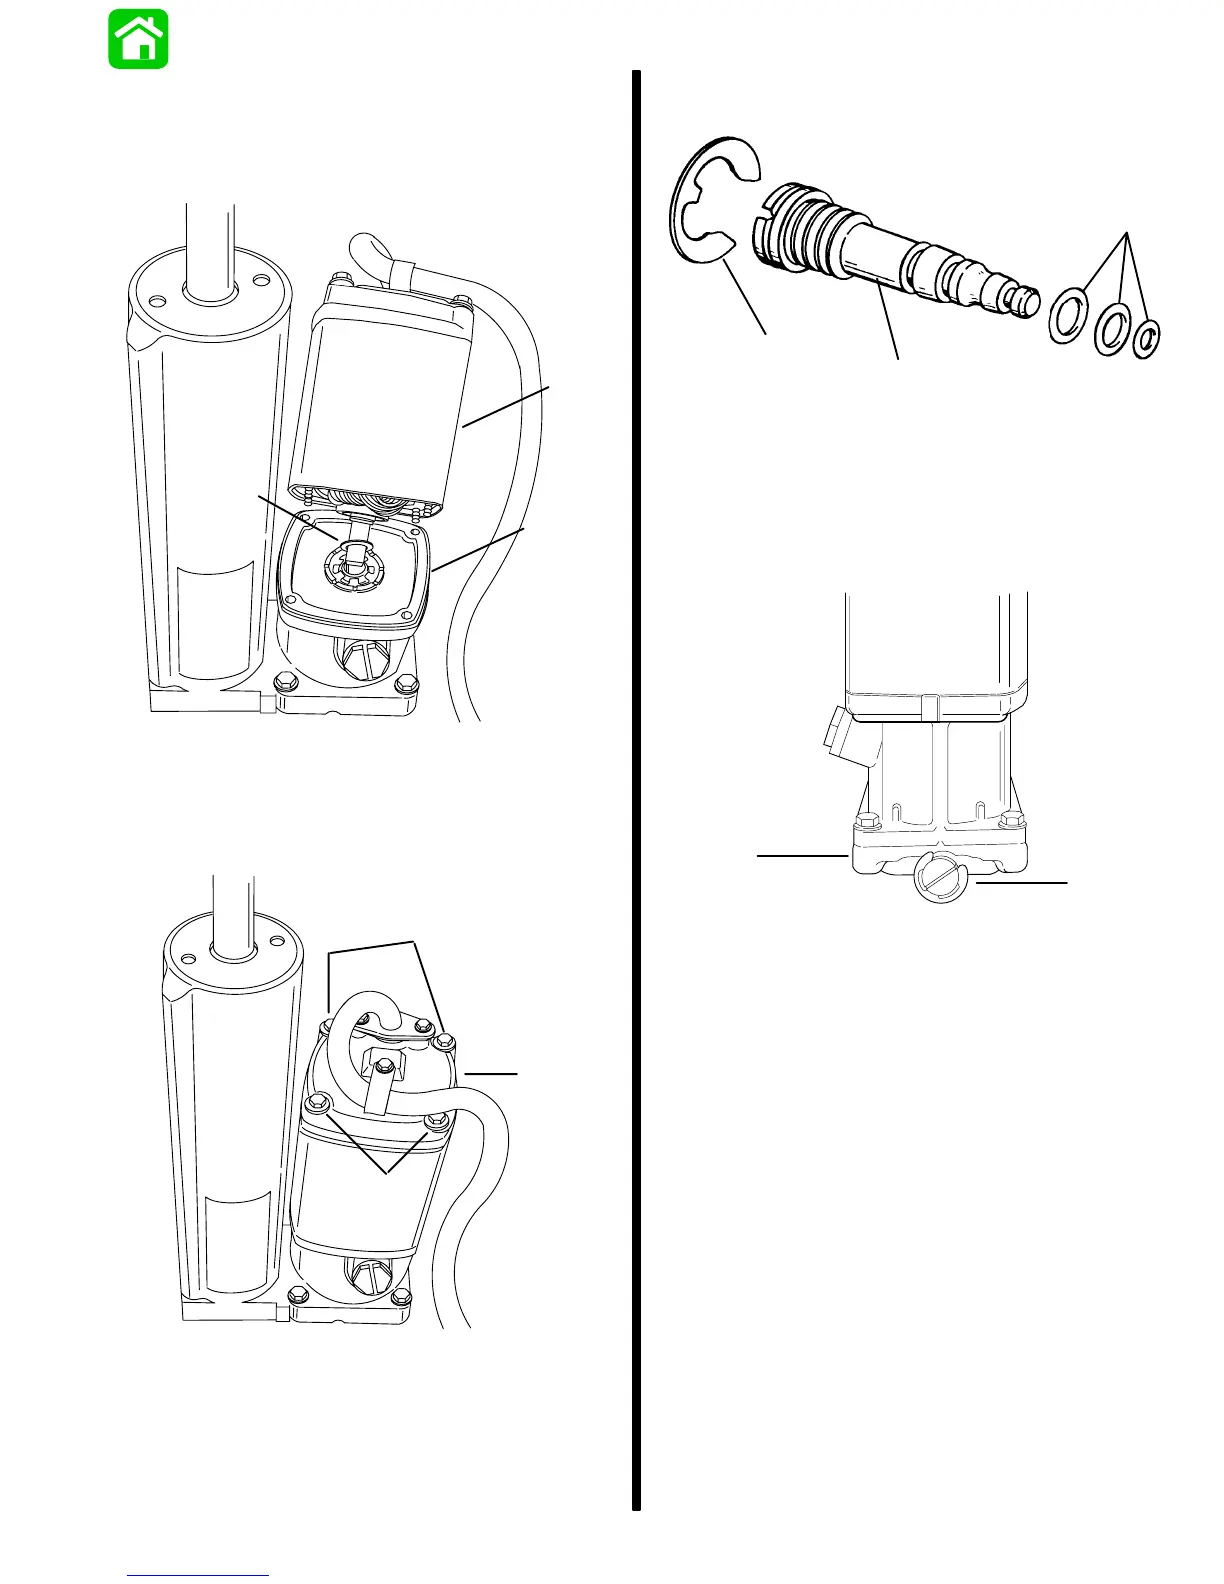
1. Inspect O-ring on top of reservoir for cuts or abra-
sions. Replace as required. Guide armature and
motor frame into reservoir housing as shown.
a
b
c
53947
a - O-ring
b - Washer
c - Armature/Motor Frame
2. Torque end cap screws to 13 lb in. (1.5 N·m).
a
b
b
53946
a - End Cap
b - Screws (4) [Torque to 13 lb. in. (1.5 N·m)]
3. Place drive shaft into oil pump.
4. Install lubricated O-ring to base of reservoir.
5. Install lubricated O-rings and “E” clip to manual
release valve.
a
c
b
51196
a - “E” Clip
b - O-ring
c - Manual Release Valve
6. Insert manual release valve into manifold and
tighten snuggly. Back release valve out 3 turns
maximum allowing trim rod installation.
a
b
53943
a - Manual Release Valve
b - Manifold

 Loading...