6A-20 - LOWER UNIT 90-830234R3 DECEMBER 1997
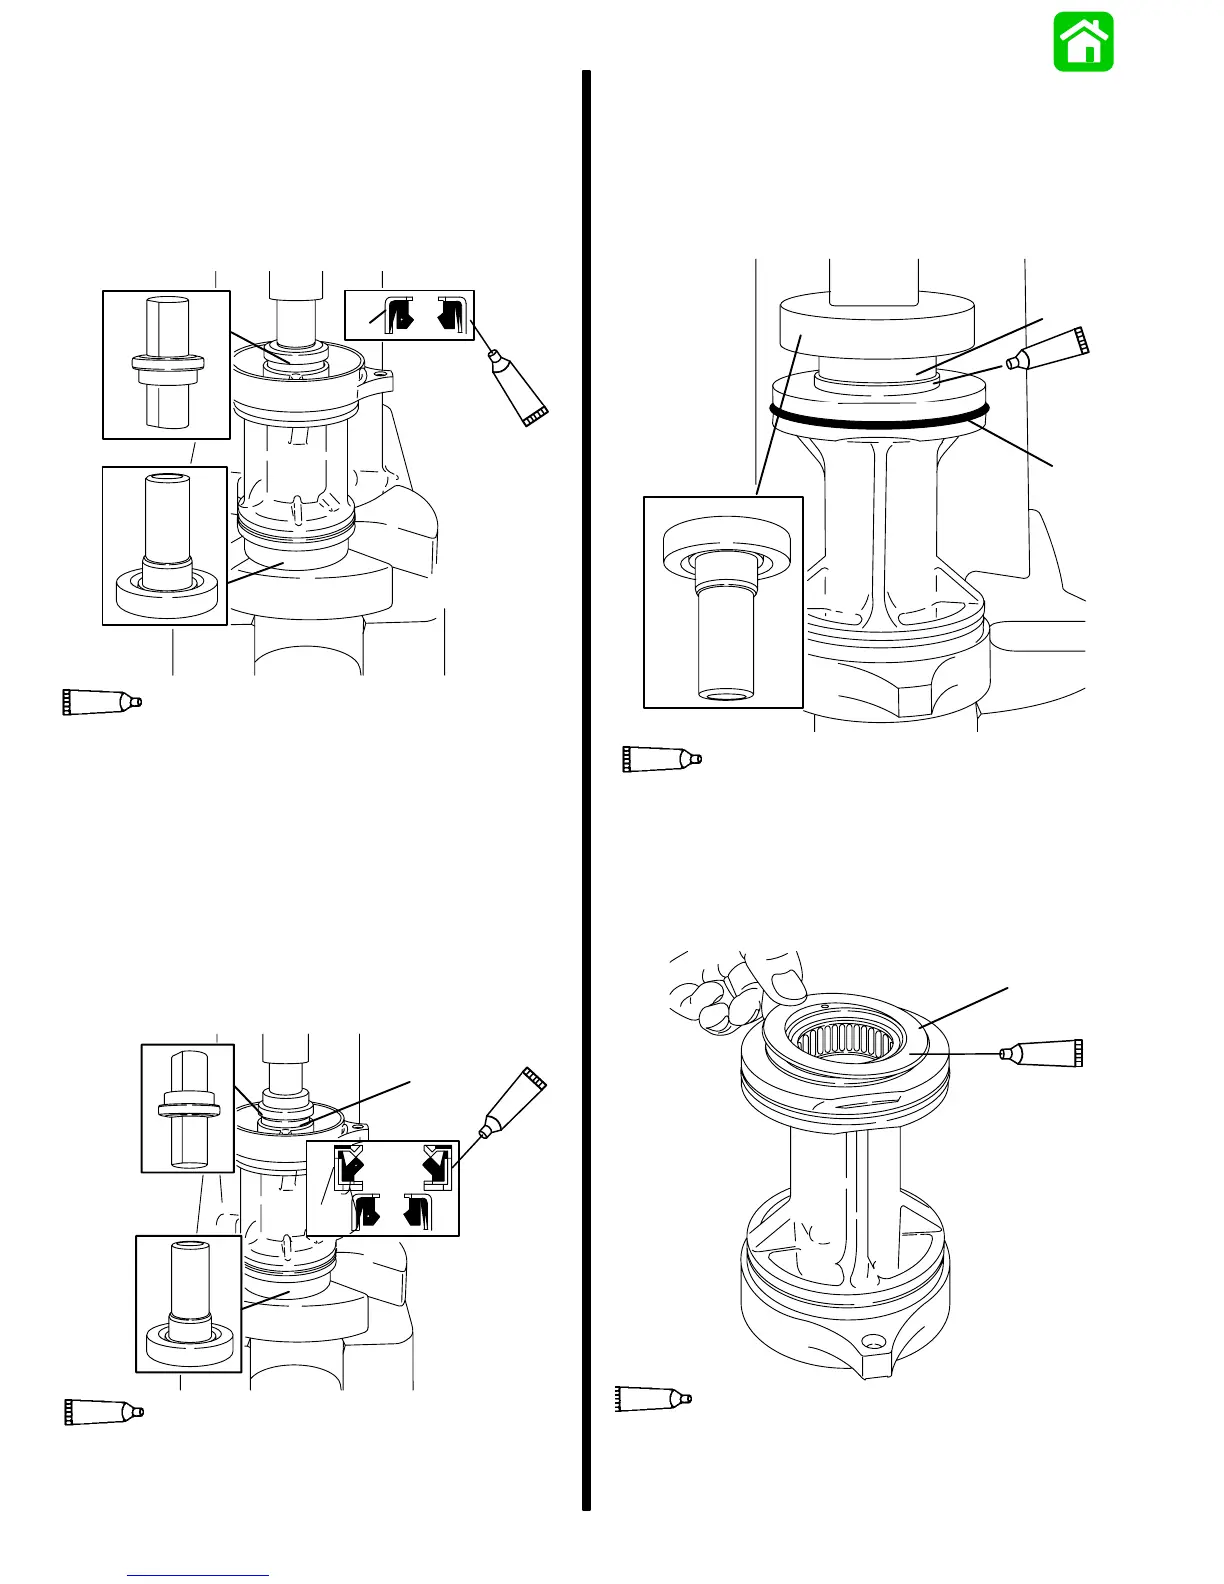
4. Place smaller diameter seal on longer shoulder
of Oil Seal Driver (91-31108) with seal lip away
from shoulder.
5. Protect lip on front side of bearing carrier using
Bearing Installation Tool (91-13945). Apply Loc-
tite 271 on O.D. of seal. Press seal into carrier un-
til tool bottoms.
b
c
a
7
7
Loctite 271 (92-809820)
21040
a - Seal
b - Oil Seal Driver (91-31108)
c - Bearing Installation Tool (91-13945)
6. Place larger diameter seal on shorter shoulder of
Oil Seal Driver (91-31108) with seal lip toward
shoulder.
7. Protect lip on front side of bearing carrier using
Bearing Installation Tool (91-13945). Apply Loc-
tite 271 on O.D. of new seal. Press seal into carri-
er until tool bottoms.
b
c
a
a
7
7
Loctite 271 (92-809820)
21041
a - Seal
b - Oil Seal Driver (91-31108)
c - Bearing Installation Tool (91-13945)
8. Install O-ring.
9. Lubricate O-ring with 2-4-C w/Teflon. Lubricate
seal lips with 2-4-C w/Teflon. Lubricate outside
diameter of bearing and bearing carrier bore with
a light coating of 2-4-C w/Teflon.
10. Press bearing into carrier until tool bottoms.
c
b
a
95
95
2-4-C With Teflon (92-825407A12)
19163
a - O-ring
b - Bearing, Numbered Side Toward Tool
c - Bearing Installation Tool (91-13945)
11. Install thrust washer. Coat thrust washer with
Quicksilver Gear Lubricant.
a
87
87
Quicksilver Gear Lubricant (92-19007A24
19167
a - Thrust Washer
 Loading...


