6B-22 - LOWER UNIT 90-830234R3 DECEMBER 1997
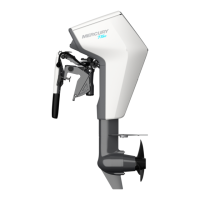
7. After setting the impeller height, tighten the im-
peller nut snug with a wrench. Secure impeller
nut by bending tabs (a) against the flats on the im-
peller nut.
a
a - Tabs
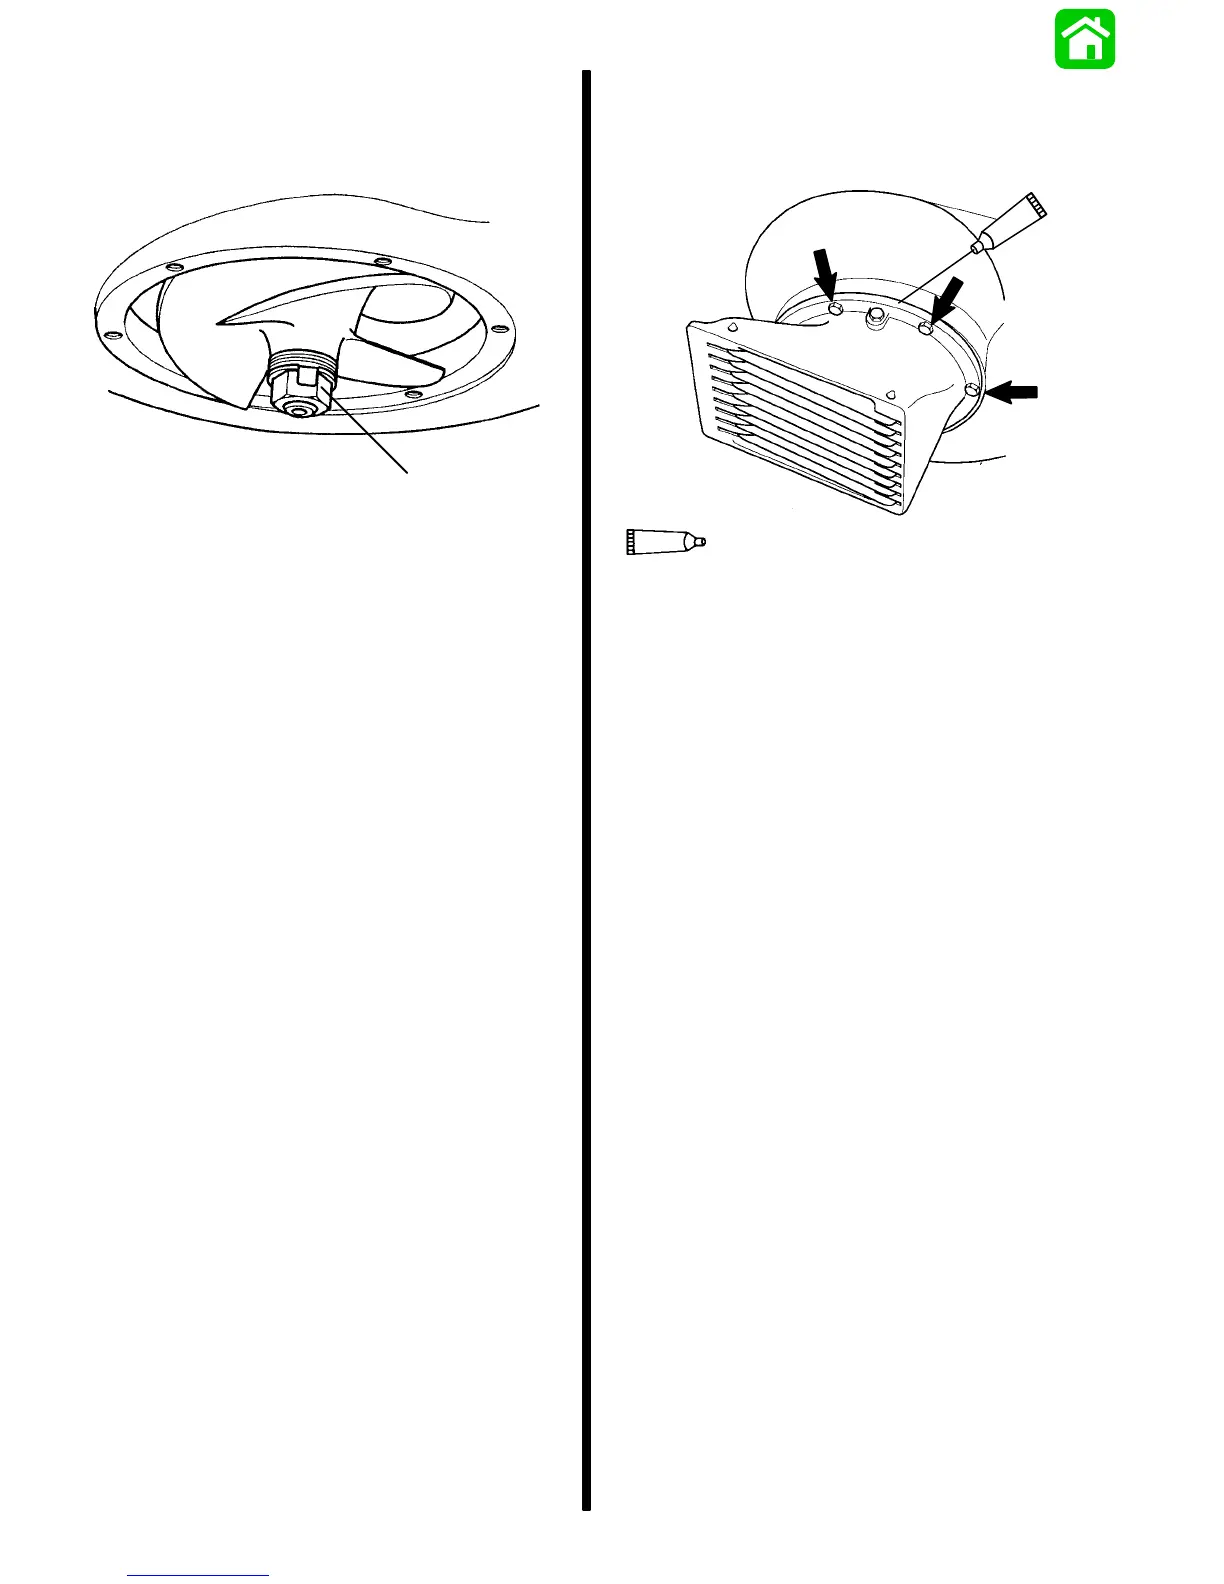
8. Reinstall the water intake housing with six bolts.
Check clearance around the impeller to make
sure the water intake housing is centered and not
rubbing against the liner. Torque mounting bolts
to 120 lbs. in. (13.5 N·m).
NOTE: If the outboard is used in salt water, apply
Quicksilver Anti-Corrosion Grease around the entire
mounting flange on the water intake housing and also
to the threads on the six mounting bolts.
94
Anti-Corrosion Grease (92-78376A6)
94
9. Refer to “SHIFT CABLE INSTALLATION” page
10 and reinstall shift cable to jet drive.

 Loading...