8 - ATTACHMENTS AND OPTIONAL EXTRA
8 - 5
CONTROL OF HYDRAULICALLY FUNCTIONING ATTACHMENTS
Consult the control plate of the
attachment in order to ascertain its
maximum operating pressure.
To control the hydraulic attachment,
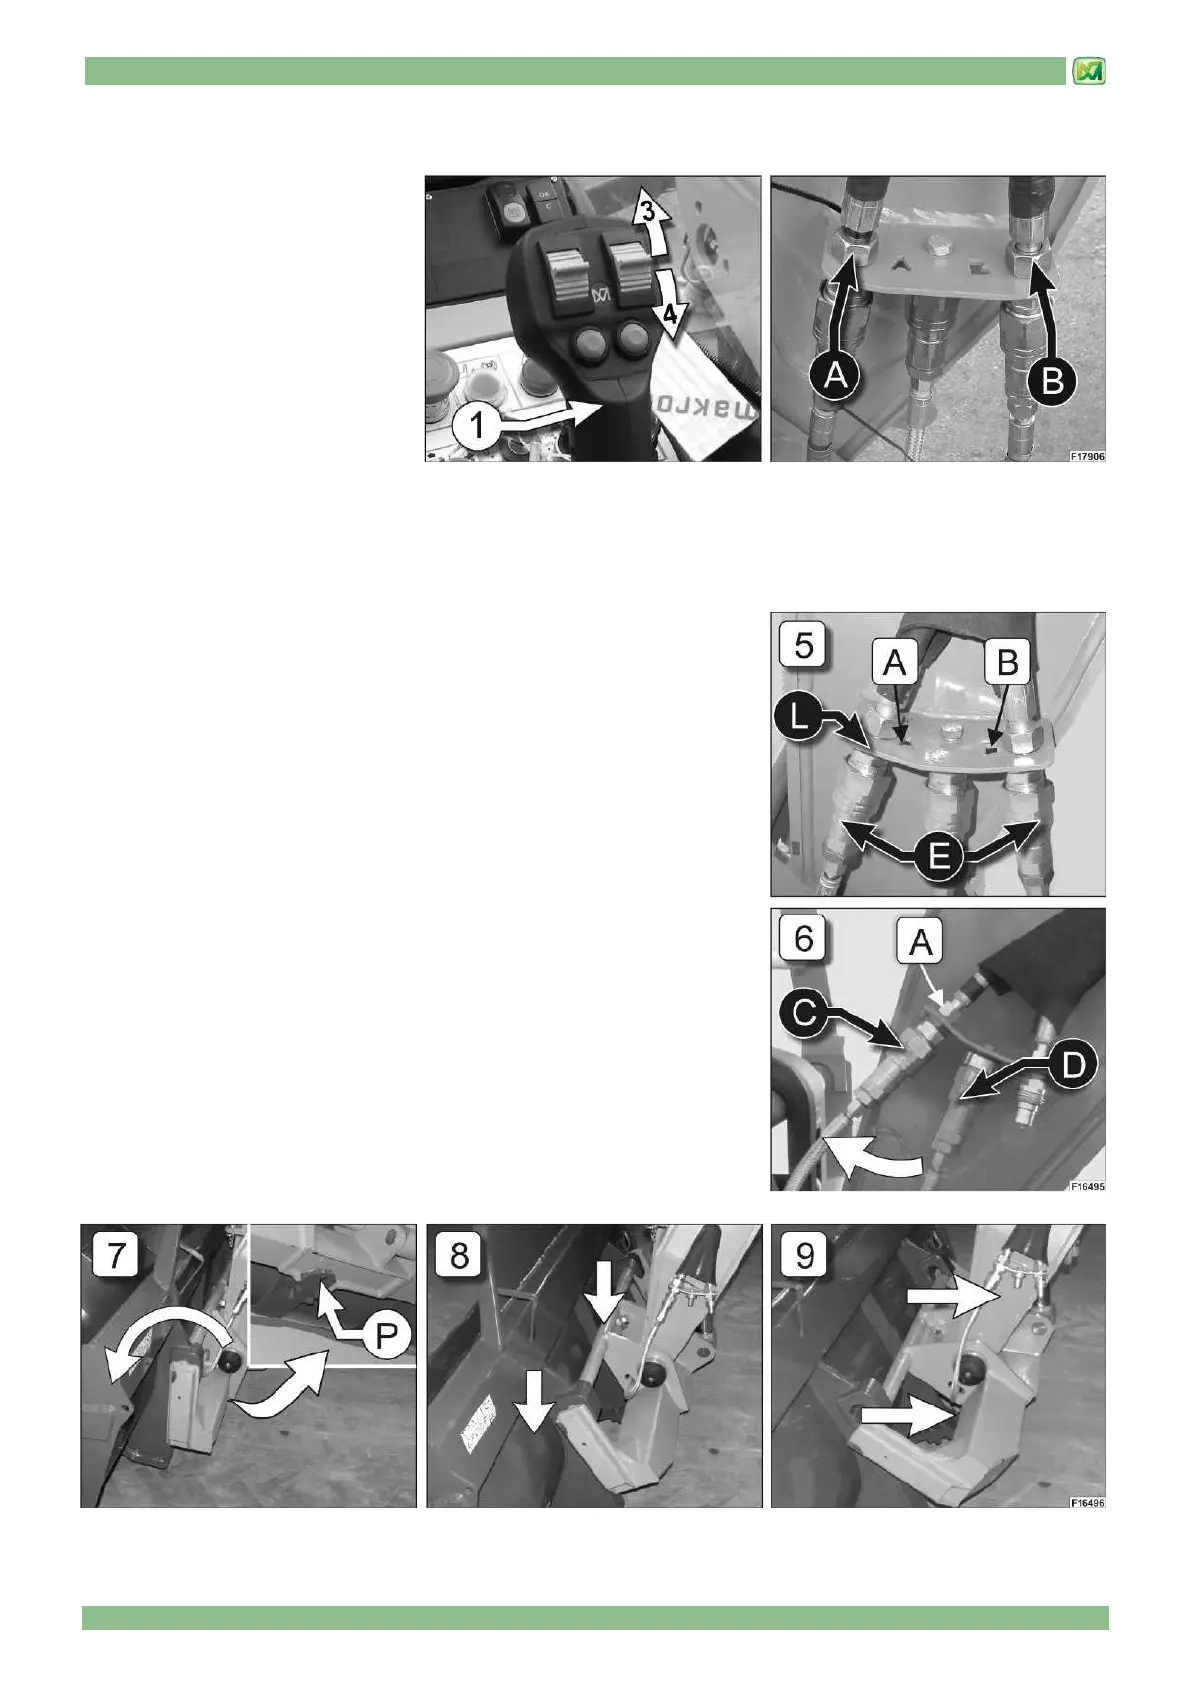
use the right joystick thumb-wheel (1)
as follows:
- rotate the right roller to position "3"
to send oil to the hydraulic conduit
"A" on the head of the boom.
(opening claws, valves, hatches,
etc.)
- rotate the right roller to position "4"
to send oil to the hydraulic conduit
"B" on the head of the boom.
(closing claws, valves, hatches, etc.)
Other types of manoeuvre will be described in the instructions relevant to the attachments.
DISMANTLING OF ATTACHMENTS WITH QUICK COUPLING
To remove a quick-coupling attachment from the carriage, please refer to the
following instructions:
- a standard loader has been chosen to illustrate the operations required for
the disassembly of a quick-coupling attachment; the following operations
apply to any attachment manufactured by Merlo that is equipped with the
same coupling system.
- read and make sure to understand all the instructions regarding the
attachment you purchased, which are provided either in the following
paragraphs or in the attached manual. Pay particular attention to safety
warnings and to any notes on how to install and handle the attachment.
- make sure that the attachment rests on compact, flat ground.
- engage the parking brake, shift both the gearbox selector (19) and the drive
direction selector (20) to position "N".
- if you need to remove attachments that feature hydraulic functions,
disconnect hoses "E" from quick couplings [A] and [B] placed on metal sheet
"L" (Fig. 5).
- disconnect hose "C" that feeds quick coupling cylinder "P" from the coupling
"D" and connect it to the quick coupling [A]. (Fig.6)
- lower the machine's telescopic boom so that the equipment is resting on the
ground
- activate the control to lift the quick-coupling piston "P" (see paragraph "MAIN
DISTRIBUTOR LEVER", in the chapter "CONTROLS AND INSTRUMENTS"),
while at the same time rotating the carriage downwards, so as to uncouple
the attachment (Fig. 7)
- release button on the control joystick
- if necessary, slightly lower the telescopic boom, so as to release the
attachment (Fig. 8)
- retract the telescopic boom, and cautiously back up (Fig. 9)