8 - ATTACHMENTS AND OPTIONAL EXTRA
1 - 30
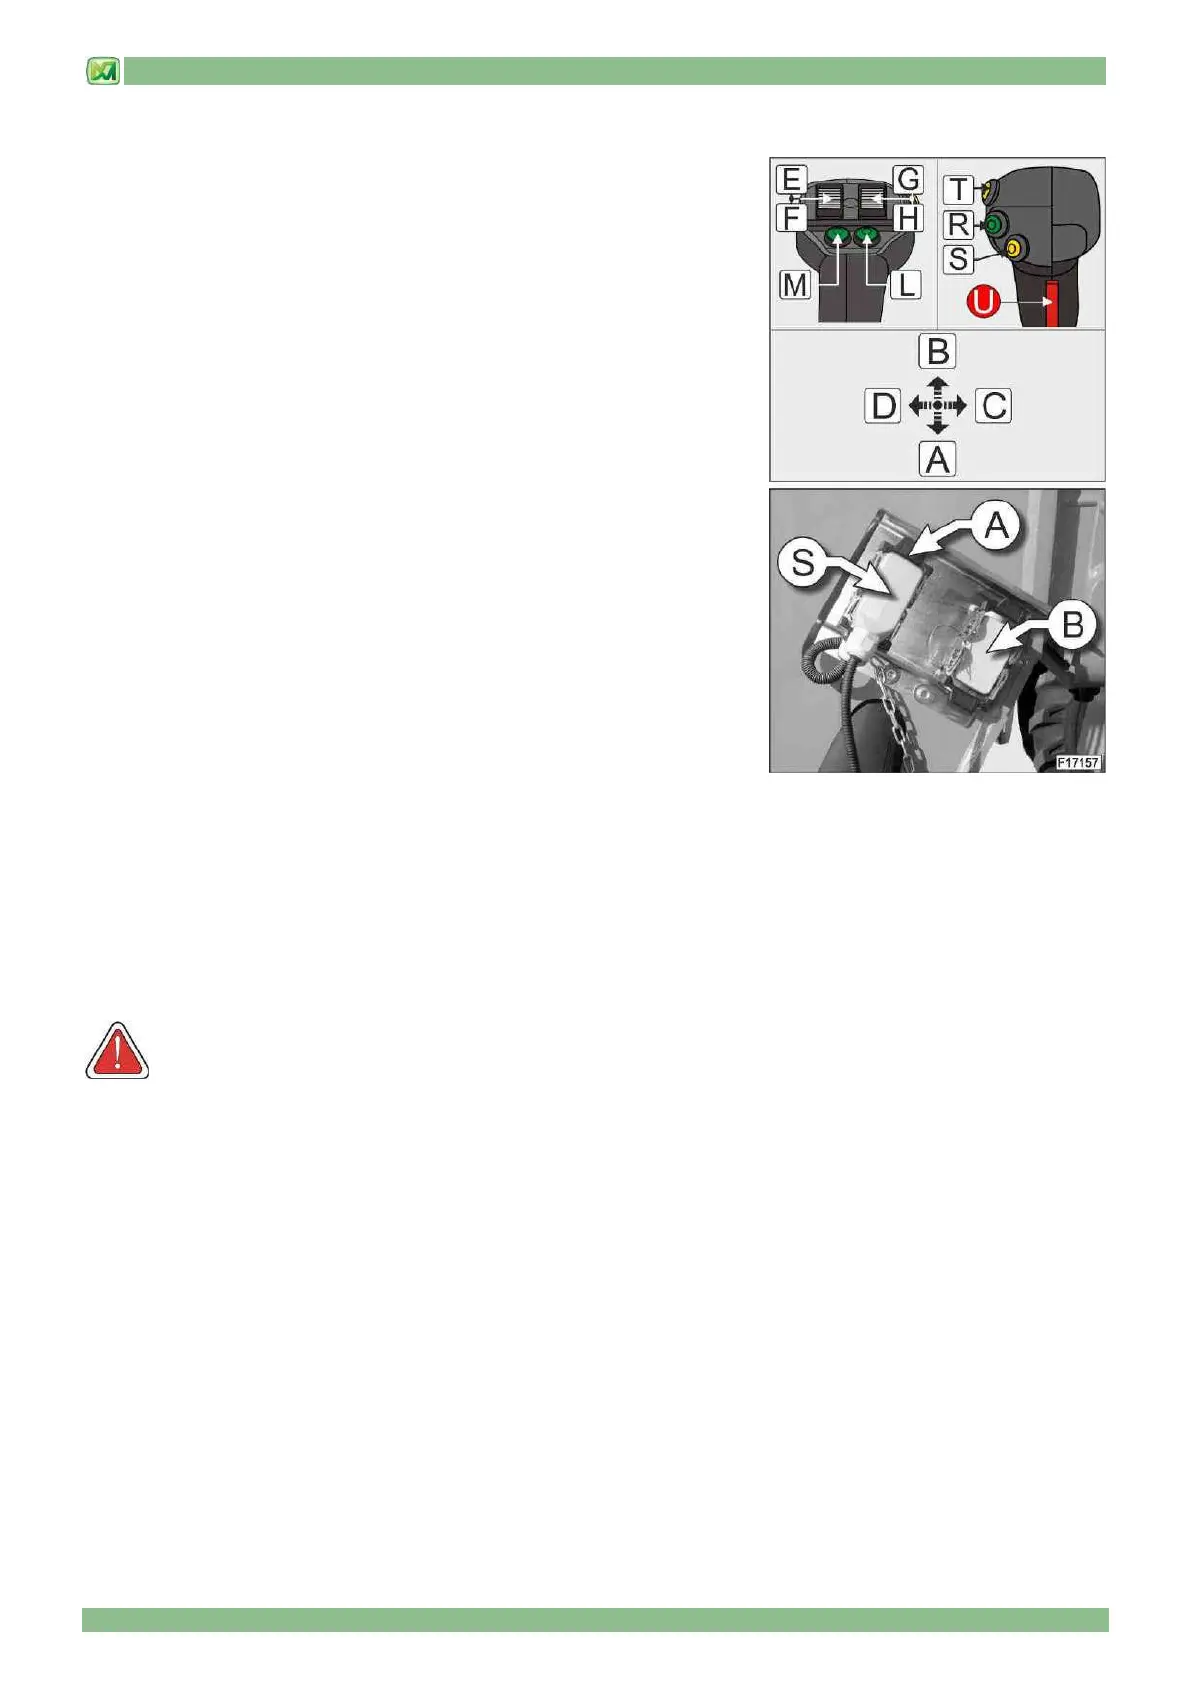
MULTI-FUNCTION CONTROL JOYSTICK
Thanks to this accessory, your machine is fitted with an electro-mechanical single-
lever joystick for performing 8 hydraulic functions
• Position A: lift telescopic boom
• Position B: lower telescopic boom
• Position C: rotate carriage upwards
• Position D: rotate carriage downwards
• Position E: extend telescopic boom
• Position F: retract telescopic boom
• Position G: release attachments installed on carriage
• Position H: • command for attachments installed on carriage
• Button L: shift machine to right
• Button M: shift machine to left
• Button R: AUX1 (first hydraulic function)
To activate the first hydraulic function of the attachment mounted on the machine,
press the button (R) and simultaneously turn the right-hand thumb-wheel in
position "G" or "H" to select the movement direction.
• Button S: AUX2 (second hydraulic function)
To activate the second hydraulic function of the attachment mounted on the
machine, press the button (S) and simultaneously turn the right-hand thumb-wheel
in position "G" or "H" to select the movement direction.
• Button T: AUX3 (third hydraulic function)
To activate the third hydraulic function of the attachment mounted on the machine, press the button (T) and simultaneously turn
the right-hand thumb-wheel in position "G" or "H" to select the movement direction.
The movement speed required is proportional to the angle given to the joystick (the larger the angle of the joystick the higher
the movement speed), the rotation of the control thumb-wheels (the larger the rotation of the thumb-wheels the higher the
movement speed) and diesel engine rpm (the higher the diesel engine rpm the higher the movement speed).
Depending on load conditions, it is possible to combine machine movements.
Movements stop automatically when the joystick, control thumb-wheel or button are released.
To enable the operation of the joystick it is necessary to press and keep pressed the red button (U) located on the rear.
WARNING! Before operating the machine, please mark off the area where the machine needs to be operated, in
order to keep both people and vehicles away from it.
Should you need to operate the machine near overhead lines, the person in charge of safety shall require the
minimum safety distance from such lines to the manager of said lines, as well as from the authorities in charge of
safety and health in the workplace; in this way all necessary precautions shall be taken and potential accidents shall
be prevented. For further information please refer to paragraph "INSTRUCTIONS FOR A CORRECT USE OF THE
MACHINE NEAR OVERHEAD LINES" in chapter "OPERATING INSTRUCTIONS".
On request, it is possible to have the control joystick (1) mounted on the right armrest of the seat; in this case, however, the
joystick installed is a proportional electronic type, although the commands and functions available are the same as those
described in this paragraph.
Before starting to use the proportional electronic joystick, check the correct locking of the armrest in the work position.
To electrically connect the attachment to the machine proceed as follows:
- remove the protection from the support connection "B"
- move the electrical plug "S" from the socket "A" to the support socket "B"
- connect the plug coming from the equipment to the electrical connection "A" on the machine