Configuration and function
1-9
1
Before Use
3
4
6
4
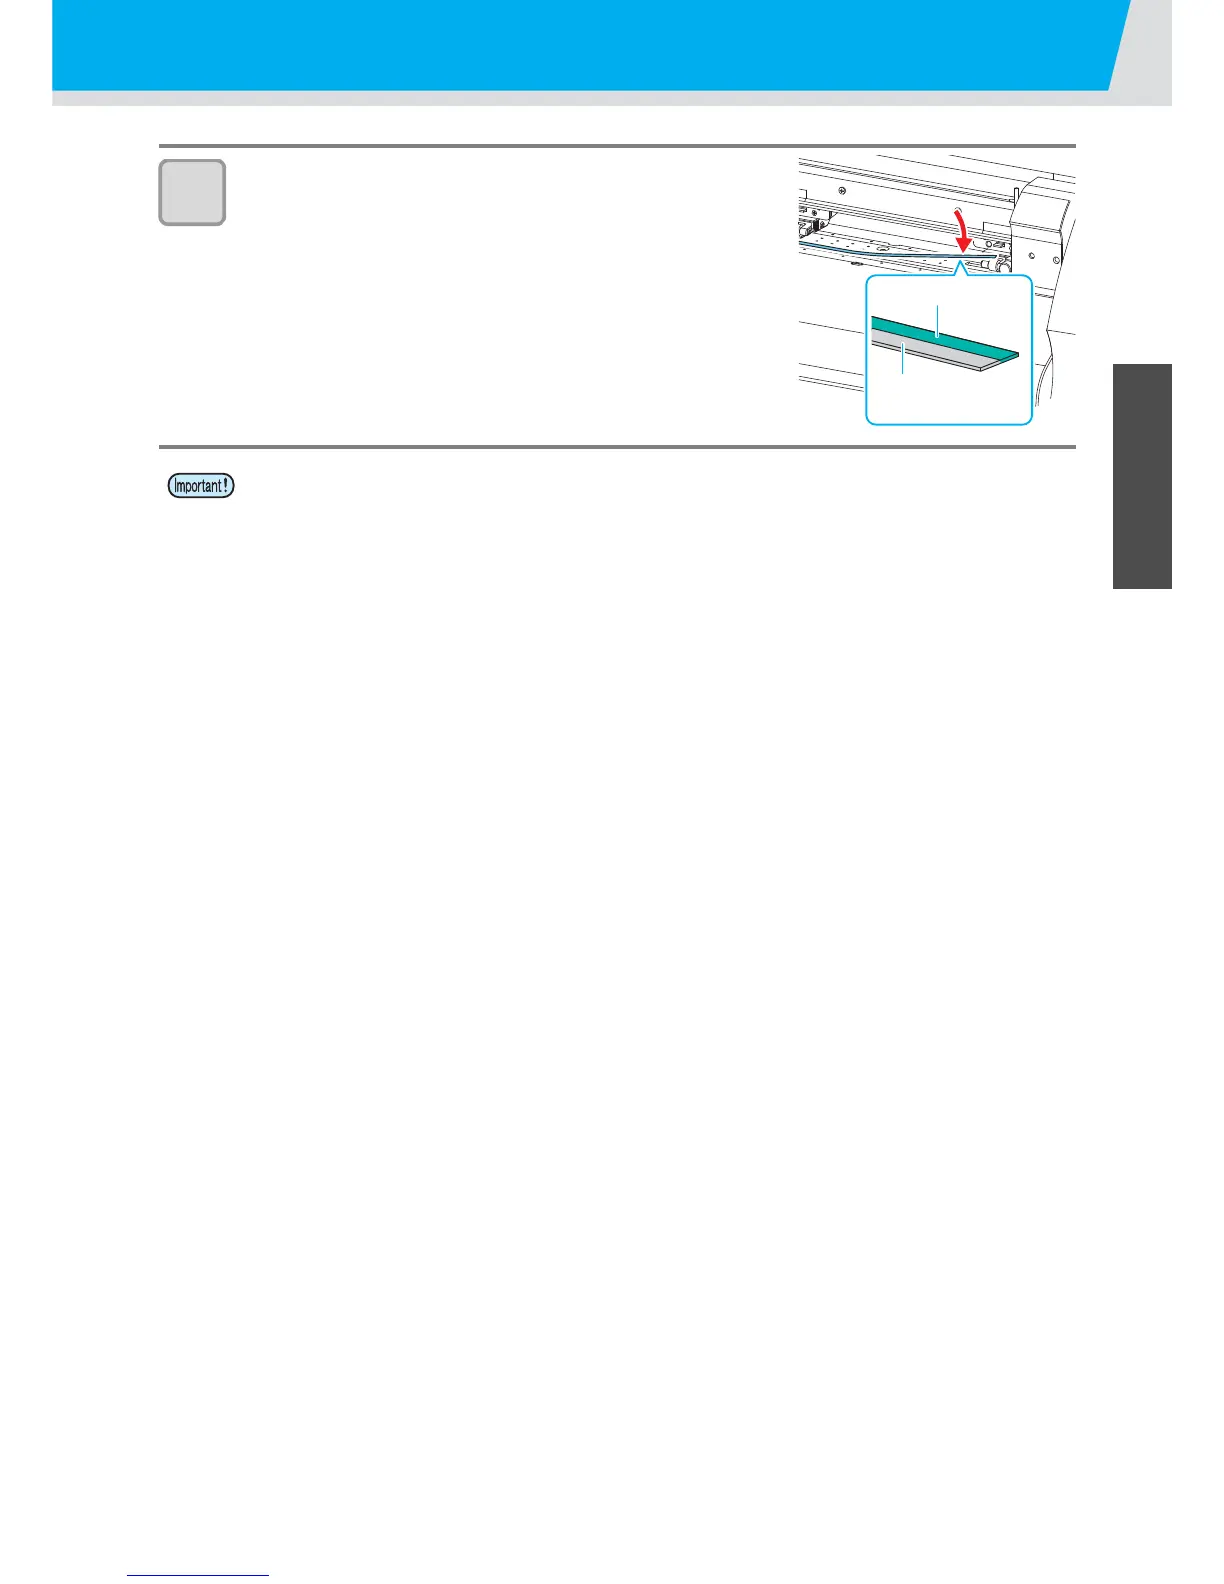
Attach a new pen line.
• Attach a new pen line in the groove.
• The back side of the pen line is a magnet. Making the magnet side
back, insert it into the groove.
• The pen line is both for cutting (green brush part) and for plotting.
Be sure to make the part for cutting (green part) back side and
attach it.
• Be sure to attach the pen line so that the green part may come to the back side of the device. If you
attach in the reverse direction, cutting and plotting quality may be degraded.
• After attaching the pen line, check that there is no floating part. If the pen line floats, the carriage or
the sheet may hit it, and it may cause the device breakdown or the sheet jam.
 Loading...