2-18
5
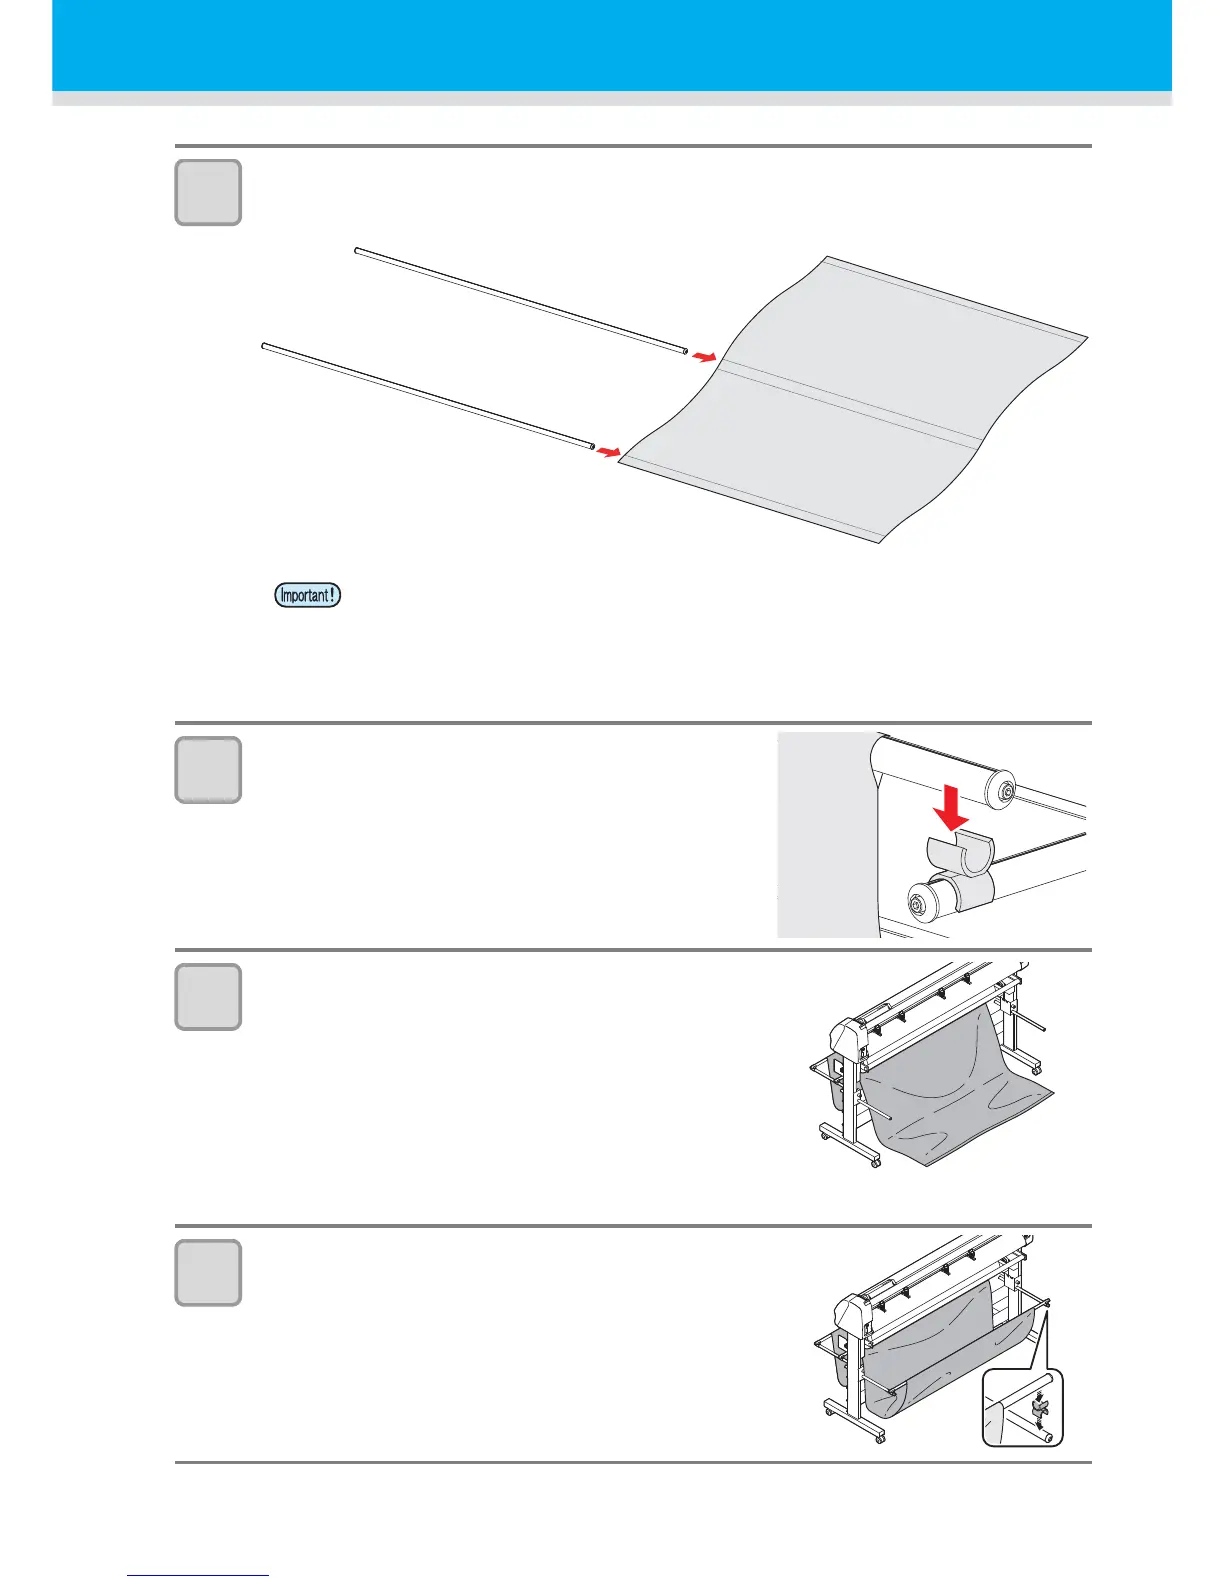
Insert the pipes (x 2) into the pipe inserting parts of the attached fabric and prepare
the sheet basket for front side.
6
Attach the pole on the front side basket bar.
• Insert the pole put through the fabric in the Step 5 on the pipe
joint attached on the basket bar.
7
Put the fabric for rear side basket through to the
rear side.
• Send the fabric for rear side basket to the rear side as
indicated.
8
Insert the remaining pipe (x 1) into the pipe
inserting part for rear side sheet basket and attach
it on the rear side basket bar.
• There are three pipes to be used for the sheet basket. Here, insert the pipe to be used for
the sheet basket in front side.
• The sheet basket has front side and rear side. The part with short intervals on the pipe
inserting part is for front, and with long intervals is for rear.
• Here, insert only two pipes. If you insert all three pipes, the pipe may hit this device when
attaching the rear side sheet basket in the Step 7 and it may cause the damage.
 Loading...