3 Printing
3-22
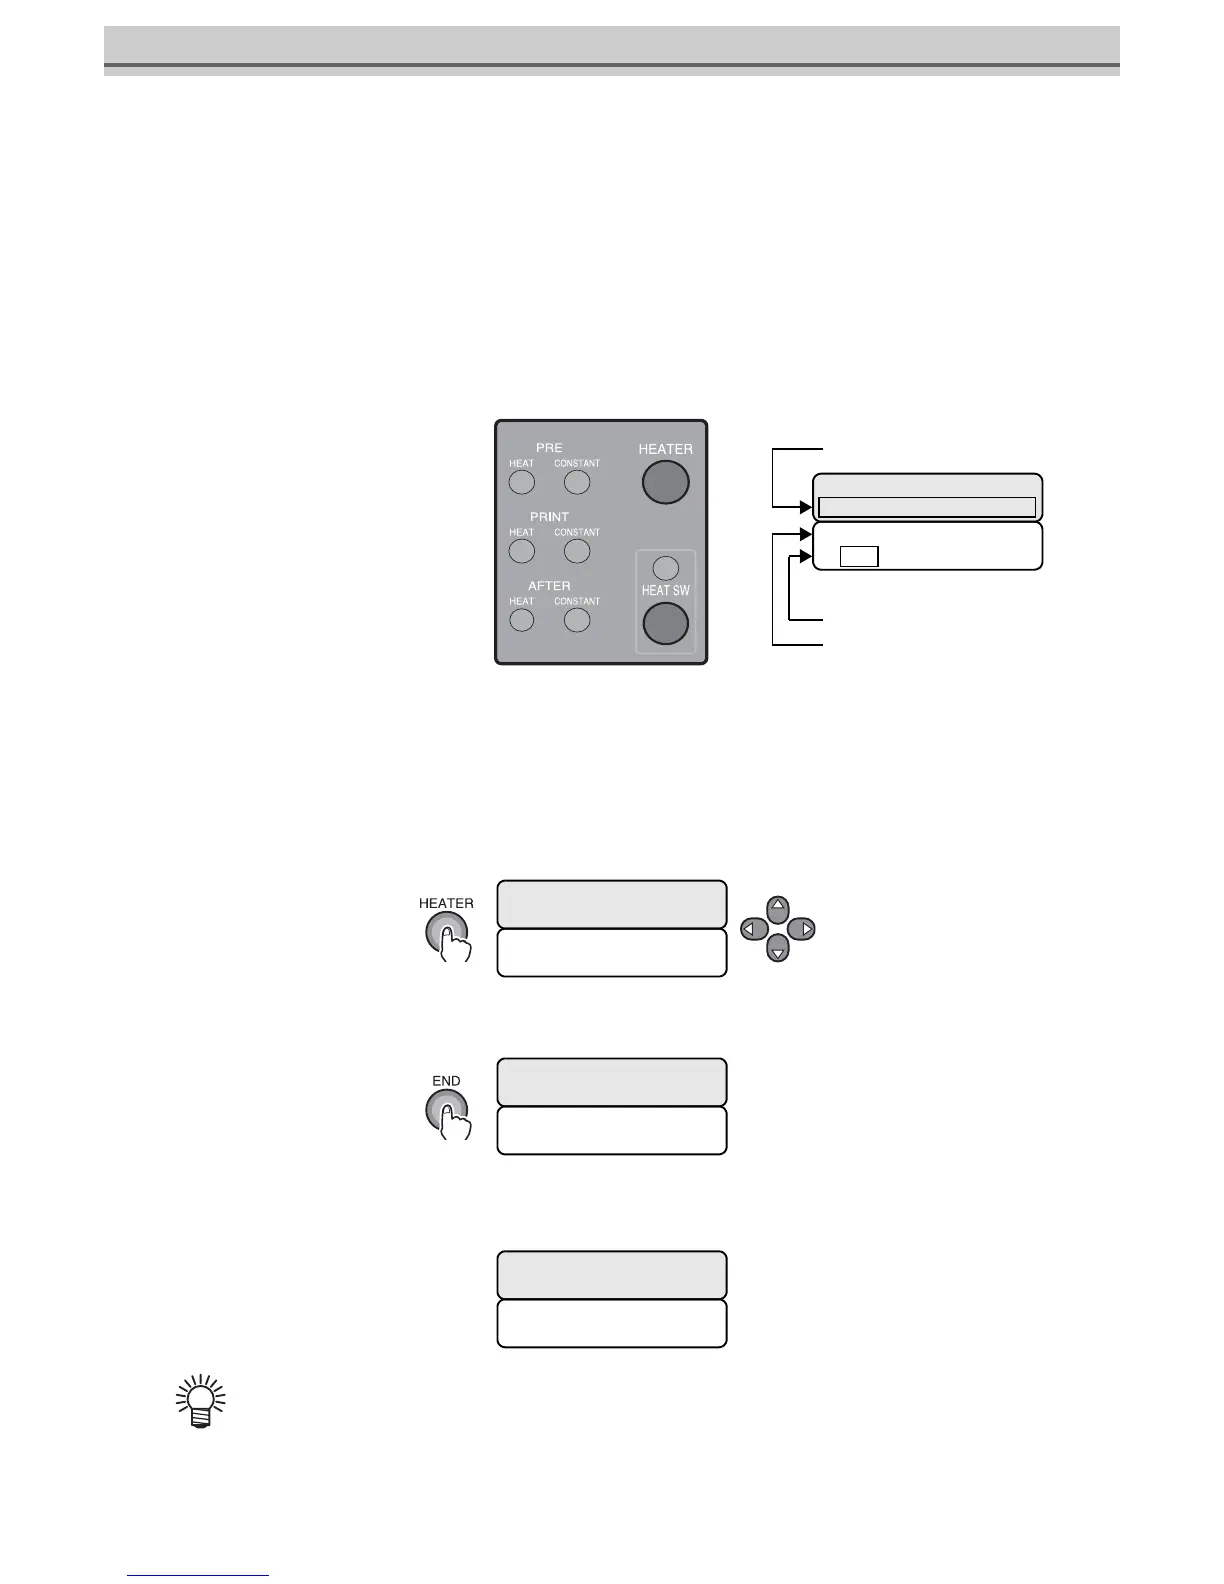
Checking the preset temperature and setting a temperature during printing
This section describes how to adjust the heater temperatures which have already been set in FUNCTION
mode (Refer to “Setting the temperatures and standby time of heaters (p.6-32)” ).
STEPS:
1Make sure that the Heater Switch is turned ON.
The HEAT lamps are lit orange while the heaters are in heating operation, respectively.
The CONSTANT lamps light up green when the temperatures of the heaters reach the preset temperature,
respectively.
2Press the [HEATER] key.
Select the PRE-heater, PRINT heater and POST-heater one by one with the [] or [] key, and set tempera-
ture for each of them with the [] or [] key.
Temperature setting can be selected to OFF or in the range from 20 to 60 °C for Pre-heater and Print heater and
in the range from 20 to 70 °C for Post-heater.
Pressing the [HEATER] key will restore the original display, and if 30 seconds have passed without any key
pressed, the printer goes into LOCAL mode or REMOTE mode.
3Press the [END] key to return to LOCAL mode.
The display shown below will be kept until the temperatures of all the heaters reach their respective preset levels.
When the temperatures of all the heaters have reached their respective preset levels, the buzzer sounds and the CON-
STANT lamps for the Pre-heater, Print heater and Post-heater light up. Then the printer enters REMOTE mode.
When printing is to be started before the preset temperatures are reached,
press the [ENTER] key to enter REMOTE mode.
PRE PRT POST
25°C 25°C 35°C
OFF OFF 50°C
(OFF OFF 35°C)
Temperature to be set
Current temperature
Temperature that has been set
PRE PRT POST
25°C 25°C 35°C
OFF OFF 50°C
( OFF OFF 35°C)
PRE PRT POST
25°C 25°C 50°C
L. ∗ > [JV5-01]
width : ∗∗∗∗ mm
PRE PRT POST
25°C 25°C 50°C
TEMPERATURE CONTROL!
PLEASE WAIT

 Loading...


