5-128 Image Optimization
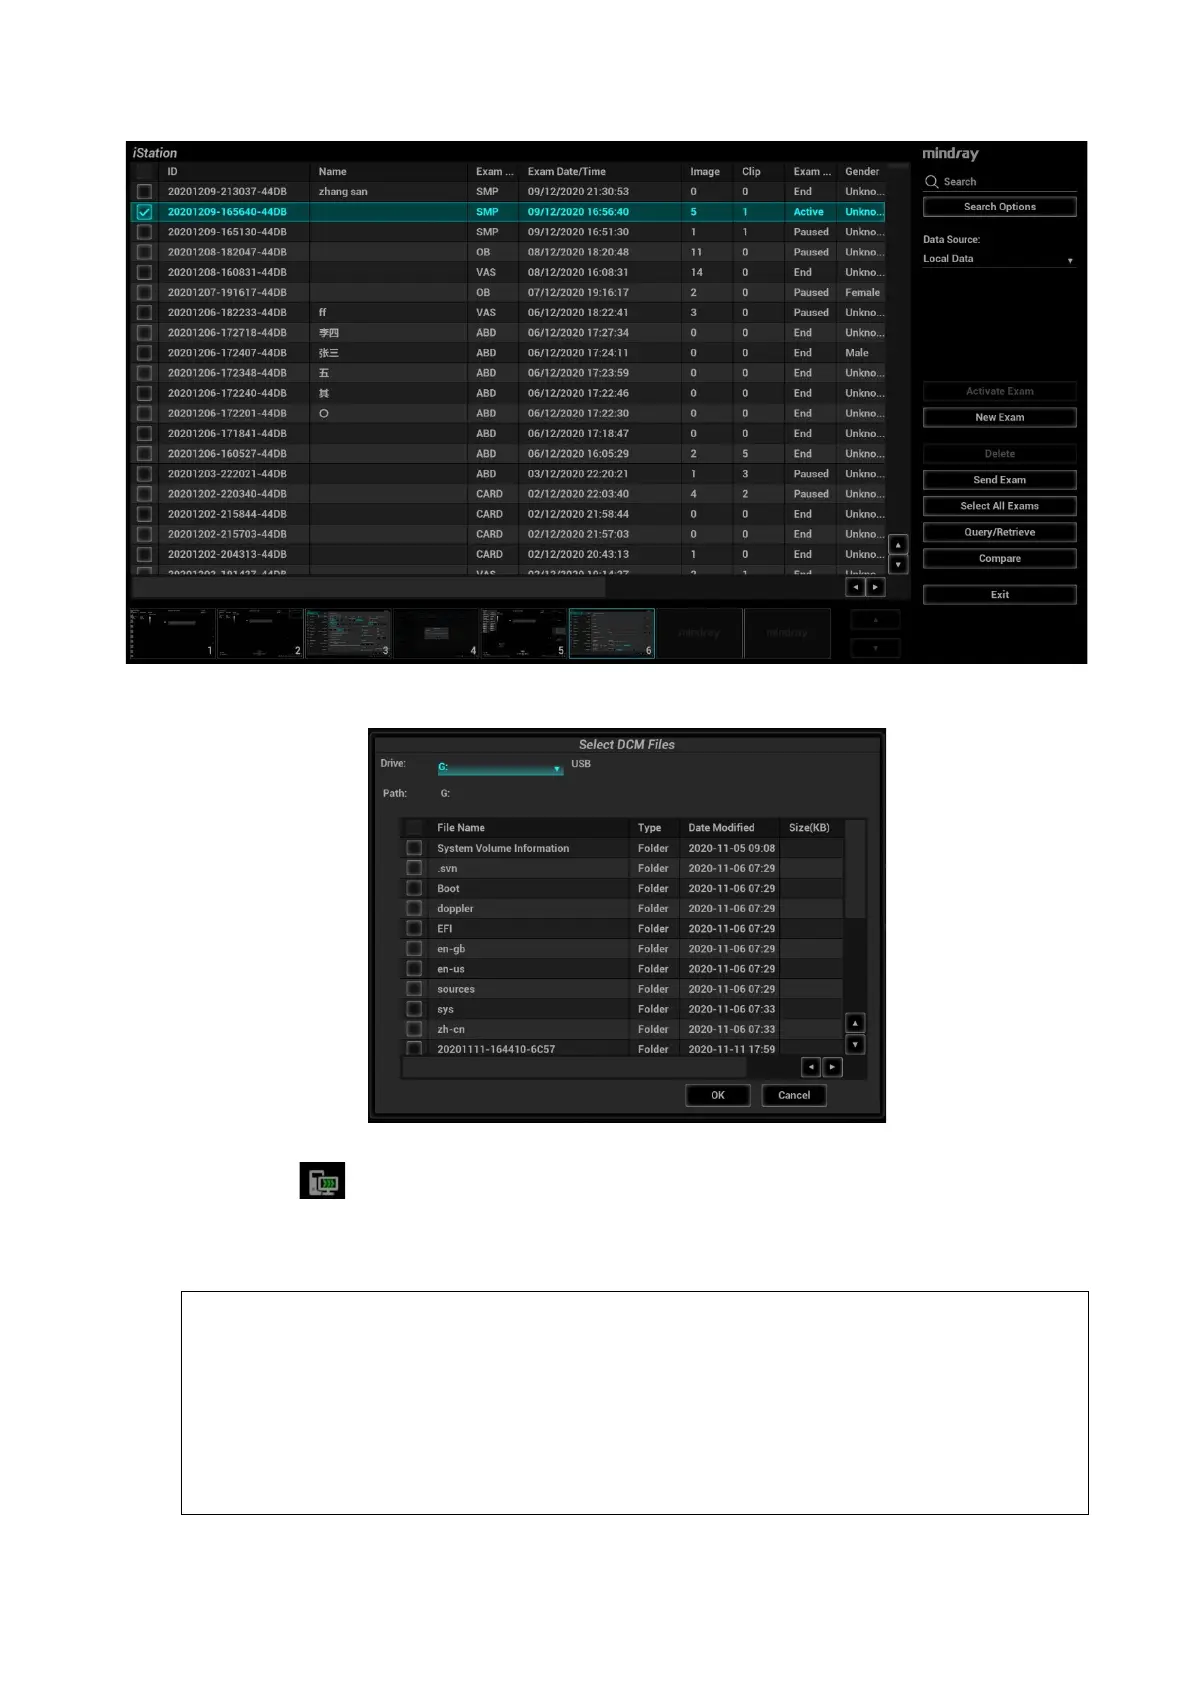
3. Select the volume data disk from the drive drop-list (or portable hard disk, optical disk). Click [OK].
The icon appears after the volume data is acquired successfully.
Note:
a) The icon at the right lower corner of the screen shows the progress of the task. Click the
icon to see the progress.
b) The icon appears after all tasks are completed, which implies that the patient data are loaded
to the ultrasound system successfully.
Note: The dialog box does not appear for:
If any file (Ultrasound patient data) is named with “DC9” in the external
storage medium, please rename the file, and conduct step 2. The dialog box
given above appears then.
If DICOMDIR volume data or backup file of the Ultrasound patient data is in
the root directory of USB disk (portable hard disk, optical disk), the
Ultrasound System does not pop up the path. However, volume data or
patient data is loaded to iStation database.
 Loading...


