Exam Preparation 4-9
4.2 Select Exam Mode and Probe
CAUTION:
If the exam mode is changed during a measurement, all measurement
calipers on the image will be cleared. The data of general measurements will
be lost, but the data of application measurements will be stored in the
reports.
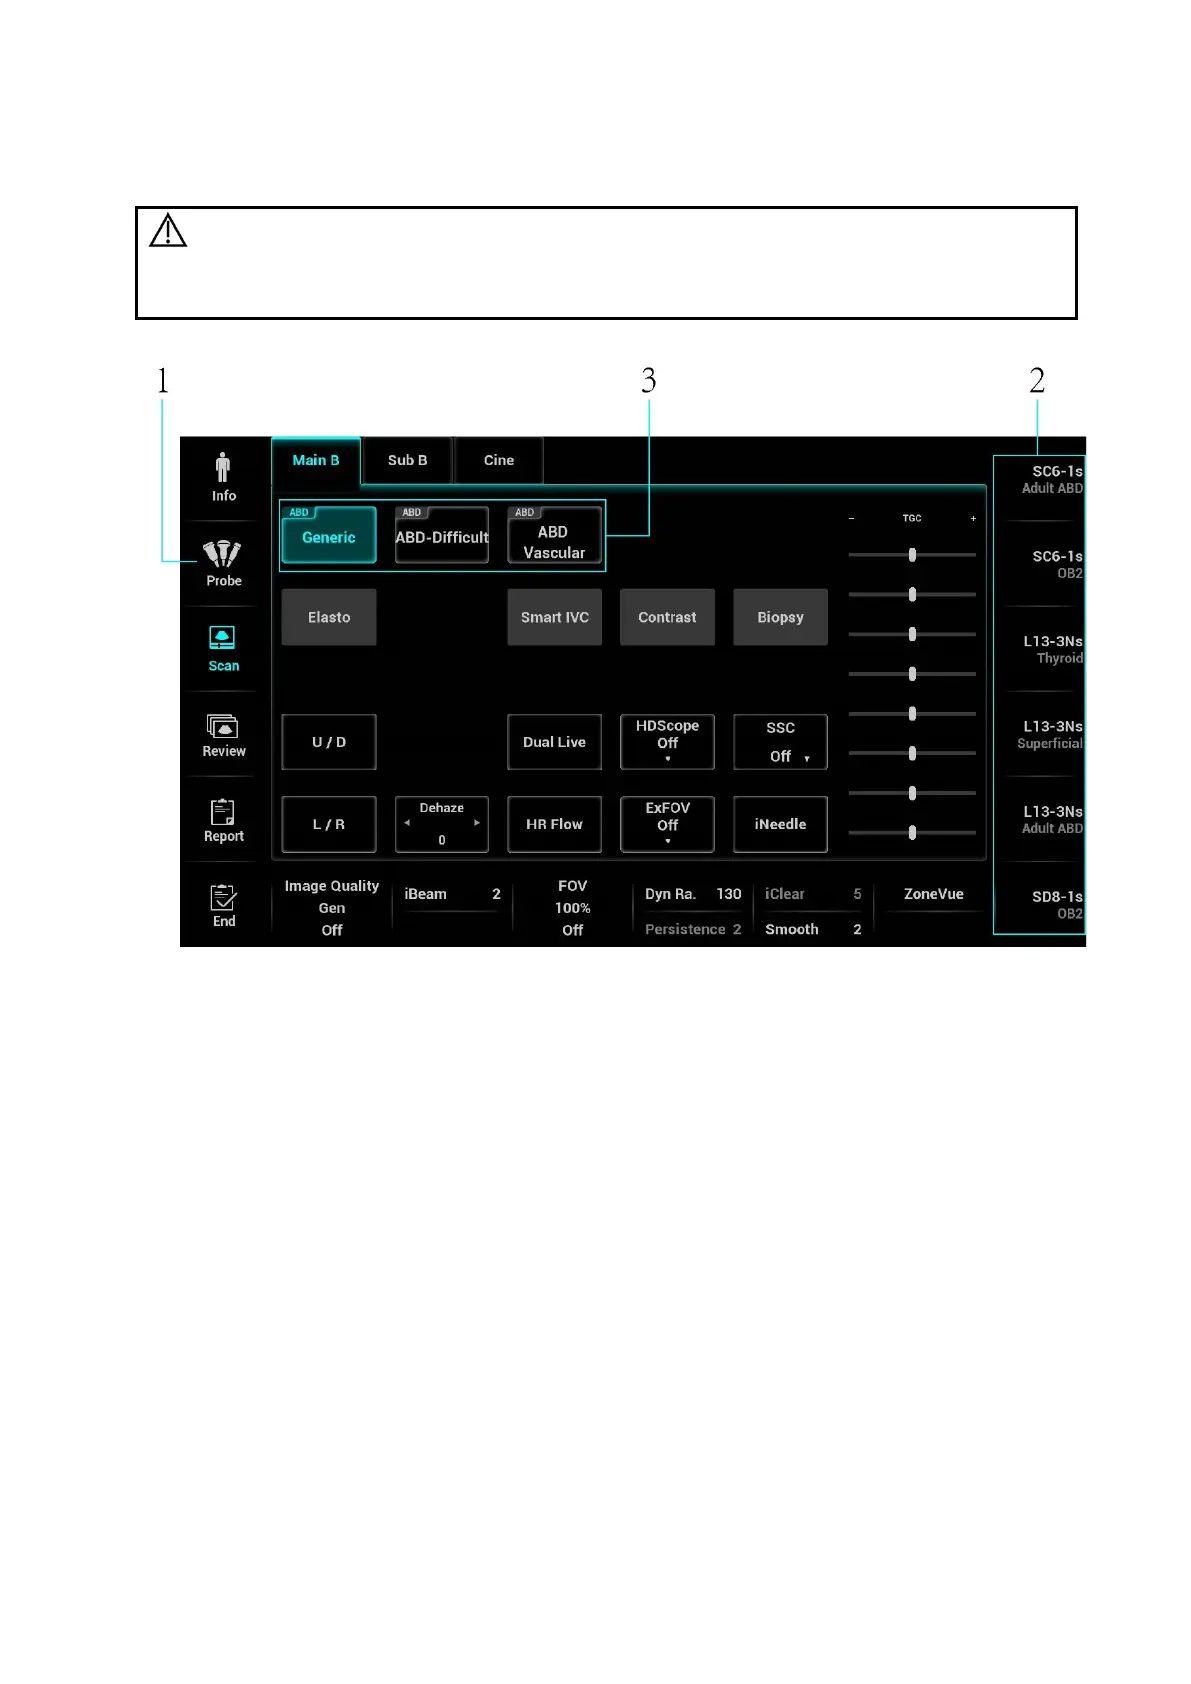
1. Regularly selecting probes and exam modes
a) Connect proper probes to the system, and tap <Probe> on the touch screen.
b) Tap to select the probe type and exam mode, and the system exits the dialogue box to enter
the selected exam mode and probe. The activation indicator of the selected probe on the front
I/O panel lights in blue.
Click [Exit] to cancel the selection and exit the screen.
2. Quickly switch to recently used probes and exam modes
The recently used probes and exam modes are displayed on the right side of the touch screen.
Select an appropriate probe and exam mode for quick switch.
3. IP (Image Process) switch
For the application that supports IP switch, a set of exam modes that corresponds to different IPs
are displayed on the touch screen. You can click to switch to the corresponding IP.
Note: 1. The exam modes that correspond to switchable IPs should belong to the same
application. For example, ABD generic, ABD Difficult, and ABD vascular all belong to
the abdomen application.
2. IP switch will not cause the system to return to real-time B mode. After the IP is
switched, only the image parameter is switched at the same time. Measurements,
comments, and bodymarks remain the same as those before switching.
For details about IP preset manager, please refer to “5.1.3 Quickly Saving Image Settings”.
 Loading...


