5. Commissioning
MiR500 User guide (en) 09/2019 - v.1.3 ©Copyright 2018-2020: Mobile Industrial Robots A/S. 87
For more information on creating a map, see the Reference Guide in the robot
interface and the Creating your first map-course in MiRAcademy on the MiR
website.
Creating the map
Before you map a new location, prepare the area with the following steps:
• Clear the area of dynamic obstacles such as empty pallets and carts. Dynamic obstacles
can also be deleted from the map later.
• Ensure that any doors and gates in the area can be opened before mapping.
• Place the robot close to a wall where the laser scanners have a good amount of coverage,
for example near a corner.
What to avoid:
• Starting the mapping with the robot in a very open space.
• Getting the robot stuck close to walls or objects as you will have to push it away manually.
Create a new map:
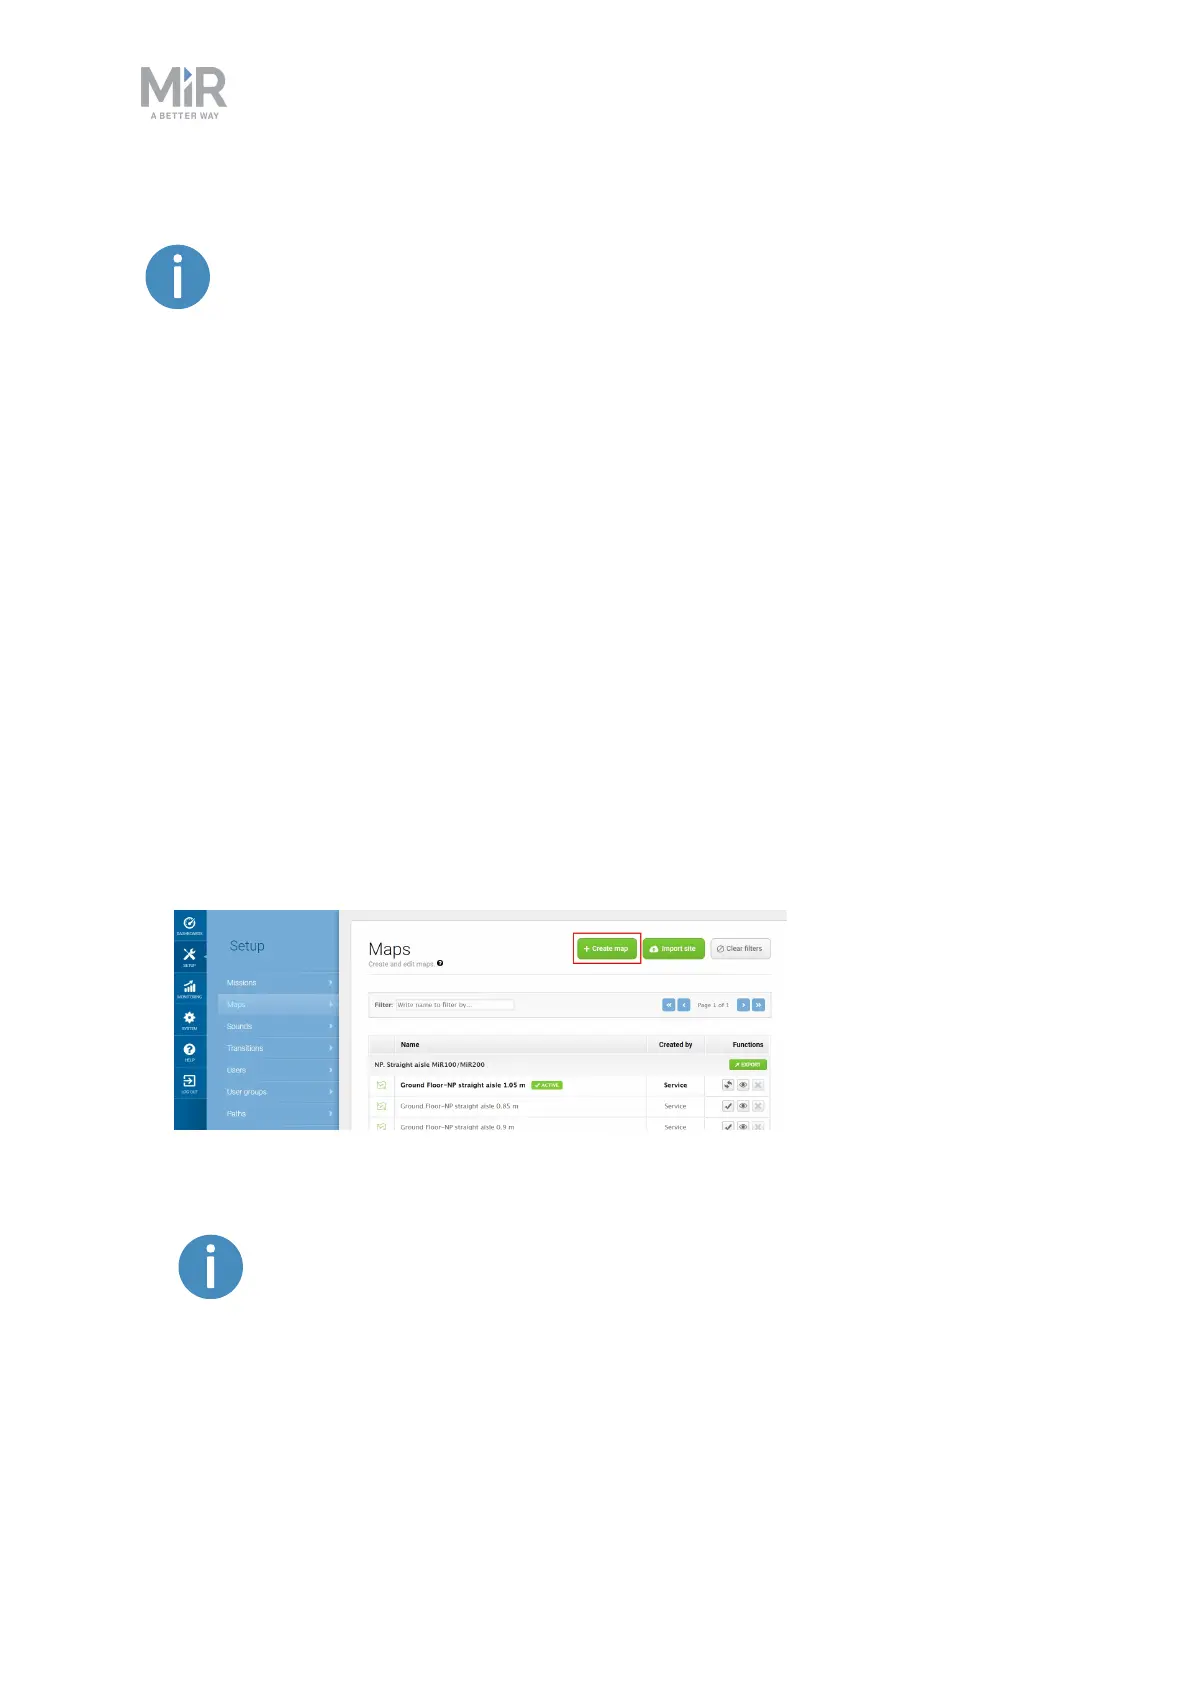
1. Sign in to the robot interface and Go to Setup > Maps.
2. Select Create map.
3. Name the map and choose a site for the map in the drop down menu.
The site is a collection of information. It stores maps and all related
information in a package that can be shared between robots. Ensure that
maps for the same facility are in the same site. In Setup > Maps you can
import sites.
4. Wait until the robot appears in the white square (3-5 seconds). This is a blank map.