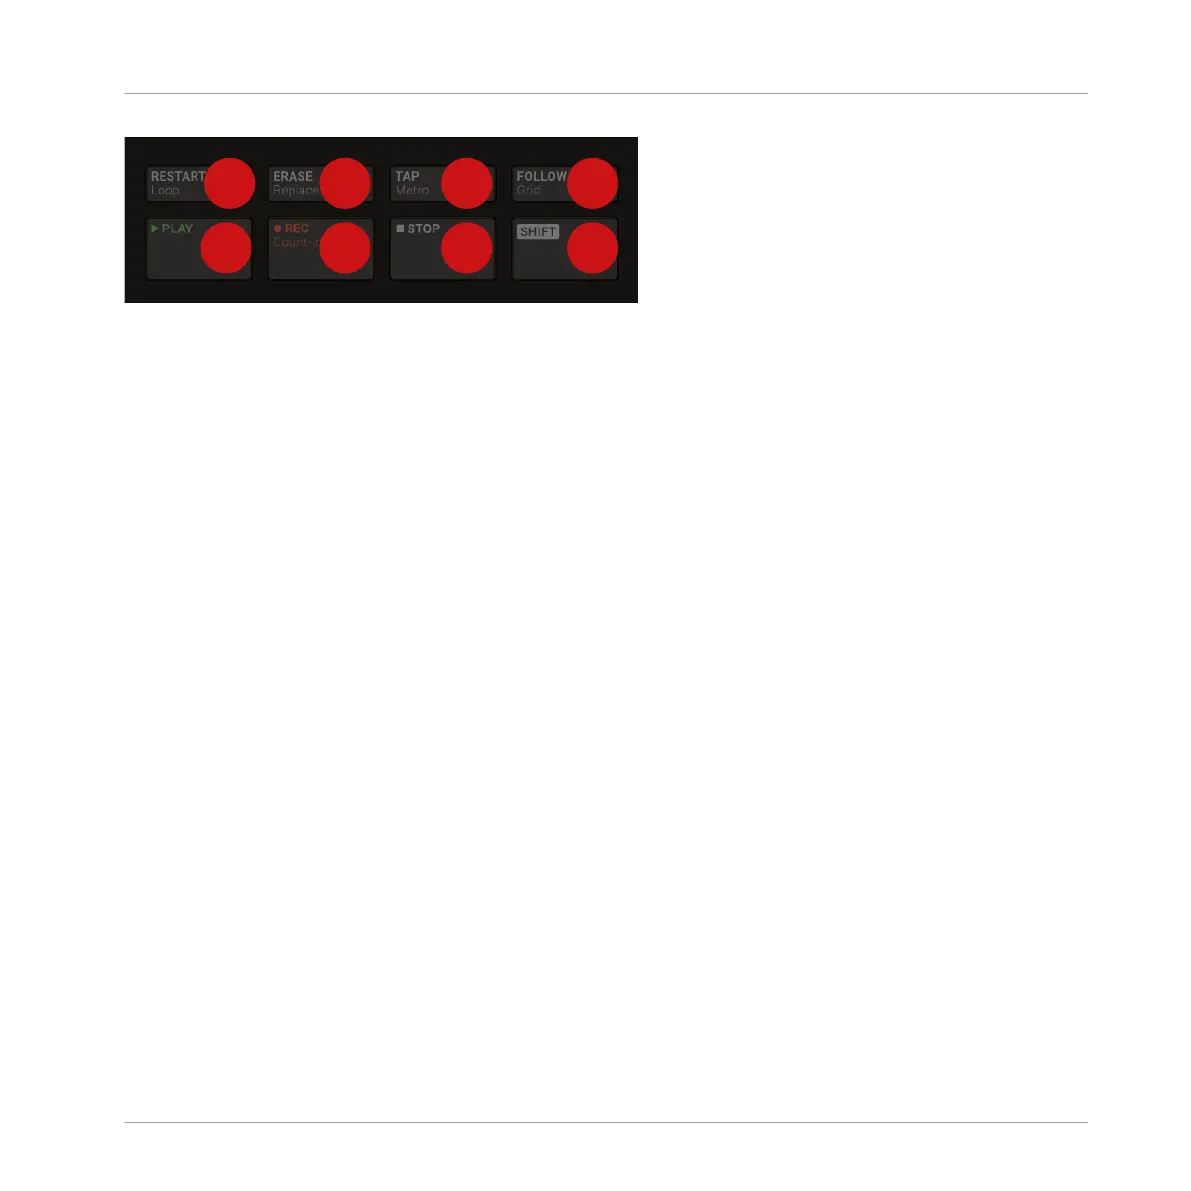
The Transport section on your controller.
(1) PLAY button: Press PLAY to activate playback. Press PLAY a second time to stop playback.
(2) REC button: When playback is on, press REC to begin recording. Or when playback is off,
press SHIFT + REC to begin recording with the Count-in. Press REC a second time to stop re-
cording. Hold the REC button to access Pattern Preset mode, this allows you to select the de-
sired Pattern Length before recording new Patterns.
(3) STOP button: Press STOP to stop playback.
(4) RESTART button: Press the RESTART button at any time to restart from the beginning of the
current loop range. Used together with SHIFT (8), the RESTART button lets you easily adjust
the Loop in many ways: Press SHIFT + RESTART to enable/disable looping. Hold SHIFT + RE-
START and turn the 4-D encoder to move the entire Loop along the Timeline, or “push & turn”
the encoder to adjust only the end point of the Loop. While you hold SHIFT + RESTART, the
displays provide another useful set of looping controls.
(5) ERASE button: During playback, hold ERASE and hold any number of pads or Group but-
tons to erase the events for the corresponding Sounds or Groups on the fly as the playback
goes on. Use the shortcut ERASE + EVENTS + pad to quickly erase all events triggered by that
pad in your Pattern. If you automated a parameter, hold ERASE and turn the corresponding
Knob under the displays to erase the automation of this parameter. Press SHIFT + ERASE +
any pad or Group button to completely remove the Sound or Group in that slot.
(6) TAP button: Repeatedly tap the TAP button to set the desired tempo. Press SHIFT + TAP to
quickly enable/disable the metronome.
(7) FOLLOW button: If you activate FOLLOW, time-related displays (like the Pattern Editor) will
show the next part as the playhead goes beyond the current part, so that you always see where
the playhead is. Press SHIFT + FOLLOW to open Grid mode and adjust the grids to define how
Quick Reference
MASCHINE Hardware Overview
MASCHINE - Getting Started - 196