1. Before Setting Up Your Projector
33
Remarks for cover mounting and removal
- "A: Side cover", "B: Front cover", "E: Lens side cover", and "F: Lamp replacement cover" are
equipped with key locks. Special keys (cover key or lamp cover key) are required to mount or
remove them.
- "C: Top front cover" cannot be removed unless "A: Side cover" and "E: Lens side cover" are
removed in advance.
- "D: Top rear cover" cannot be removed unless "A: Side cover", "C: Top front cover", "E: Lens
side cover", and "F: Lamp replacement cover" are removed in advance.
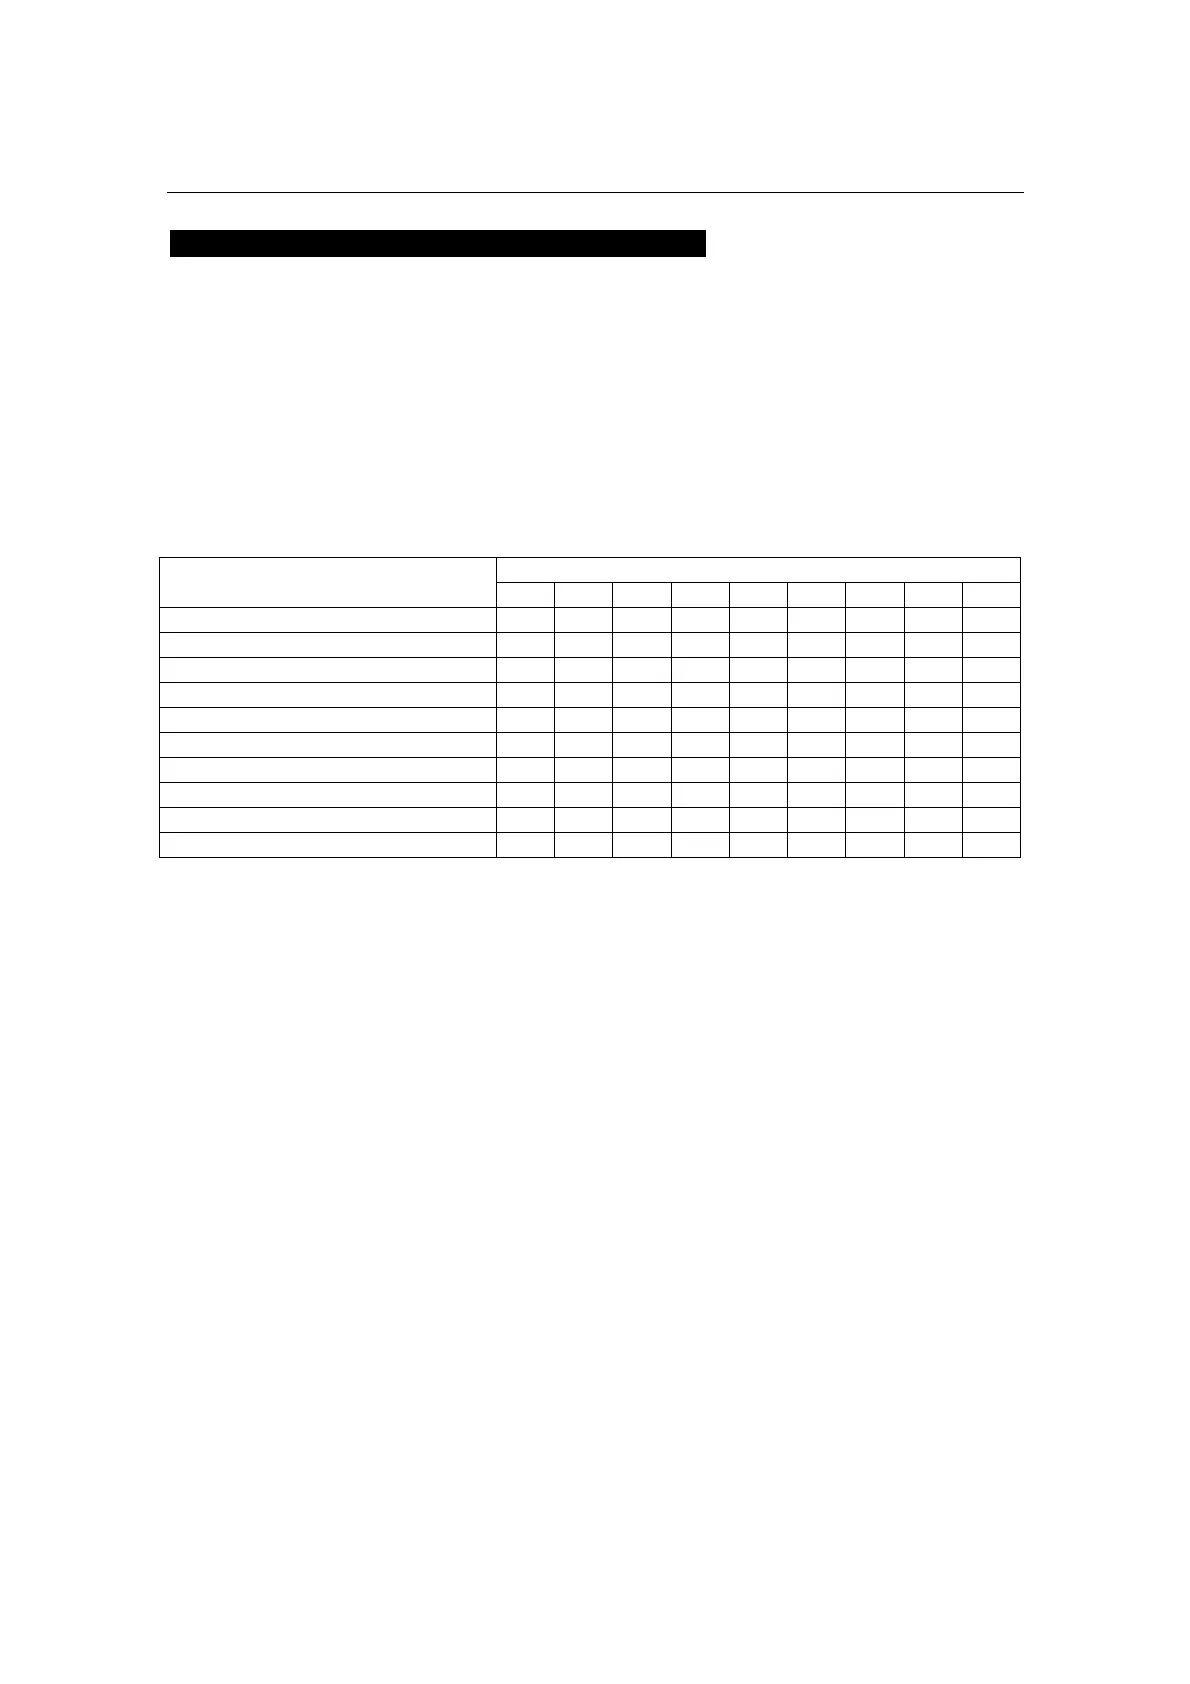
The table below shows the covers which need to be removed at each step.
Step Covers (*:the covers which need to be removed at each step)
A B C D E F G H1 H2
Connecting the Lamp power cable *
Connecting the Lamp control cable *
Connecting the AC power cable *
Mounting the Primary lens *
Mounting the wide converter lens turret * *
Mounting the Small iris *
Mounting the Media Block (optional) *
Mounting the SIB (optional)(Note1) *
Mounting the MMS (optional) *
Mounting the Exhaust equipment
Note1: SIB (NC-80LB01)is equipped to NC3200S at factory default. Nothing is equipped to NC3200S-A/
NC-3240S-A at factory default.