21
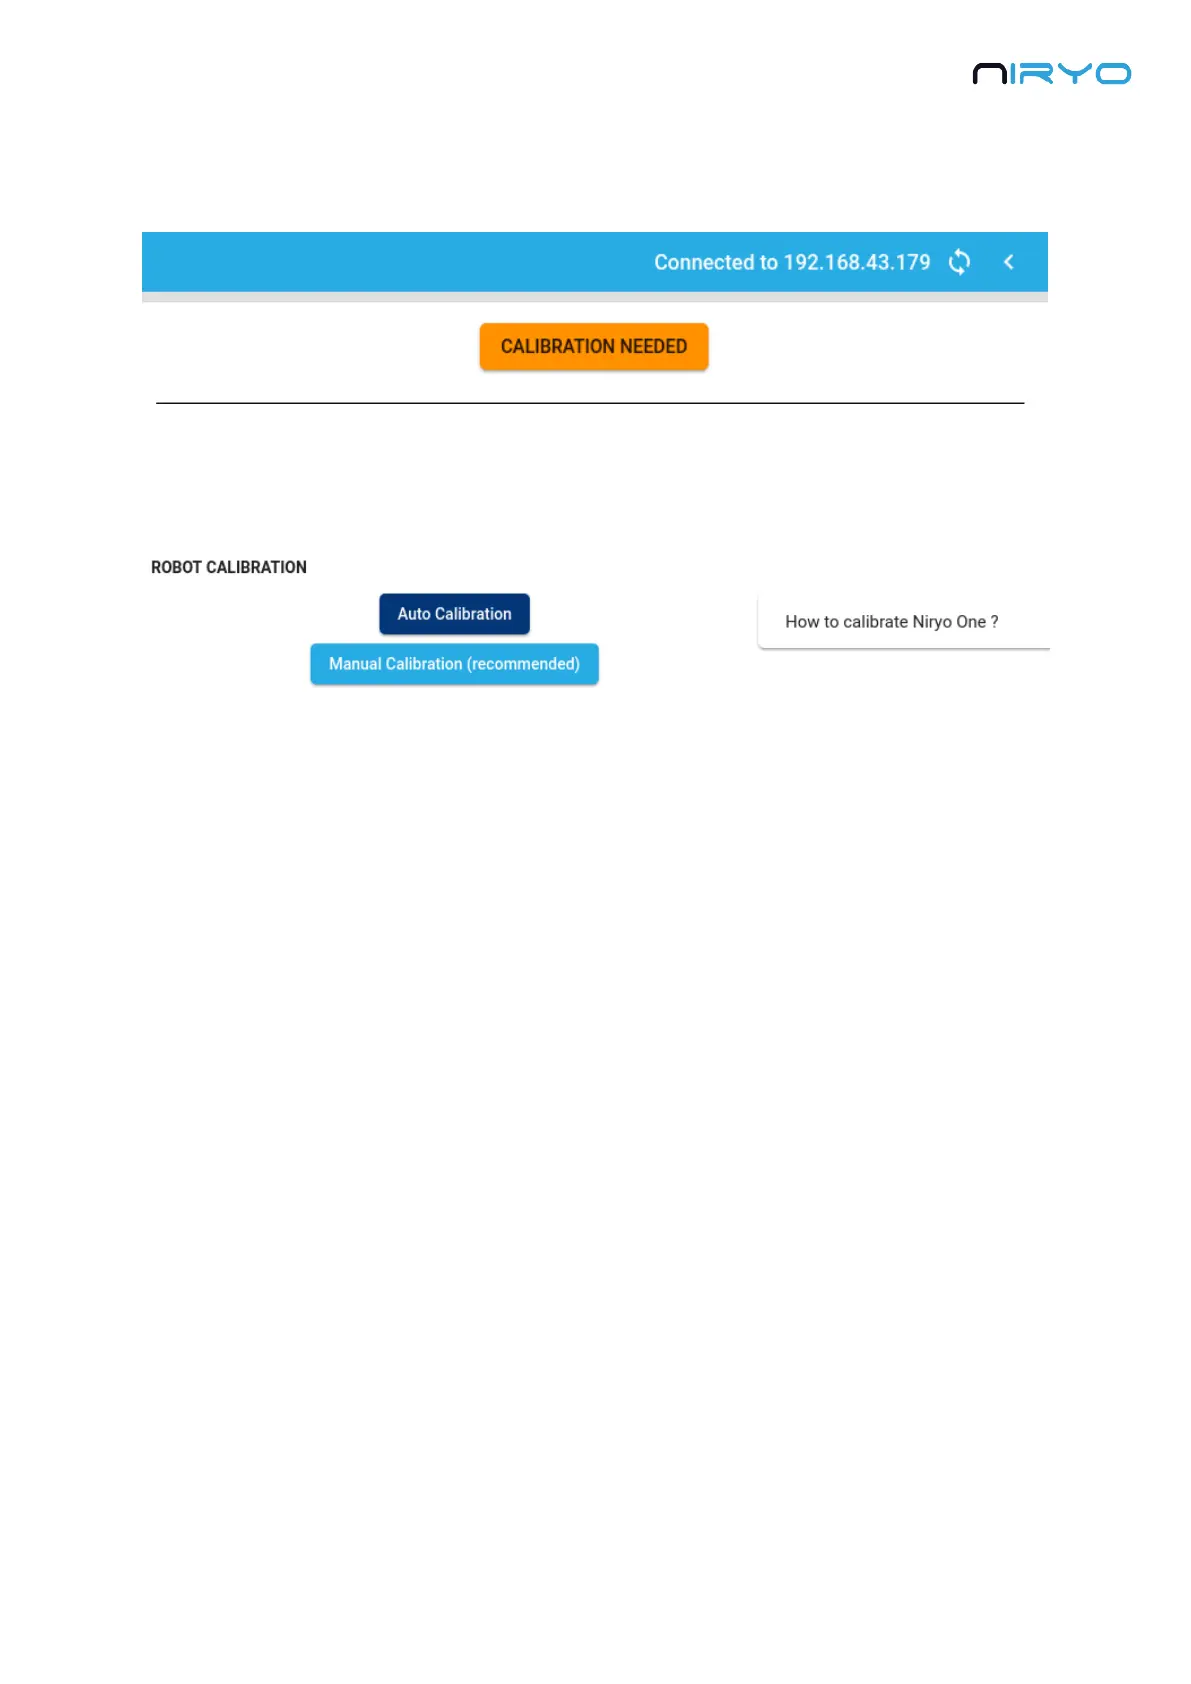
Once connected, you will easily find out if a calibration is needed. In this case, you’ll see a
“Calibration needed” blinking warning on the top right of Niryo One Studio.
Click on the warning, or on the calibration icon on the left menu to go on the calibration panel.
There are 2 available calibrations: auto calibration and manual calibration.
3.6.1 Auto-calibration
⚠ Before executing the auto-calibration, make sure that there is no obstacle near the robot.
Also we suggest that you remove any too attached to the robot before starting the auto-
calibration.
When you select the auto-calibration, the robot will move by itself (more precisely, the axis
which need to be calibrated will move until they reach their maximum position, so a correct
offset can be applied to each motor). The auto-calibration should take about 30-40 seconds.
After the calibration is finished, the robot will come back to a resting position.
If the calibration is not successful, the “Calibration needed” warning will still be displayed. It
can happen sometimes. Try 2 or 3 more times to calibrate the robot. If it still doesn’t work, then
it means that your robot has a mechanical/hardware issue.
You won’t get a success message after the calibration is done. The success message you
get when clicking on the auto-calibration button is just to tell you that the calibration has been
started.
3.6.2 Manual calibration (recommended)
The manual calibration is the recommended way to calibrate the robot. You just have to place
the axis approximately at a given position, and the robot will compute the needed offset. You
don’t lose any precision by doing that, in fact, the precision will be the same as the last auto-
calibration.