25
The 3D view can help you see if a manual or auto calibration was not done correctly. If
there is an offset between what you see on the screen and your robot (ex: the axis 1 is clearly
not at the same position), then you should probably do the auto-calibration again.
2. “Learning mode” button. Activating the learning mode will deactivate the torque on all
motors. When the robot is in “learning mode”, you can move it with your hand. When the
“learning mode” is off, the torque is activated on all motors and you can’t move the robot with
your hand.
When the robot is powered on and you don’t use it, it’s better to let it in “learning mode”.
This will avoid heat and motor problems on the long run.
3. Current joints state (1-6)
4. Current TCP (Tool Center Point) position and orientation
5. “Save current position” button. You can save the current position and give it a name, so you
can reuse it later.
6. Current arm max speed. You can modify it at any time (0-100%).
7. Current selected tool
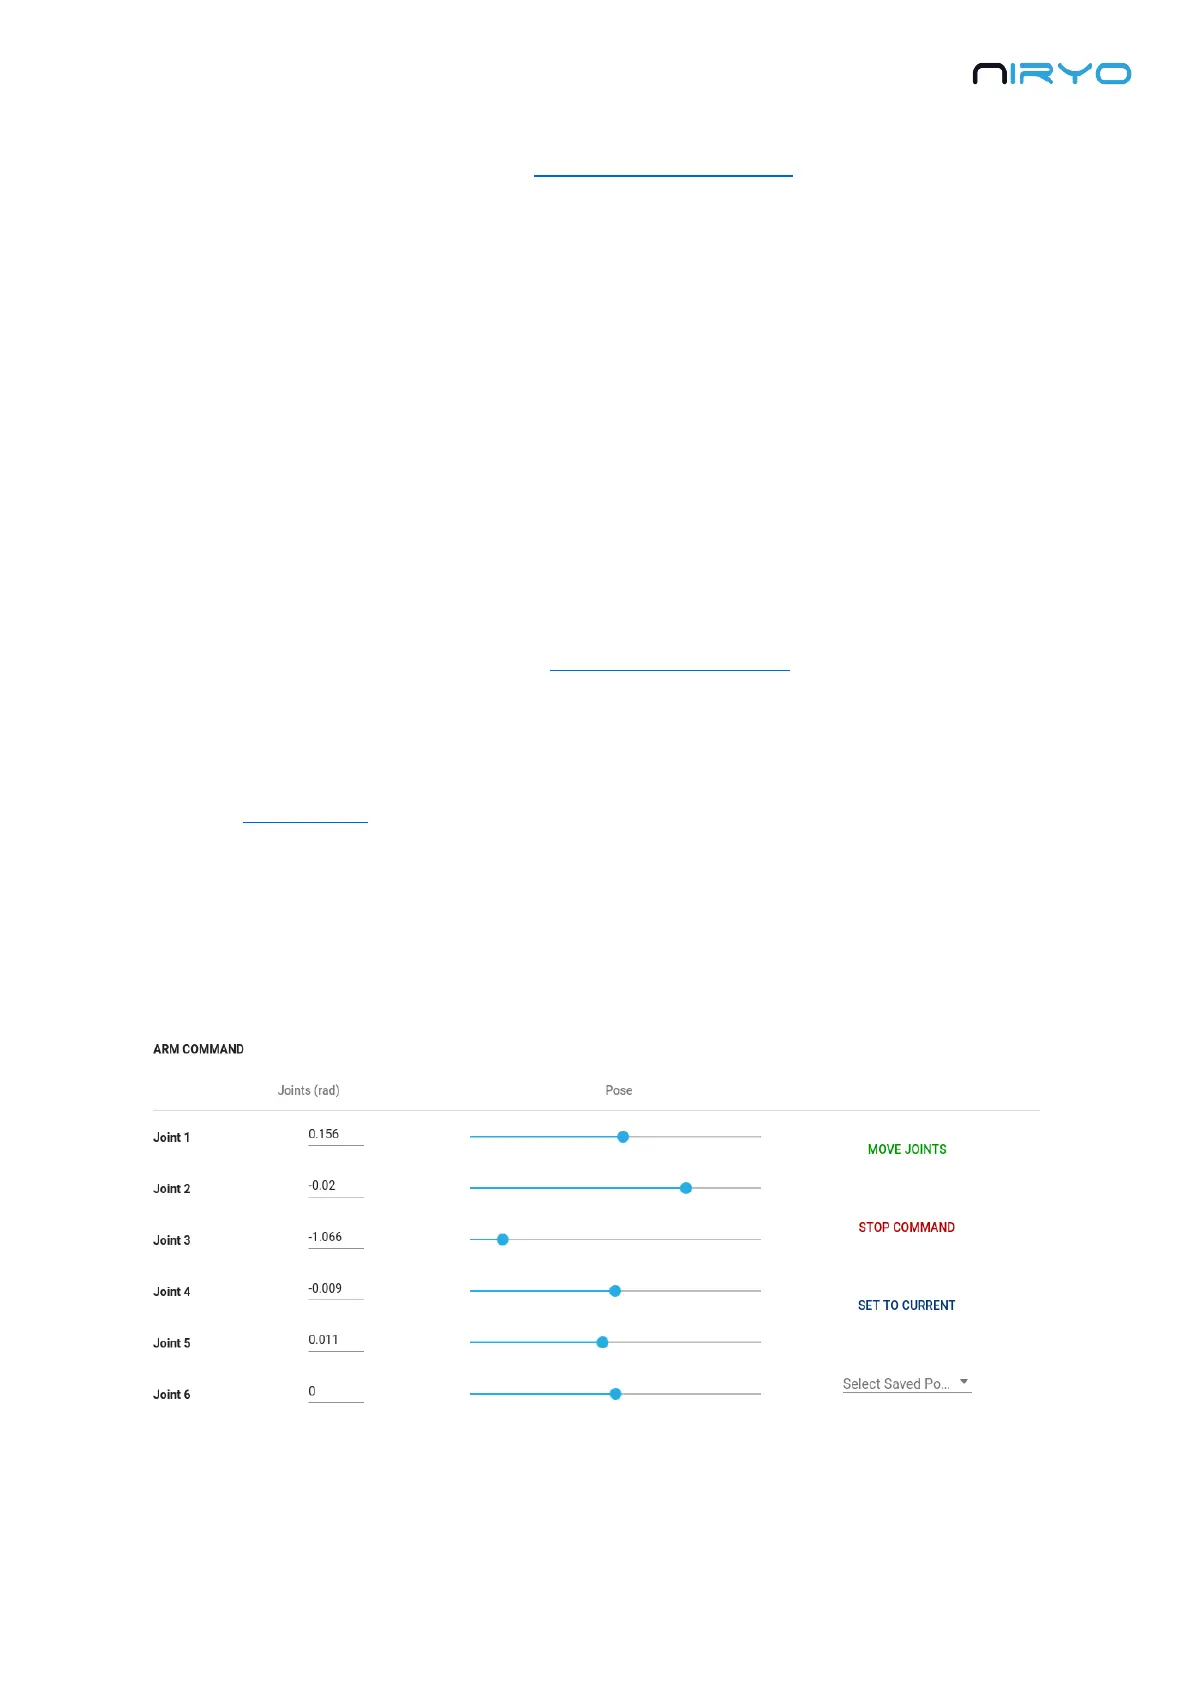
4.2 Move the robot
Go to the command panel. You’ll see 3 different sections. Here we’ll focus on the “Arm
command” section.
You can use either the “joints” tab or the “pose” tab.