Repair
6-9
Part 1612500−02
E 2018 Nordson Corporation
Cable Installation
1. See Figure 6-7. Feed a new cable through the handle base, then install
the E-ring (32) on the cable to hold it in place.
2. Connect the cable to the trigger switch and power supply.
3. Connect the cable terminal to the ground pad (27) with the M3 x 6 screw
and lock washer (25, 26).
4. Tuck the cable connectors and ground wire into the gun, below the
multiplier.
5. Hook the top of the ground pad into the gun body, then rotate it into
position on the handle.
6. Push the handle base (39) up against the handle and ground pad, and
tighten securely the two M3 x 20 screws (31B) in the base.
7. See Figure 6-1. Install the bottom M3 x 20 screw (31B) in the housing
(29) and tighten it securely.
Trigger Switch Replacement
Switch Removal
1. See Figure 6-7. Remove the ground pad as described in Cable
Removal steps 1−5 . You do not have to disconnect the ground cable
from the ground pad.
2. Pull out the round trigger connectors out of the handle and disconnect
them.
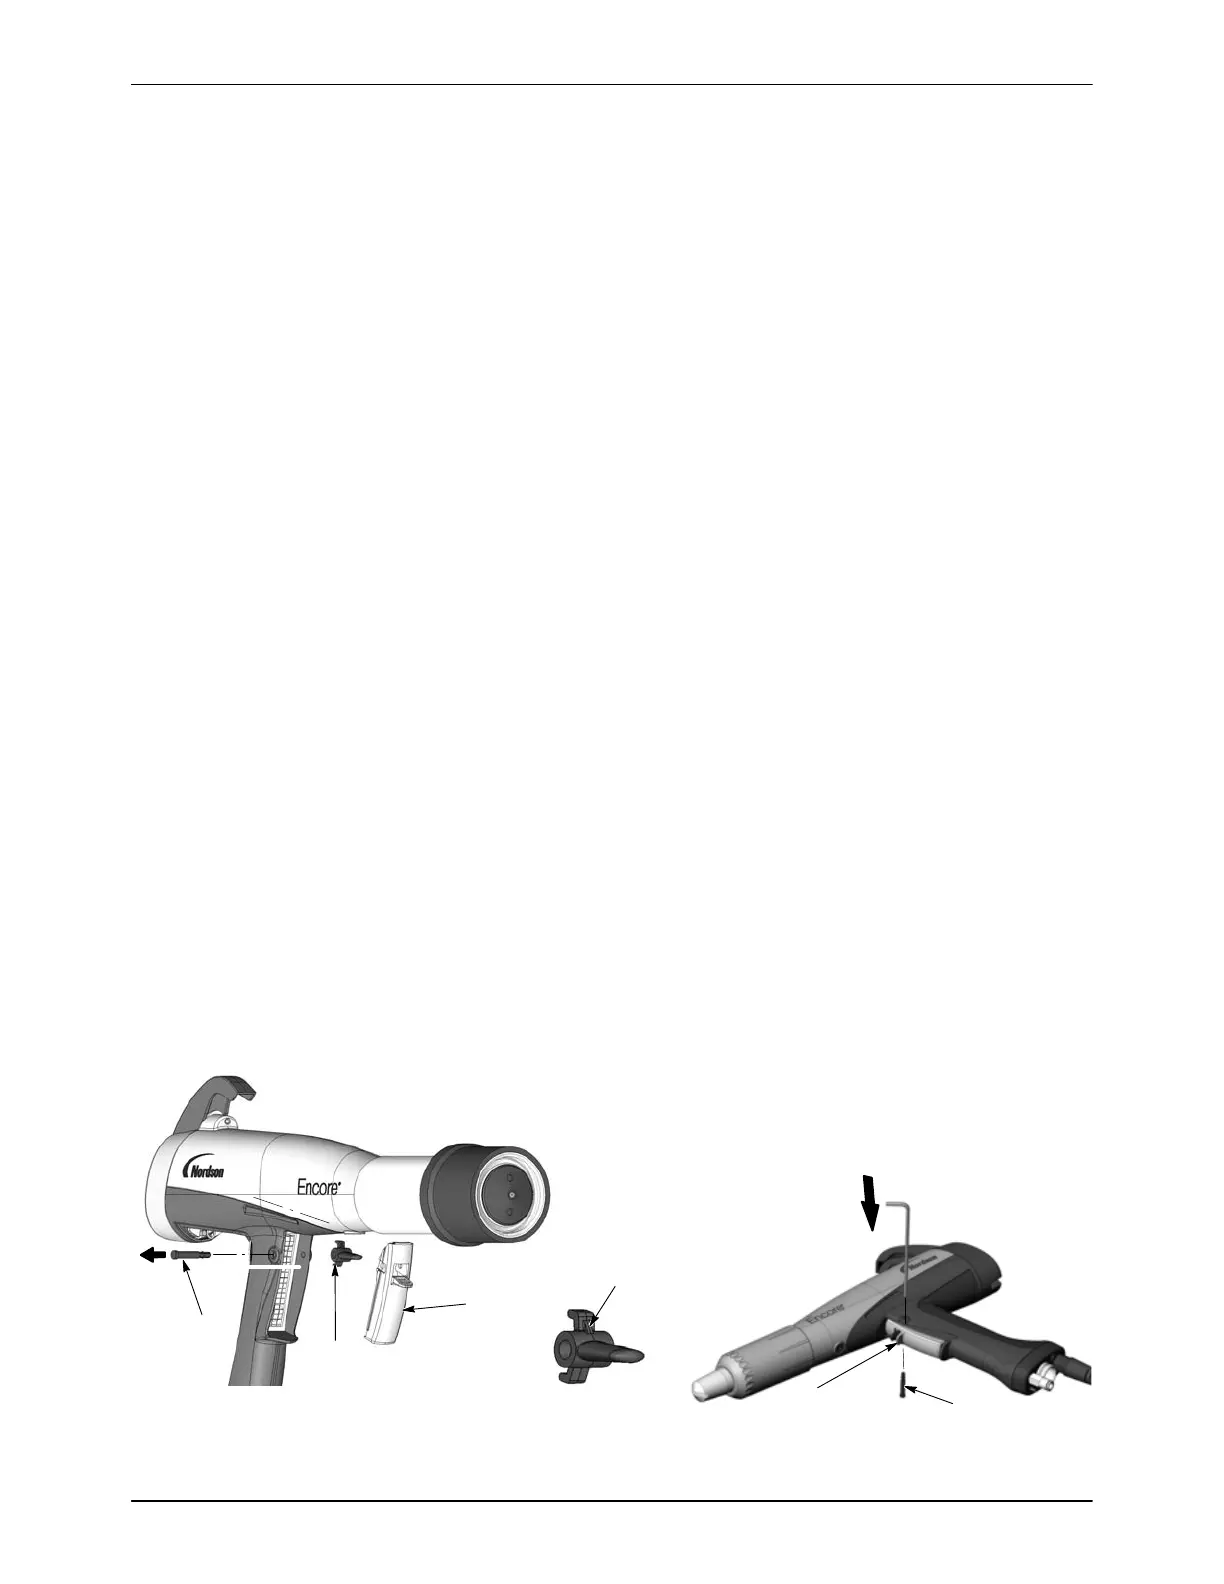
3. See Figure 6-8. Place the spray gun on a solid surface so the small
diameter end of the trigger axle (41A) is oriented upward.
4. Using a small, flat-ended punch or Allen key, apply light downward
pressure to the small diameter end of the trigger axle (41A) and lightly
tap to remove.
5. Remove the spray trigger (41), actuator (42, not shown), and purge
trigger (43) from the handle.
41A
41
41A
43
41
Gusset
Figure 6-8 Removing the Axle and Trigger from the Handle

 Loading...
