3.4.1 Connecting an input device
On the back of the music center you fi nd an analog Audio In port (26) for
tape decks, or similar components. Connecting a vintage turntable mostly
needs an additional phono pre-amplifi er. But usually all your components are
connected to a central stereo amplifi er, whose audio output signals (LINE
OUT) are well suited for the music center.
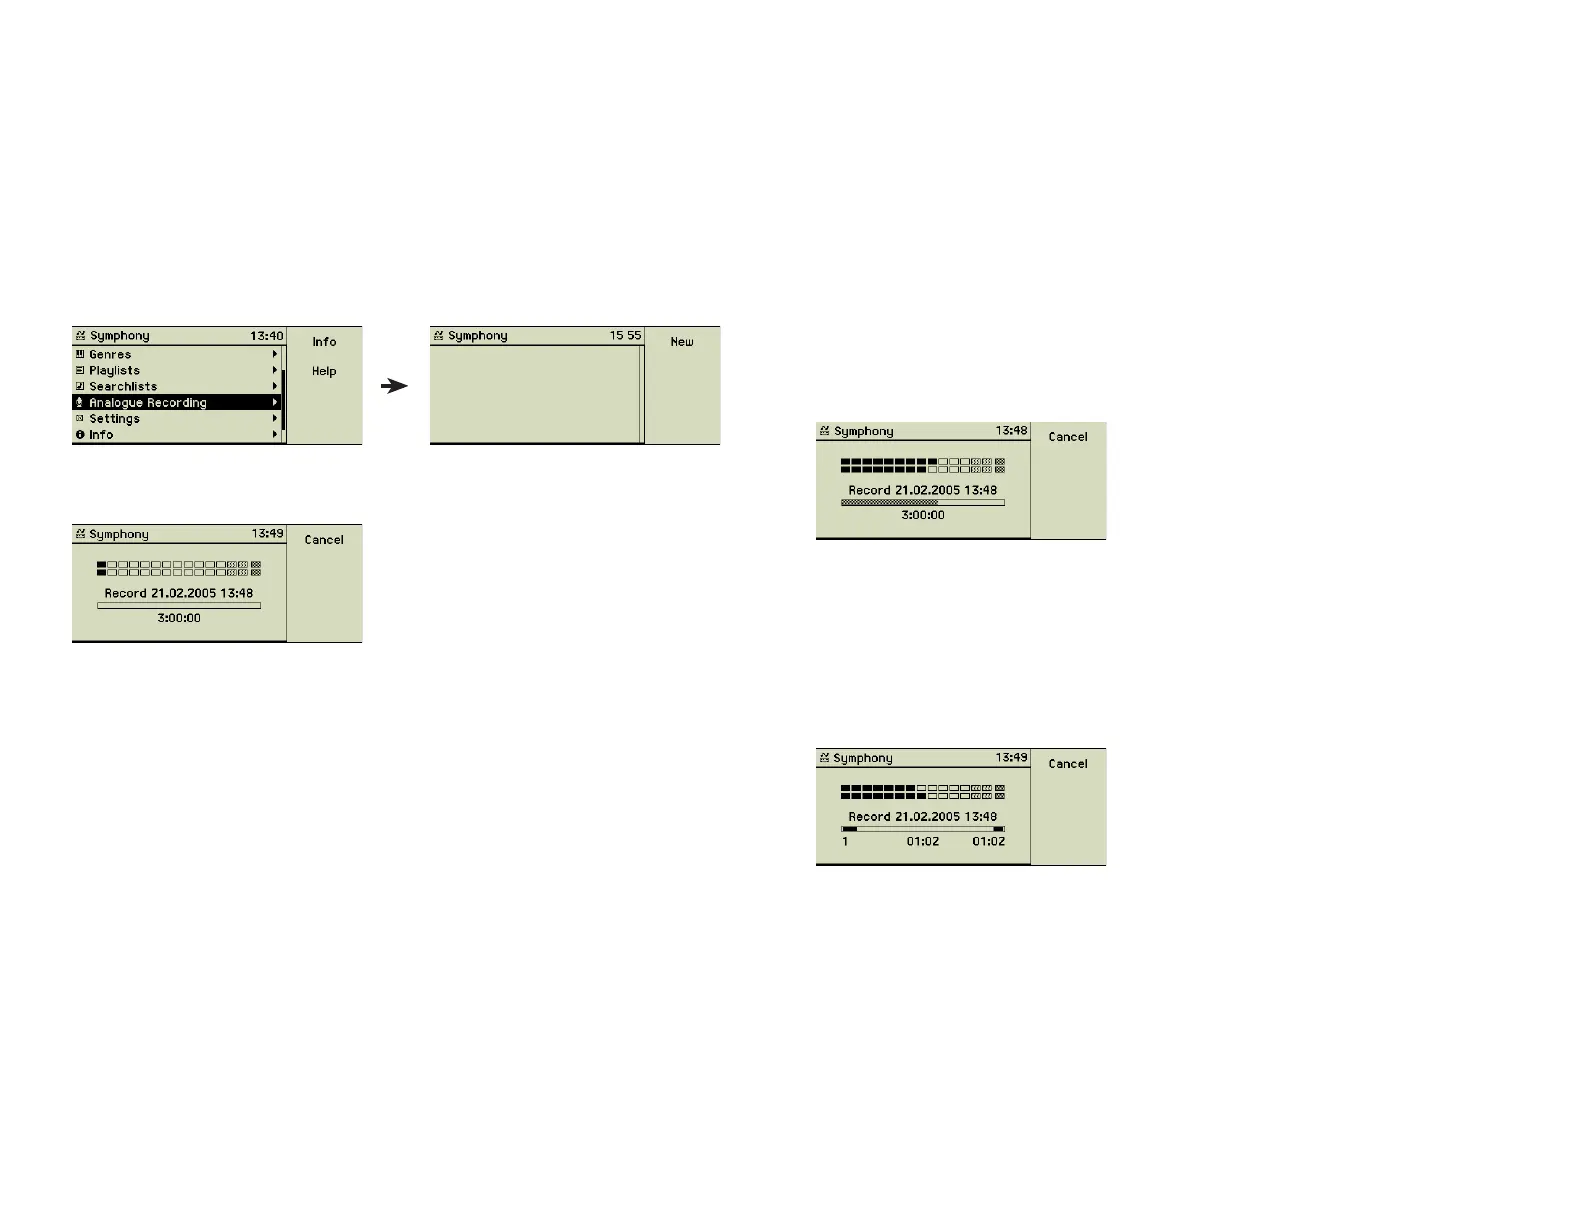
3.4.2 Creating a new recording
Choose the main menu option Analogue Recording.
Press function key 1 “New” or the Record button (7) at the front of your music
center to prepare for the recording.
The default name of the song, generated from the current date and time, is dis-
played. The available recording time is shown beneath. It depends on the free
space of your music center. The more songs your music center already stores,
the smaller becomes the free space for recordings. The maximum recording
time is set to three hours. This equals to a fi le size of about 2 GB.
The music center stores your recording twice: First as an uncompressed AIFF
fi le and after cutting the recording to single tracks, these songs as individ-
ual entries. These songs are fi nally imported into the music centerʼs music
library.
3.4.3 Adjusting the record level
The level of the analog input is shown on the display. Use this to adjust the
record level. Start your tape or other source and play some of the loudest
parts of the music.
Auto adjust level
If your music center is set to “Auto adjust level” (see section 4.6 «Analog
recording» on page 26 for details) play two or three songs to get a repre-
sentative sample. After the recording has been started the recording level is
changed only if overmodulations are detected.
Manual adjust
If you want to adjust the recording level manually, watch the level display
closely. Use the inner wheel of the Turn&Select wheel (11) to adjust the level.
The loudest parts of the music should bring the peak level display to its maxi-
mum without getting to the rightmost, blackrimmed element. Your selected
record level is displayed by the lower row, while the upper row shows the
current input level using your current record level settings.
Manual adjusted record levels are never changed by the music center, even if
this yields to an overmodulation of the recording.
You may now stop the playback of your music source.
3.4.4 Start the recording
When all adjustments are done rewind your tape to the start and press the
Play button (5) of the music center.
Below the progress bar three values are displayed:
• left: number of the track
• centered: duration of the currently recorded track
• right: total duration of the recording
17