80
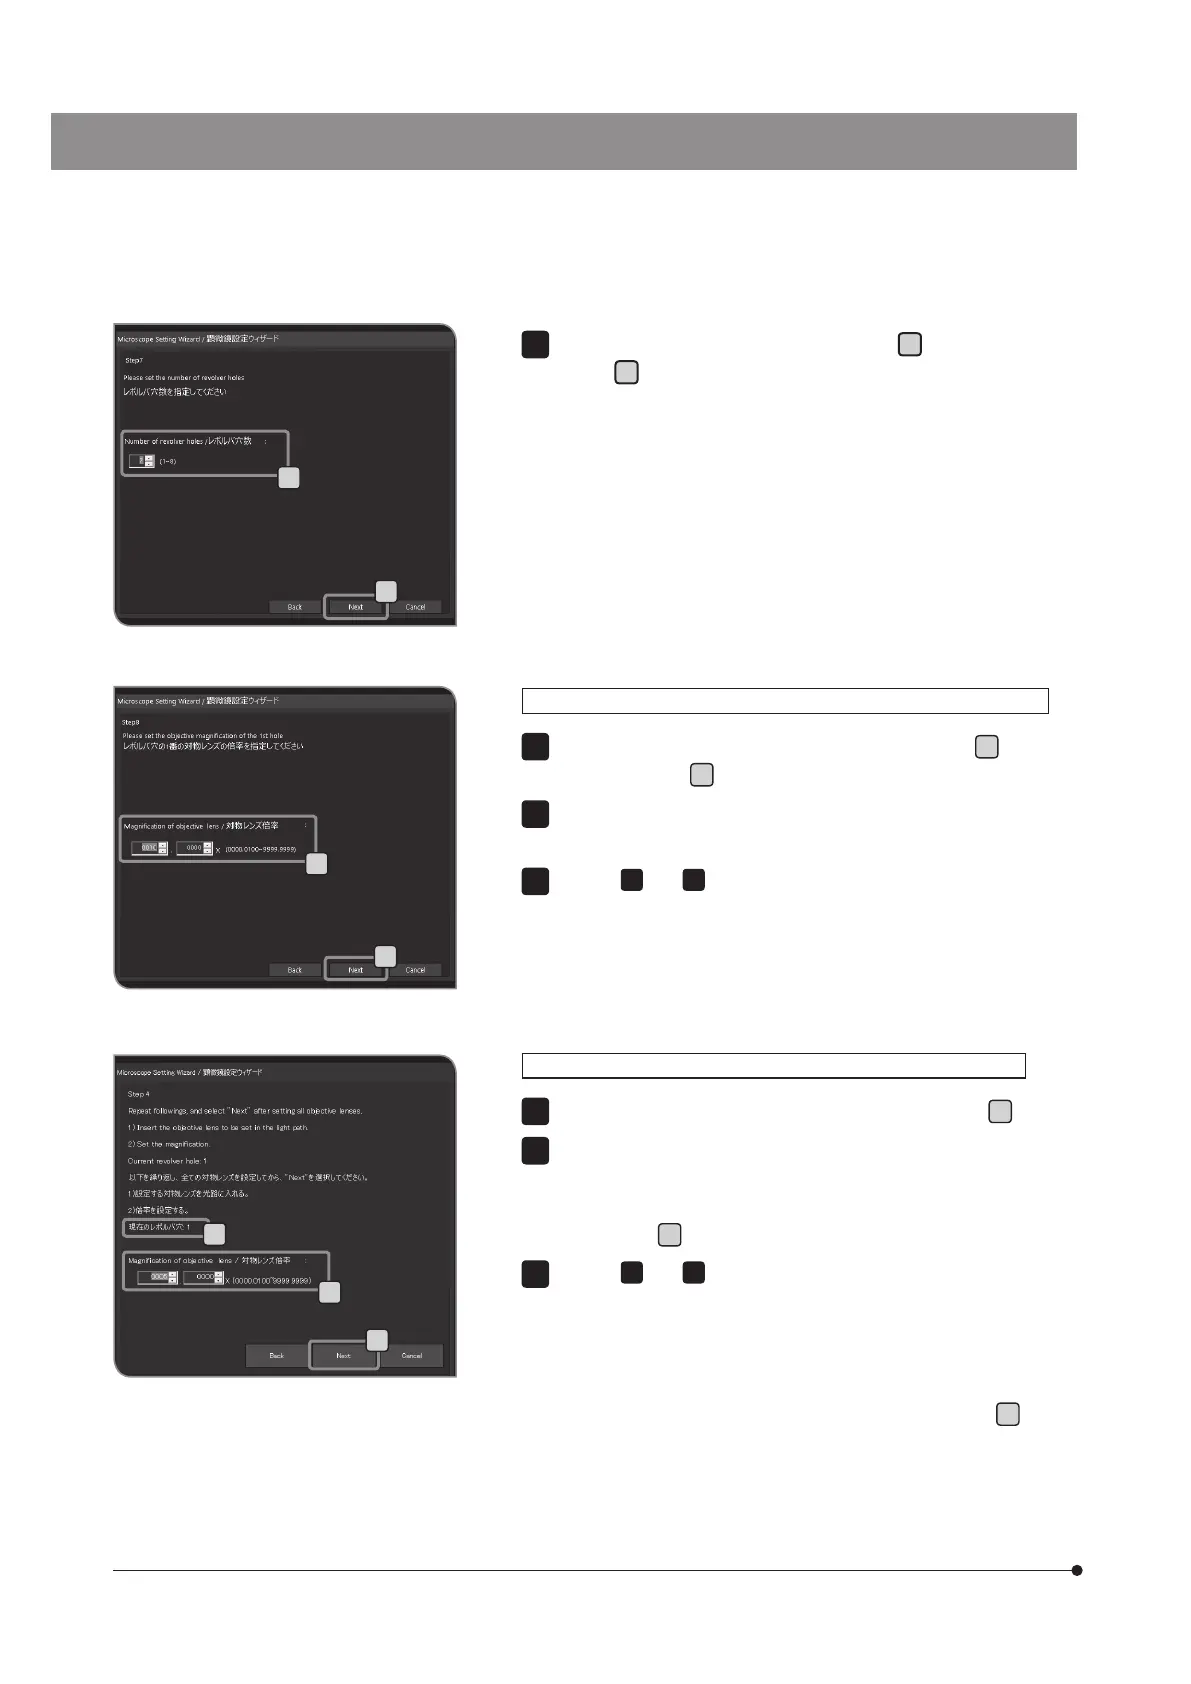
Set the magnification of the objective in the light path to
l
and press
the [Next] button
m
.
Rotate the revolving nosepiece of the microscope and engage the
adjacent objective into the light path.
Repeat
7
and
8
to set the objective magnification of each
revolving nosepiece hole.
You do not need to set the magnification of the hole where no
objective is inserted. Rotate the revolving nosepiece to set the
magnifications of other objectives.
Set the magnification of the objective in the light path to
n
.
Rotate the revolving nosepiece of the microscope and engage
the adjacent objective into the light path. The information of the
revolving nosepiece hole position is acquired automatically and is
displayed in
o
in the left picture.
Repeat
and
to set the objective magnification of each
revolving nosepiece hole.
You do not need to set the magnification of the hole where no
objective is inserted. Rotate the revolving nosepiece to set the
magnifications of other objectives.
When the settings are completed, press the [Next] button
p
.
} If no magnification is set to the hole, the initial value (10x) is set. If
you add the objective, set the magnification again.
When the revolving nosepiece without coded functions is combined
7
8
9
When the revolving nosepiece with coded functions is combined
7
8
9
l
m
Set the number of revolving nosepiece holes
j
, and press the [Next]
button
k
.
} This step is not displayed if the revolving nosepiece with coded
functions is combined.
If this step is displayed, go to “When the revolving nosepiece
without coded functions is combined” described below.
If this step is not displayed, go to “When the revolving nosepiece
with coded functions is combined” described below.
6
j
k
o
n
p