534
Installation and Initial Setup Section 9-8
• Do not lay the twisted-pair cable together with high-voltage lines.
• Do not lay the twisted-pair cable near devices that generate noise.
• Do not lay the twisted-pair cable in locations subject to high temperature
or high humidity.
• Do not lay the twisted-pair cable in locations subject to excessive dirt and
dust or to oil mist or other contaminants.
Hub Installation
Environment Precautions
• Do not install the hub near devices that generate noise.
• Do not install the hub in locations subject to high temperature or high
humidity.
• Do not install the hub in locations subject to excessive dirt and dust or to
oil mist or other contaminants.
Hub Connection Methods If more hub ports are required, they can be added by connecting more than
one hub. There are two possible connection methods for hubs: Cascade and
stacked.
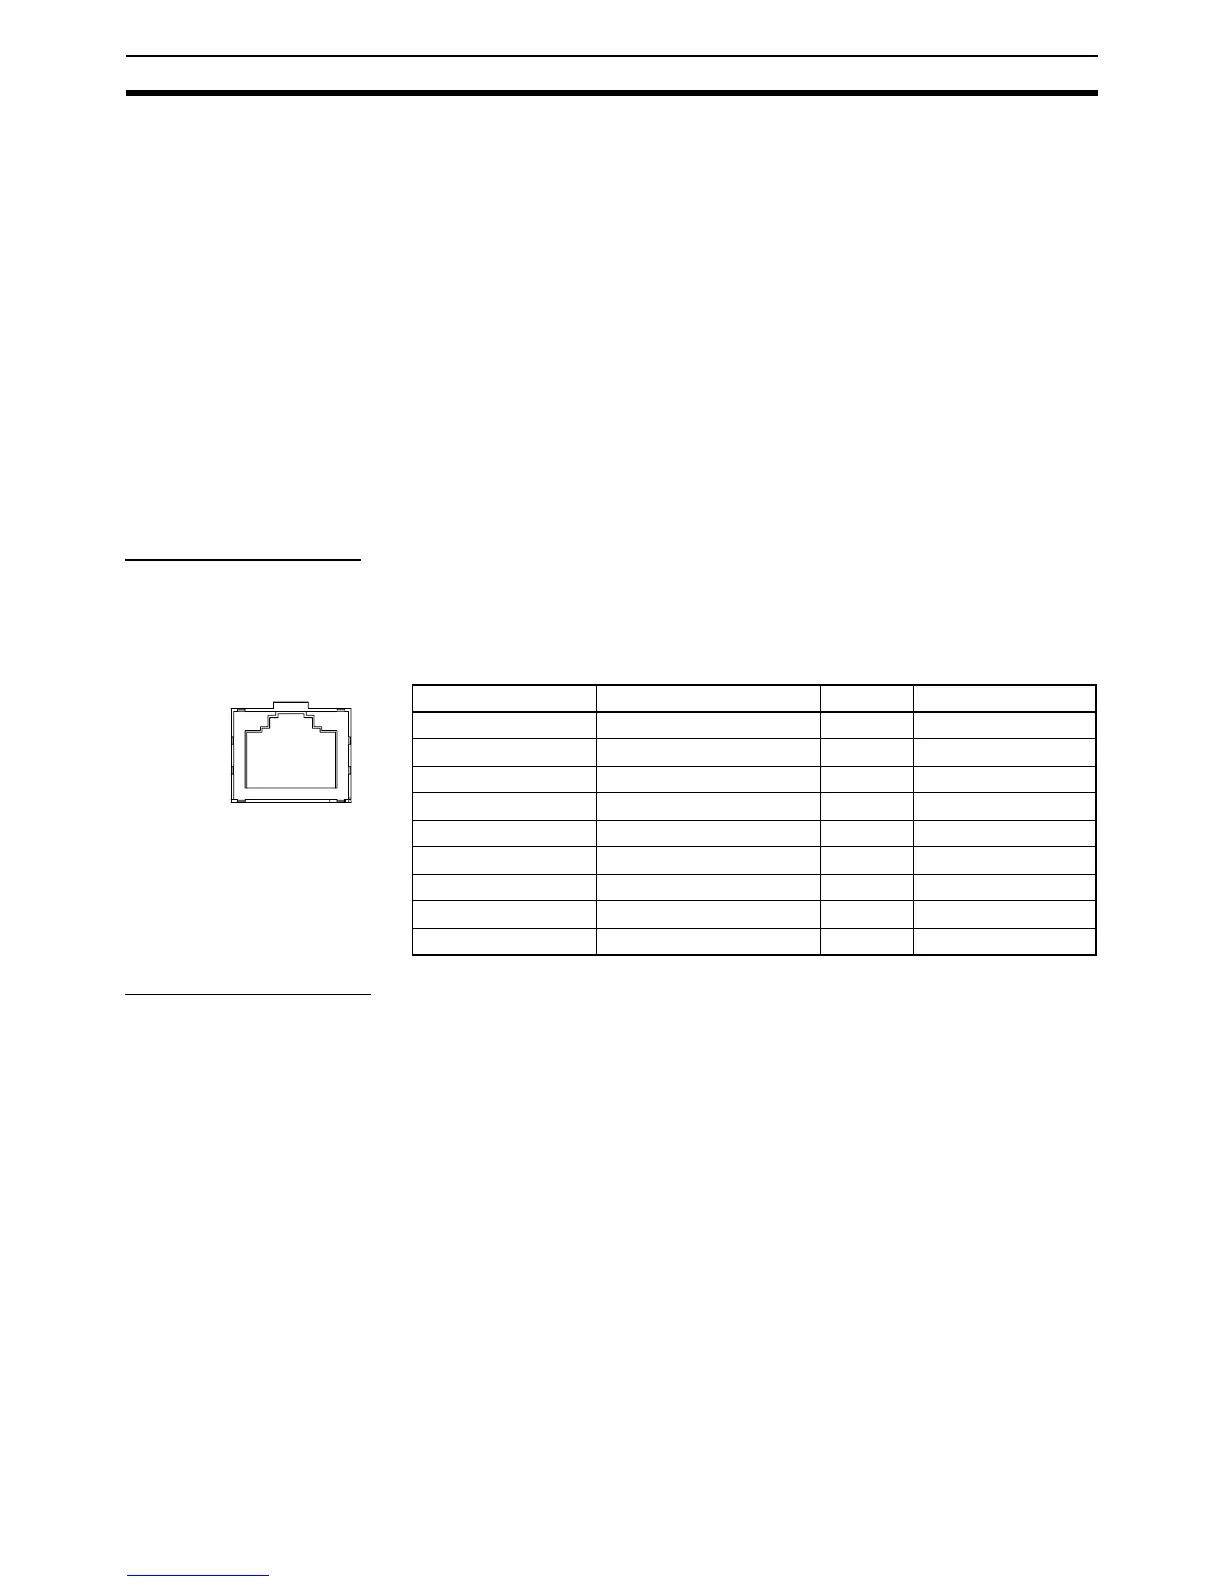
Ethernet Connectors The following standards and specifications apply to the connectors for the
Ethernet twisted-pair cable.
• Electrical specifications: Conforming to IEEE802.3 standards
• Connector structure: RJ45 8-pin Modular Connector
(conforming to ISO8877)
Connecting the Cable
!Caution Turn OFF the PLC’s power supply before connection or disconnecting twisted-
pair cable.
!Caution Allow enough space for the bending radius of the twisted-pair cable.
1,2,3... 1. Lay the twisted-pair cable.
2. Connect the cable to the hub. Be sure to press in the cable until it locks into
place.
Request cable installation from a qualified professional.
3. Connect the cable to the connector on the Ethernet Option Board. Be sure
to press in the cable until it locks into place.
Connector Pin Signal Name Abbr. Signal Direction
1 Transmission data + TD+ Output
2 Transmission data - TD- Output
3 Reception data + RD+ Input
4 Not used --- ---
5 Not used --- ---
6 Reception data - RD- Input
7 Not used --- ---
8 Not used --- ---
Hood Frame ground FG ---