Chapter 8: Maintenance
NOTE: Make sure that the pin is short enough that you can pull it out
after the assembly is in place.
2.
Connect the motor cable to the new drive assembly.
3.
Install the new drive assembly over the three studs at the top of its bracket.
Use the nuts, screws, and washers you removed from the old drive assembly.
4.
Remove the pin or screw you used to hold the wheel in the up position.
5.
Put the side skin next to the platform, and attach the cable to the light disc PCA.
6.
Reinstall the side skin.
7.
Connect the battery power and data cables, and close the battery compartment door.
8.
Reinstall the rear skin.
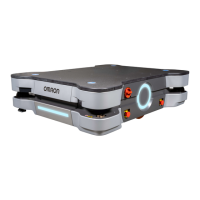
Front or Rear Casters
Check the casters every 3 months, and replace them if they show signs of cracking, excessive
wear, or any damage.
All four casters are identical, and are mounted to the platform in the same way.
NOTE: If you can lift the platform enough to access the screw that holds on the
caster, you can avoid removing the payload structure and the battery, which is
only necessary to tilt the platform on its side.
1.
Move the payload structure out of the way.
If the payload structure can be completely removed, do so. This enables you to tip the
AMR on its side, so you have access to the casters underneath.
2.
Remove the inner rear skin.
3.
Unlatch and open the battery door skin, at the back of the platform.
The battery compartment door is lockable. You may need to unlock it before opening.
4.
Disconnect the battery by unplugging the two cables at the rear of the battery.
5.
Remove the battery from the platform.
6.
Remove the side skins.
7.
Lay the body of the platform on its side, exposing the casters.
WARNING: MAGNETIC FIELD - MEDICALIMPLANTRISK
Magnetic fields can be hazardous to medical implant wearers. Medical
Implant wearers stay back 30 cm from the underside of the platform,
which is exposed during certain maintenance procedures when the plat-
form is tipped on its side.
Regardless of whether you removed the battery:
11970-000 Rev M LD-60/90 Platform User's Manual 145