Chapter 8: Maintenance
1.
Ensure that the E-Stop button is NOT depressed before starting.
2.
In MobilePlanner software, select:
Main Menu > Robot > Safety Commissioning
3.
Follow the on-screen instructions to complete the test. You can print a certificate after
successfully completing the commissioning.
Safety Laser Commissioning
This procedure verifies that the navigation laser reports speed zone information correctly, and
the E-Stop circuitry trips when an obstacle that the laser should detect is placed in front of the
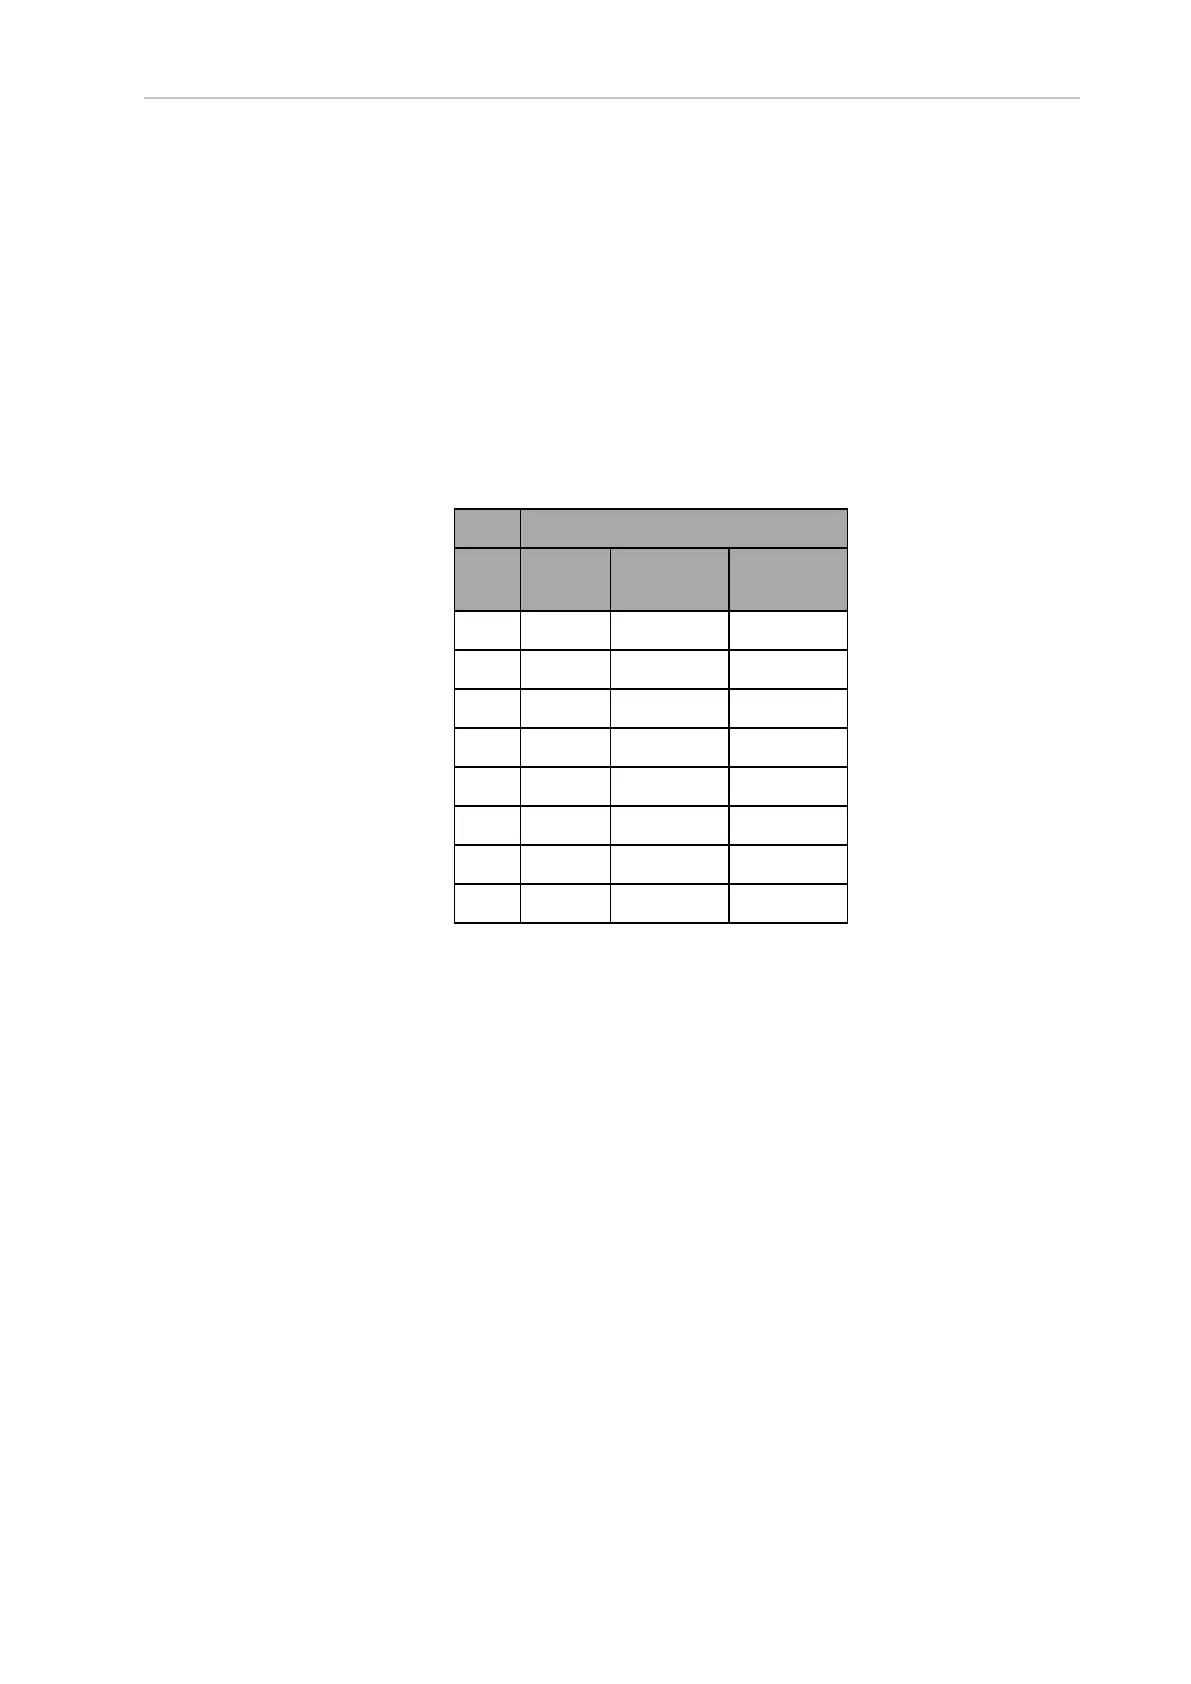
AMR. The speed zones are listed in the table that follows. For the LD-60, each speed zone rep-
resents 300 mm/s, so if the maximum speed is 1500, six zones should be reported. (When you
press the Drive button in the wizard, the wizard will display the maximum AMR speed.)
Maximum Speed (mm/s)
Zone LD-60
LD-90
LD-105CT
LD-130CT
0 300 225 150
1 600 450 300
2 900 675 450
3 1200 900 600
4 1500 1125 750
5 1800 1350 900
6 1800 1350 900
7 1800 1350 900
1.
From the MobilePlanner software, select:
Main Menu > Robot > Safety Commissioning
2.
Follow the on-screen instructions to complete the test. You can print a certificate after
successful completion of the commissioning.
Accessing the Payload Bay
Access to the payload bay depends on the design of your payload structure. A small, light pay-
load structure may be easily disconnected and simply lifted off, taking care not to damage any
of the wires connected to the platform.
A taller or heavier payload structure may have hinges, so that it can be tilted off of the plat-
form after being mechanically disconnected. For most payload structures, this will enable a
single technician to access the payload bay without assistance. Use care when accessing the
payload bay, that the wires and connections between the platform and the payload structure
are not disturbed when the payload structure is tilted.
11970-000 Rev M LD-60/90 Platform User's Manual 149