REGULATORY COMPLIANCE UL AND CE
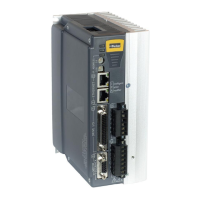
IPA Hardware Installation Guide 93
A Highly-Immune, Low-Emission Installation – Meeting the Requirements of the
Electromagnetic Compatibility (EMC) Directive
The following information was compiled to aid the machine builder or systems integrator in gaining EMC
compliance. For effective control of Conducted and Radiated Emissions, along with maximizing the IPA Drive’s
inherent noise immunity, the following recommendations should be followed. A drawing of a typical EMC
installation is shown below.
Mount the Drive and all components to a clean (not painted), earthed, metal panel. For proper control of Electrical
Noise, paint must be removed from areas providing RF bonding such as the Drive and mains filter mounting
location and cable R-Clamps, etc.
IMPORTANT: To reduce the risk of electrical noise entering your system you must
properly earth ground the enclosure, and remove all paint and other
non-conductive surface coatings from the panel mounting surface and
RF earth bonding locations.
If you mount the IPA drive in an equipment cabinet, terminate cable
braids (screens) at the entrance of the enclosure. This can be easily
accomplished using the “additional EMC installation hardware” shown
below.
The only exception is for the motor braid, which must return to the
drive’s R-Clamp (located on the front of the IPA drive). Do not return
the motor braid to any other location as its function is to return high-
frequency chopping current back to the drive. This may require
mounting an auxiliary connector on a sub-panel insulated from the
main cabinet, or using a connector having an insulated internal screen
from the connector housing.
The shields of all other cables that enter or exit the enclosure must be
RF bonded to the enclosure entrance point using an R-Clamp,
bulkhead clamshell clamp, or other 360° bonding technique. This
ensures that no stray noise will enter or exit the enclosure. The
following drawing illustrates 360° bonding techniques.