Splitting the crankcase halves
- Before opening the crankcase, it is advisable to
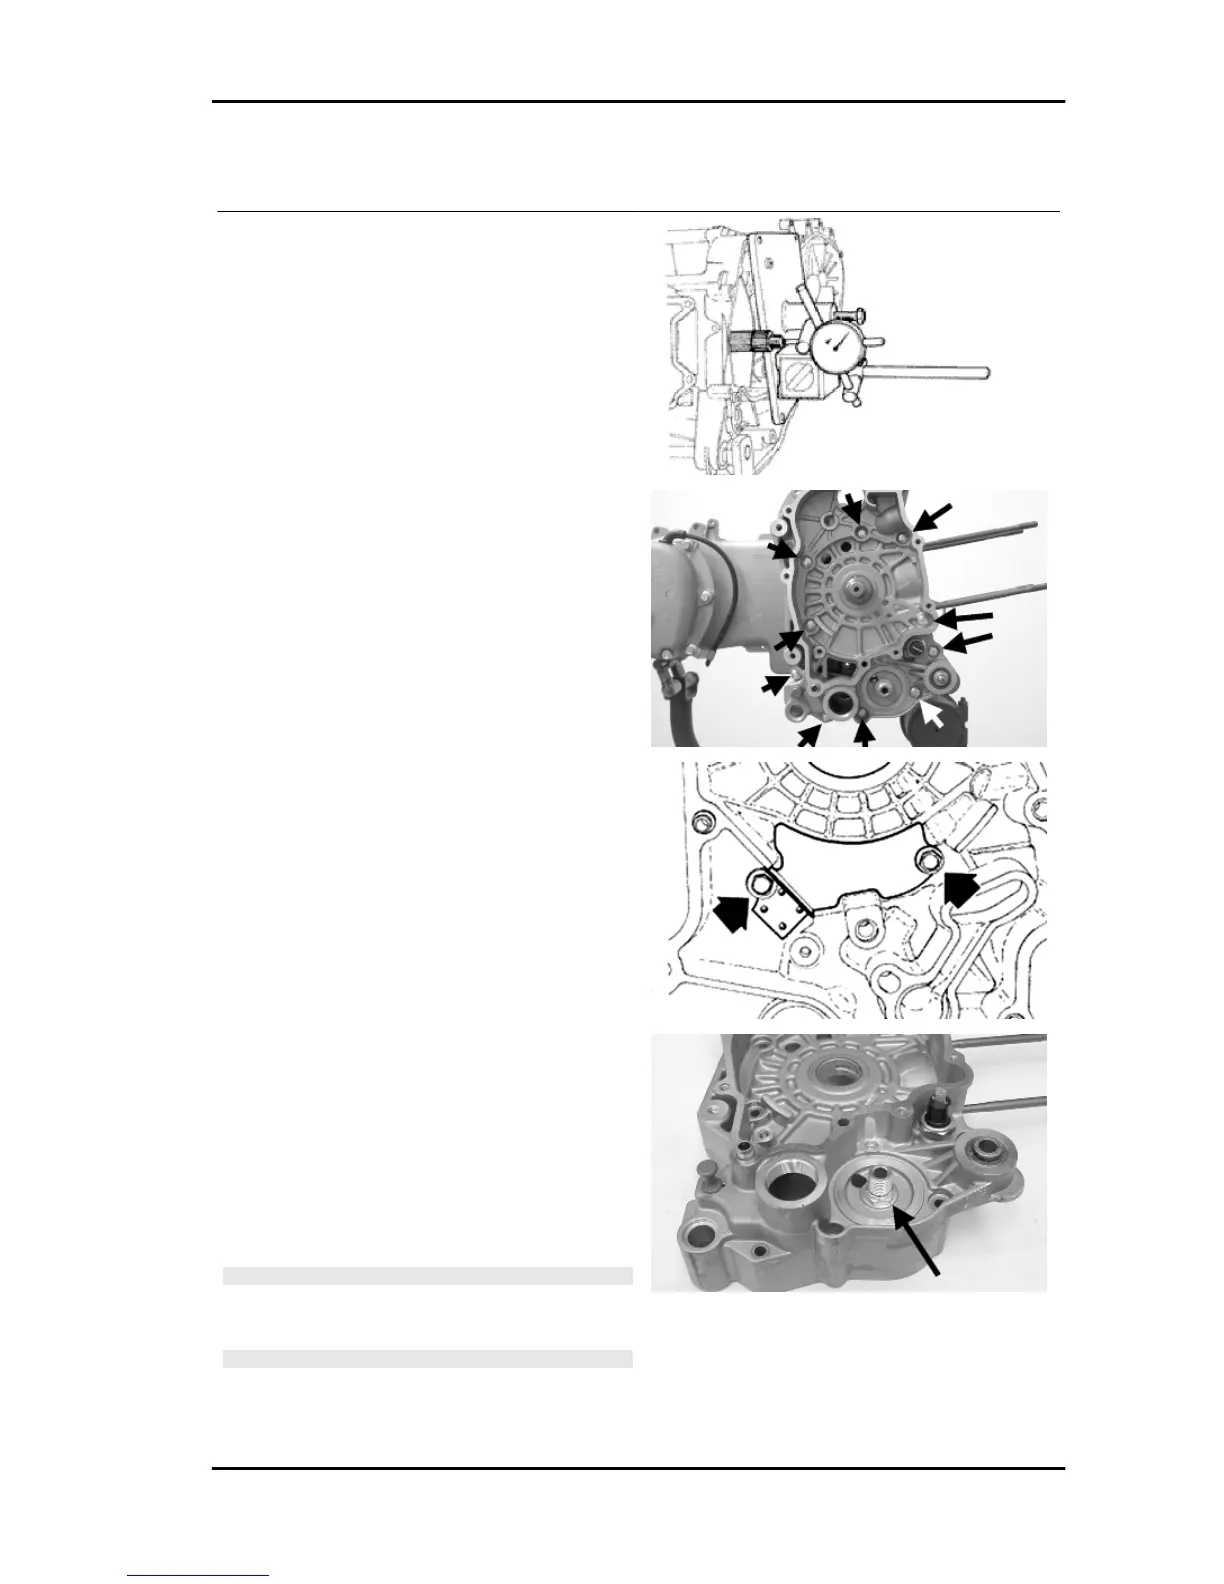
check the axial clearance of the crankshaft. To do
this, use a plate and a support with appropriate tool
dial gauge.
- Upper clearances are an indication of wear on
the surfaces of the crankshaft casing support.
- Remove the 10 crankshaft coupling screws.
- Separate the crankcase while keeping the crank-
shaft in one of the two halves of the crankcase.
- Remove the crankshaft.
- Remove the half crankcase coupling gasket.
- Remove the two screws and the internal cover
shown in the diagram.
- Remove the oil guard on the flywheel side.
- Remove the oil filter fitting shown in the diagram.
- Check the axial clearance on the connecting rod.
- Check the radial clearance on the connecting rod.
-Check the surfaces that limit the axial free-play
are not scored and measure the width of the crank-
shaft between these surfaces, as shown in the
diagram.
- If the axial clearance between crankshaft and
crankcase is exceeding and the crankshaft does
not have any defect, the problem must be due to
either excessive wear or wrong machining on the
crankcase.
- Check the diameters of both the bearings of the
crankshaft in accordance with the axes and surfa-
ces shown in the figure. The half-shafts are clas-
sified in two categories Cat. 1 and Cat. 2 as shown
the chart below.
CAUTION
THE CRANKSHAFT CAN BE REUSED WHEN THE WIDTH
IS WITHIN THE STANDARD VALUES AND THE SURFACES
SHOW NO SIGNS OF SCORING.
CAUTION
WHILE OPENING THE CRANKCASES AND REMOVING
THE DRIVING SHAFT, CHECK THAT THE THREADED
SHAFT ENDS DO NOT INTERFERE WITH THE MAIN BUSH-
MSS X9 Evolution 250 Engine
ENG - 129